 Last update for 2 weeks!
Got some things done on the new repro tub such as sanding and drilling holes, but it’s been quite the pain! A new shipment of items arrived, like a new muffler and special filter system for the air bath. I’m taking a break for two weeks for a vacation, so updates will continue once I start back up! Then it’s in super drive mode for the home stretch to finish it by mid-july!

My hope was to put the engine back on the frame of the Jeep so when I got back to work on the Jeep in over two weeks it would be already installed and ready to go… but the engine had other plans for me. After attempting to reinstall the flywheel, I noticed I could not manually turn it no matter how much force I applied and with/without the spark plugs in. Uh oh.

It took a little bit of process of elimination and looking at WW2 diagrams of the Jeep (along with Roger Smith’s help)… but we figured out the issue and it was with the front of the engine.
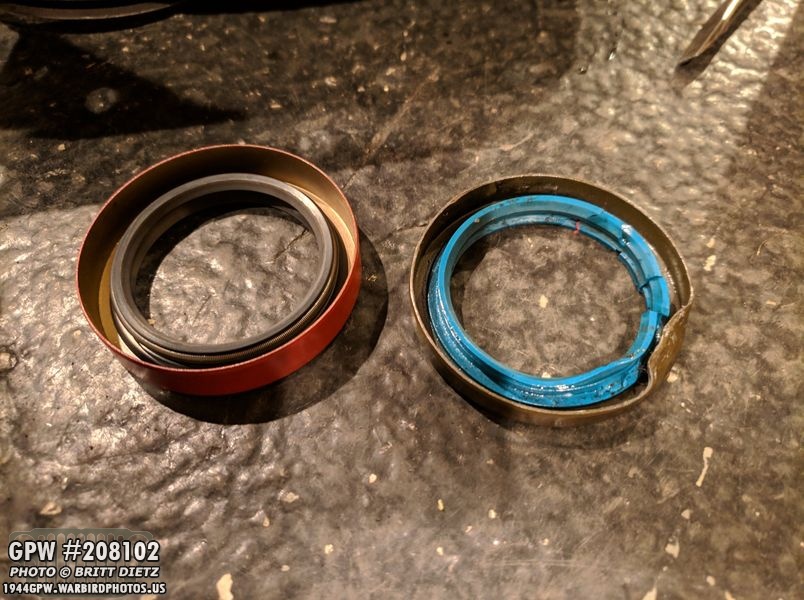
If you remember back a few months ago, I replaced the inner seal for the timing cover with a new one from Ron Fitzpatrick Jeep Parts. On the left is the new one, on the right is the mangled old one. I noticed that the new one was significantly taller than the original.

I installed it, but it stuck out a lot. It’s all the way in, but it’s got a massive lip. This was the issue. That extra tall red lip was preventing the crank from turning when the front crank nut was installed.

I ordered another one from Amazon, and you can see the difference in height. I had to mangle the incorrect one to get it out, but you get the picture. I installed it into the timing cover, put the front of the engine back together, and the flywheel turns! Yay!
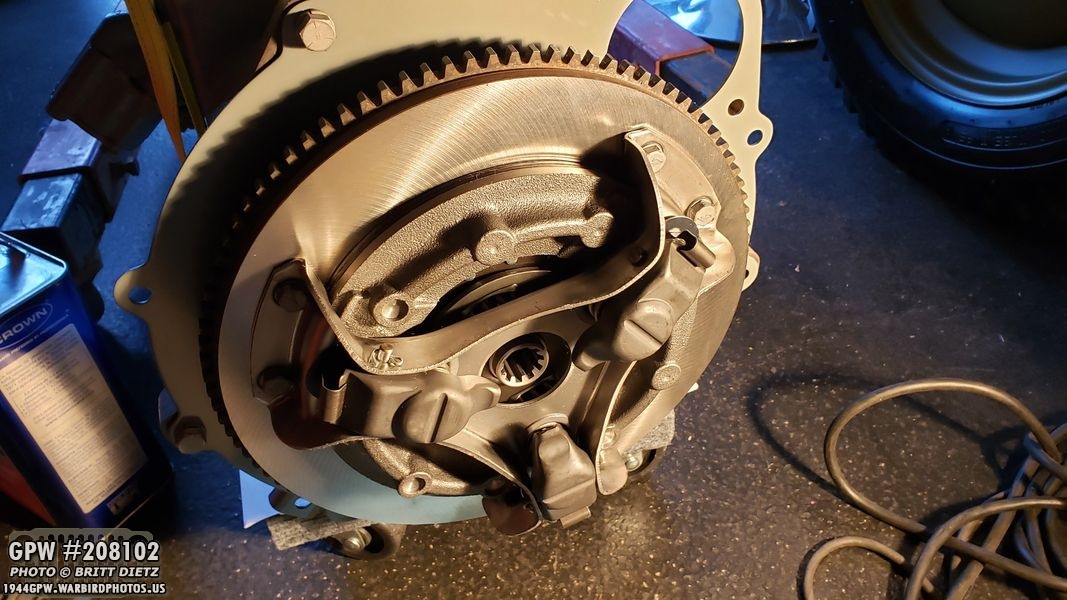
I then reinstalled the brand new pressure plate and clutch to the flywheel. I bought a new set as the ones that were on the Jeep were okay, but had some slight wear. Sadly, by the time I got all this put back together, it was too late to reinstall the engine before the break. So it’ll have to wait till mid-June.

So it’ll sit on the engine hoist ready to go when I get back!
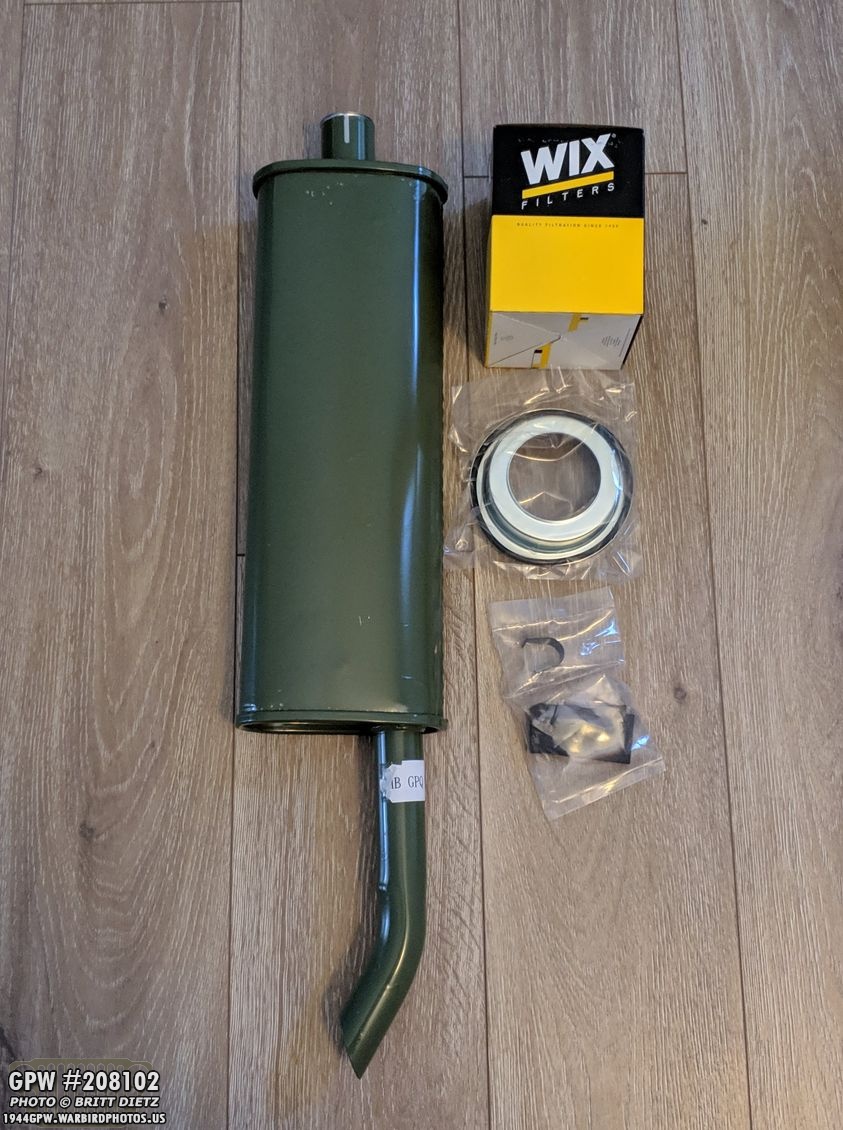
I realized when I was looking to install the new muffler/exhaust clamp kit that the muffler that came with the Jeep was incorrect… being that it was massive and none of the clamps fit. So I had to buy the correct size muffler. I ordered that, new reinforced pads for those muffler clamps, a glove box spring, and a special kit for the air bath (I’ll explain in a few).
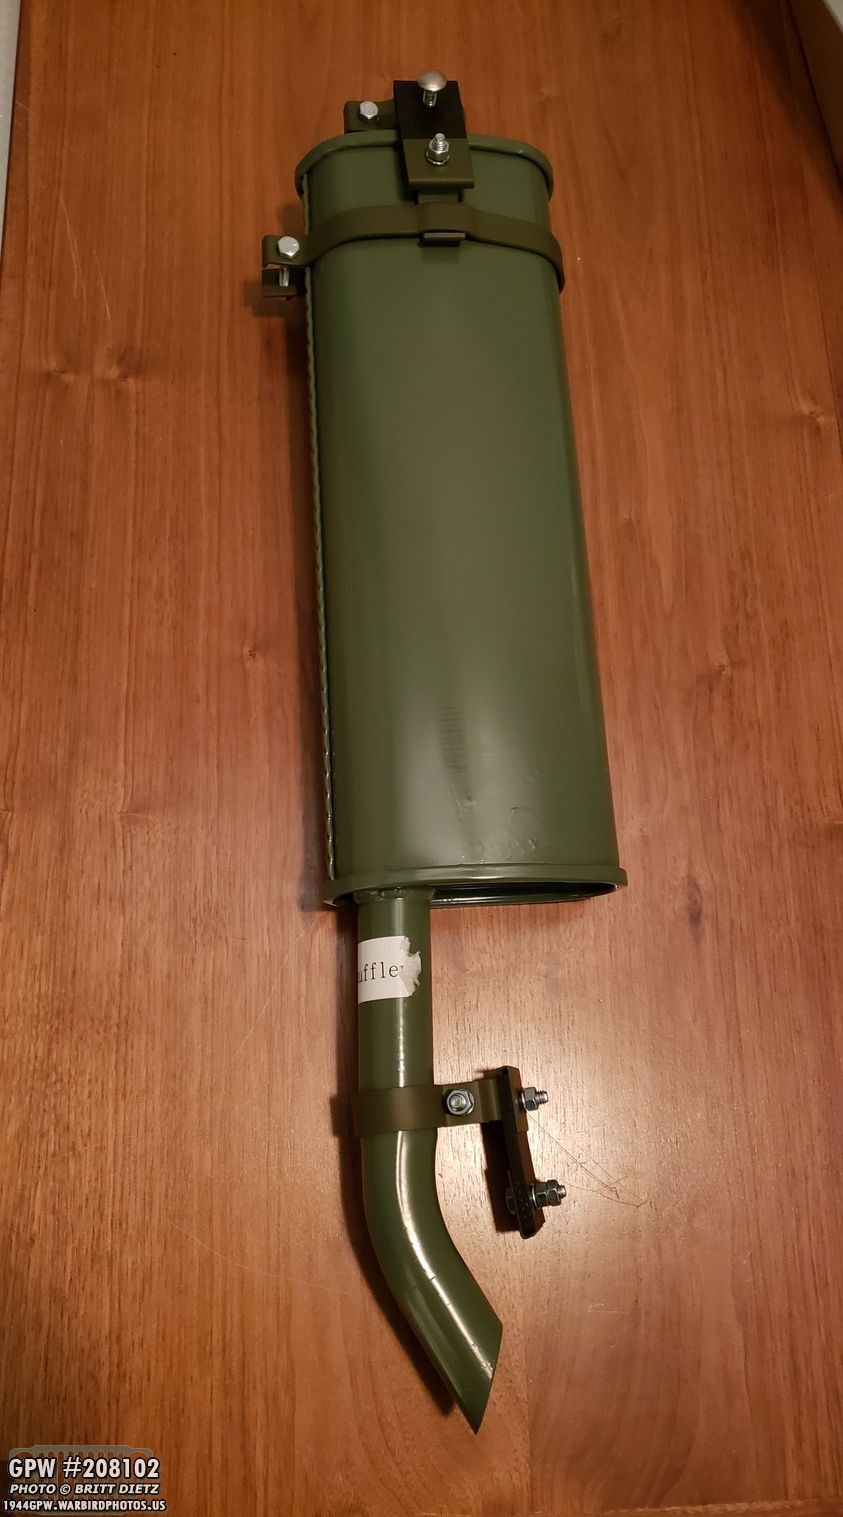
Everything installed great with a little work! The muffler is just about ready to be mounted! Just needs the darn sticker to be ripped off (which will require goof gone, hate these type of stickers). I’m not going to paint it as the paint will eventually burn off anyway.
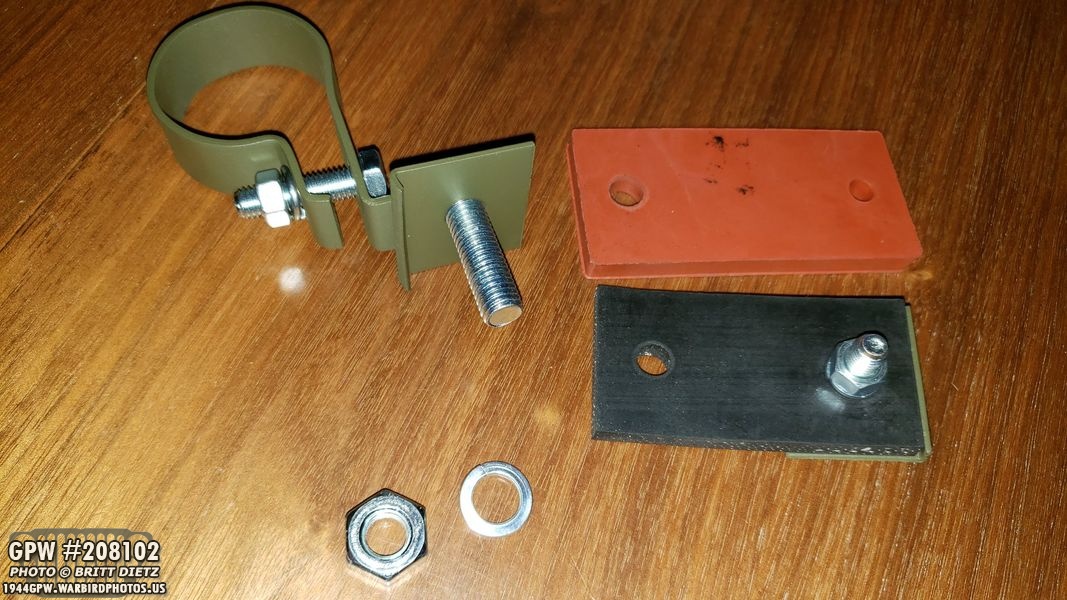
One issue was the bolts that came with the hardware kit, a few of them were incorrect. So I had to go to Lowes to get the correct sizes. Here’s also a look at the cheap red silicone pads and the much higher quality black reinforced pads I’ll be using instead.

Another part that came was the exhaust pipe clamp bracket to skid plate. My Jeep didn’t come with one, so I was pleasantly surprised! Sadly, it was missing the correct capture bolt.

Another trip to Lowes and it installed great one my skid plate! I’ll paint the bolts before I put the exhaust pipe in there.

Another thing that arrived, from the Netherlands, are the hard to find correct silver hollow rivets for the glove box data plates on a Ford. I’ll install these once I drill the holes and get the new data plates stamped with the numbers
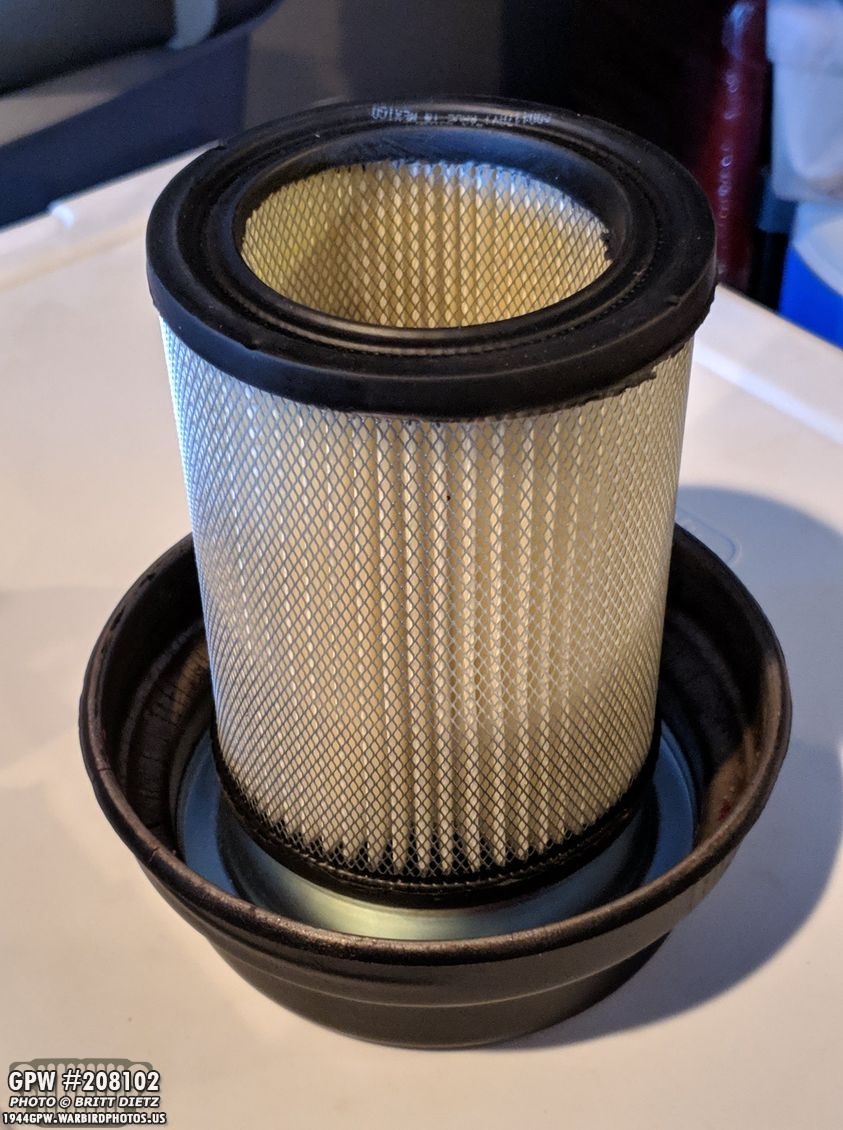
This was a nifty new thing for Ron Fitzpatrick Jeep Parts that I realized I had to get after I saw Scott Schiller’s video about this kit. Instead of using oil, this specially made kit can be used inside the air bath container and it’s a perfect fit! No need to change any oil and you’d never know since it’s all inside! Yay!

Primed the brake pedal arm with red oxide!

Continuing my ongoing battle with MD Juan’s repro tub and some things that don’t fit quite right, here’s one instance where actually the MD Juan part fits better than the other repro part I have. I had finished priming, painting, and installing the correct chain on windshield swivel brackets that came with the Jeep (Which I assume are repro). Turns out, those don’t fit on the MD Juan tub. I thought it was the MD Juan’s bracket that was wrong (as you can see they are both different sizes, the MD Juan is, of course, the red one). So a win for MD Juan in this case, although now I’ll have to sand, reprimer, and paint the MD Juan brackets. Plus I’ll have to install the chain on them which will not be fun (doh!)

Here’s another look showing how not all repro parts at built the same!

Some good news, the floor push button starter fits through the hole! It was snug, but this push button starter seems to be slightly larger than a normal one, as I couldn’t get it through the hole on the original tub. So another win for MD Juan.

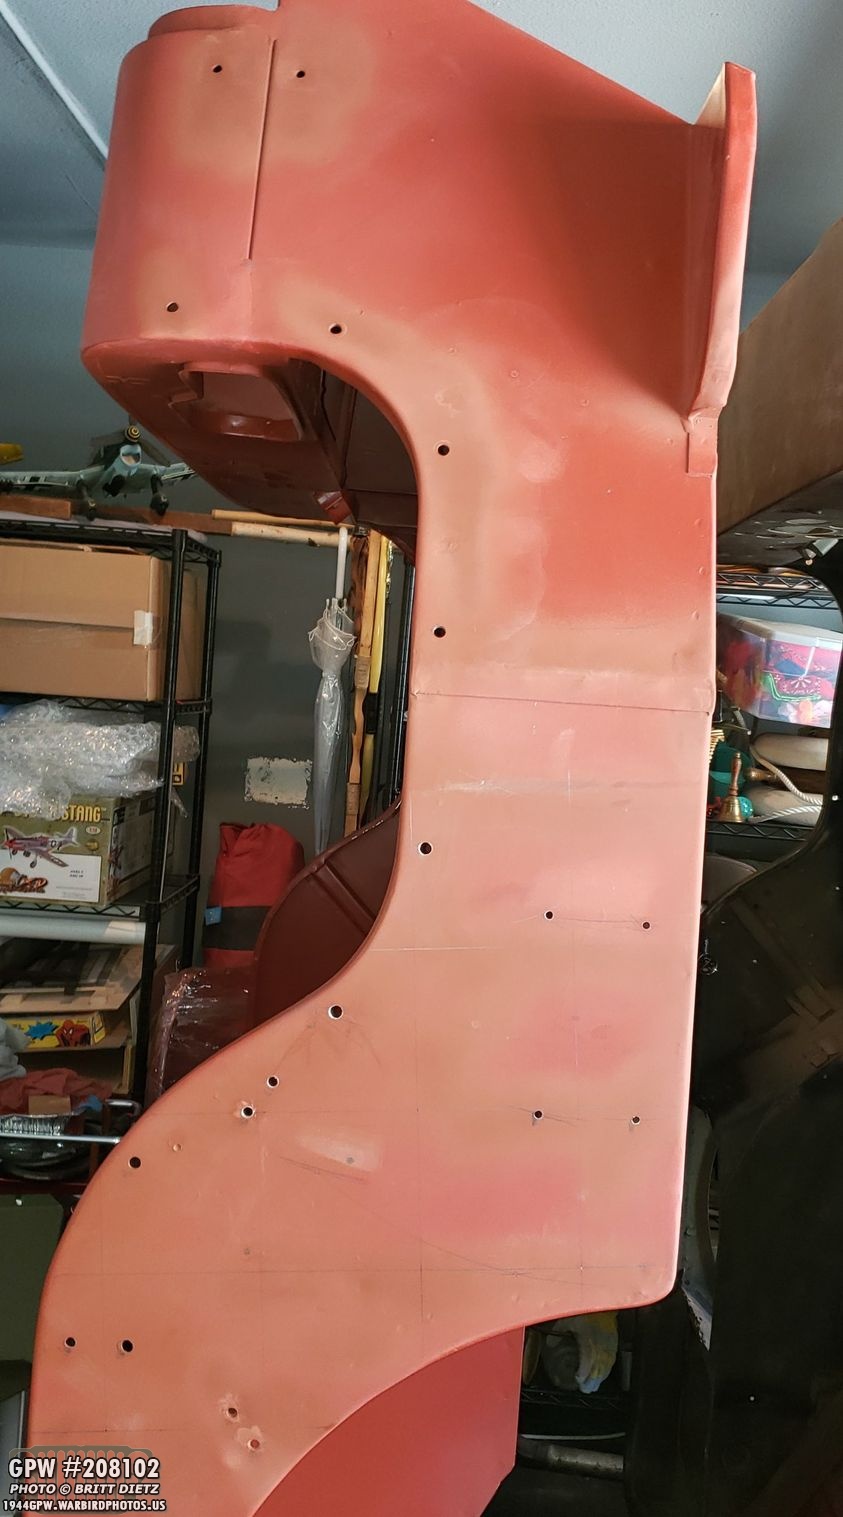
But, as mentioned in the previous update… the body itself is a different story. Things have not been lining up well due to differences between the body tubs. It’s been a big headache. They may look the same, but when you measure the MD Juan with my original, it’s different.

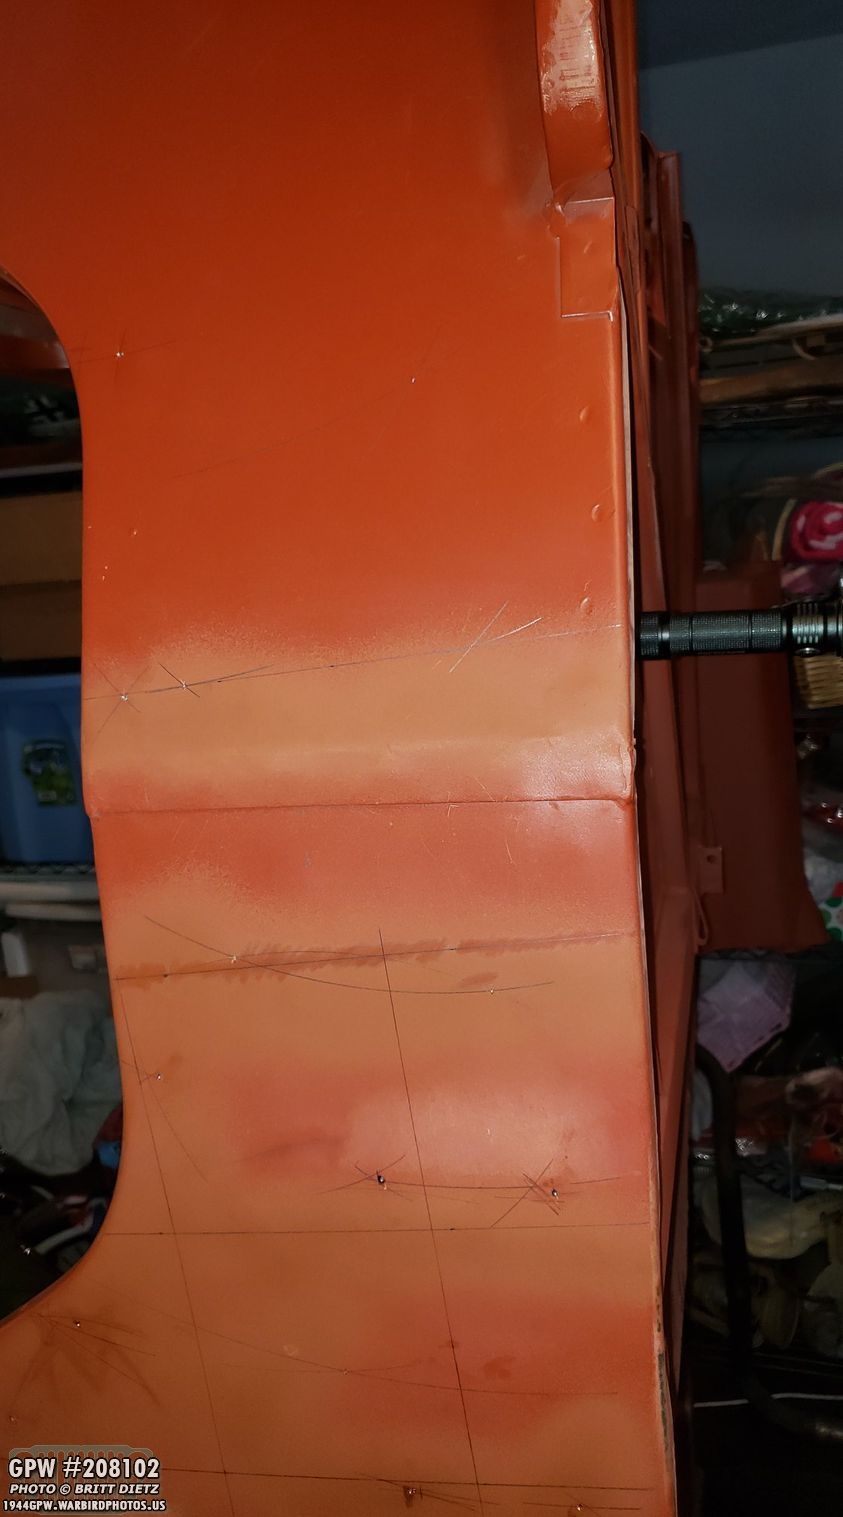
What I found seemed to work better than my grid system was using a drafting compass! I started from one point (the top bolt hole for the windshield mount bracket which lined up really good on both tubs) and slowly drew intersecting curves to form points.

You can see how the curves made intersecting points, which I could then use to calculate the various holes. I did these same intersecting curves on both tubs. It worked well, and I got the holes very very close. Some of the holes, however, I had to move because they would be too close to the edge due to the differences between the two tubs.

Lots and lots of curves… but I was able to mark all the holes.
More curves and more holes marked. I’m pretty confident on their positions.

Then it was time to drill after checking my work several times. I think it came out pretty good so far! 14 holes down!
Touched them up with some red oxide primer and got the correct sized drills for the various holes. A trip to The Home Depot for these weirdly sized drill bits, but it’s done now for all these!
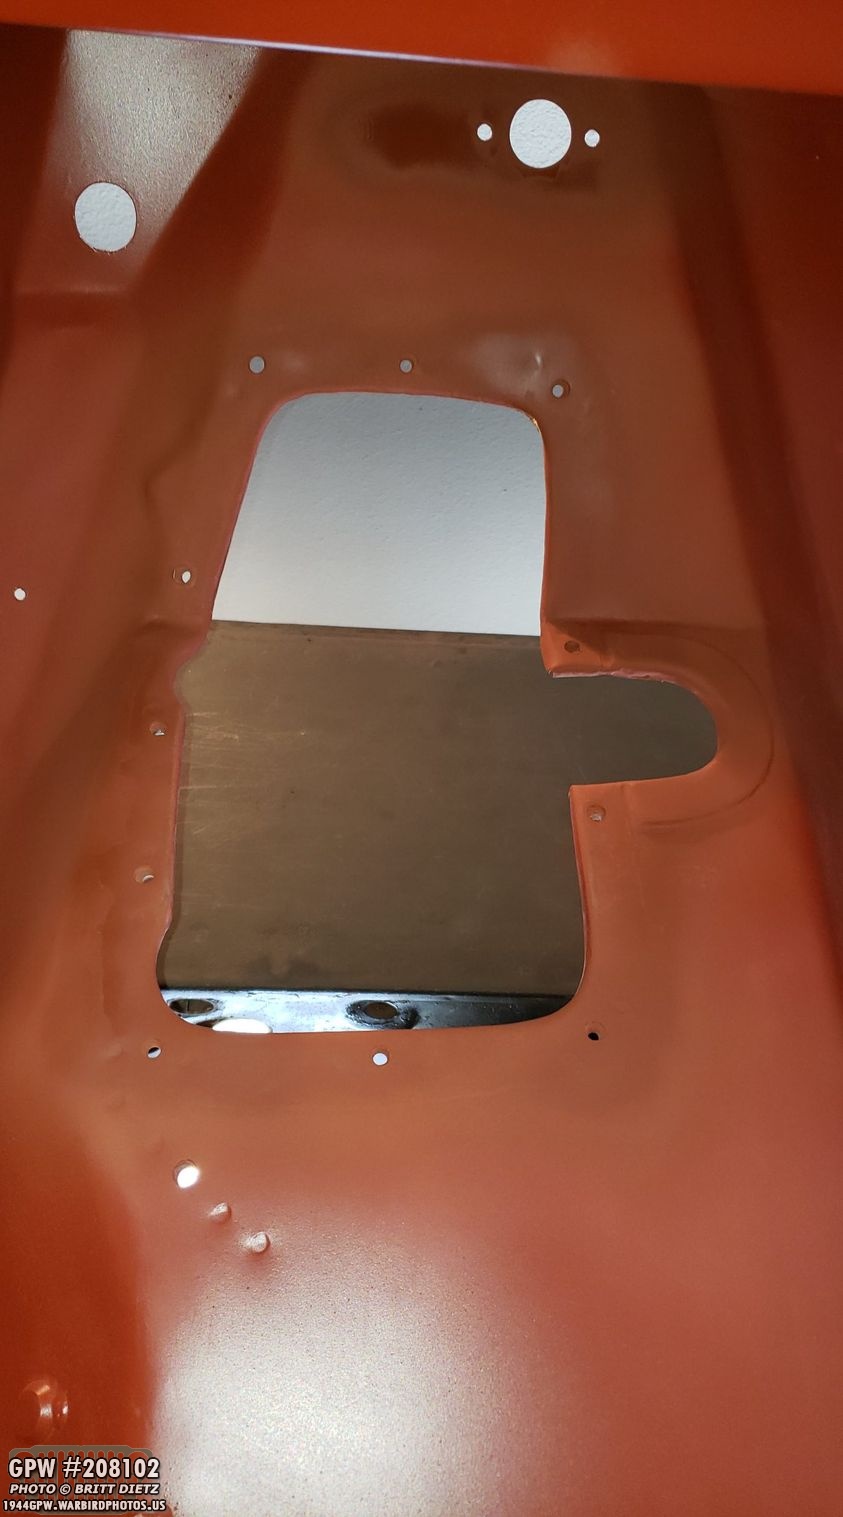
I used some sandpaper and cleaned up the scratched/unprimered areas of the transmission cover and the hole for the foot push button switch. The paint is still wet here, but looks a ton better.
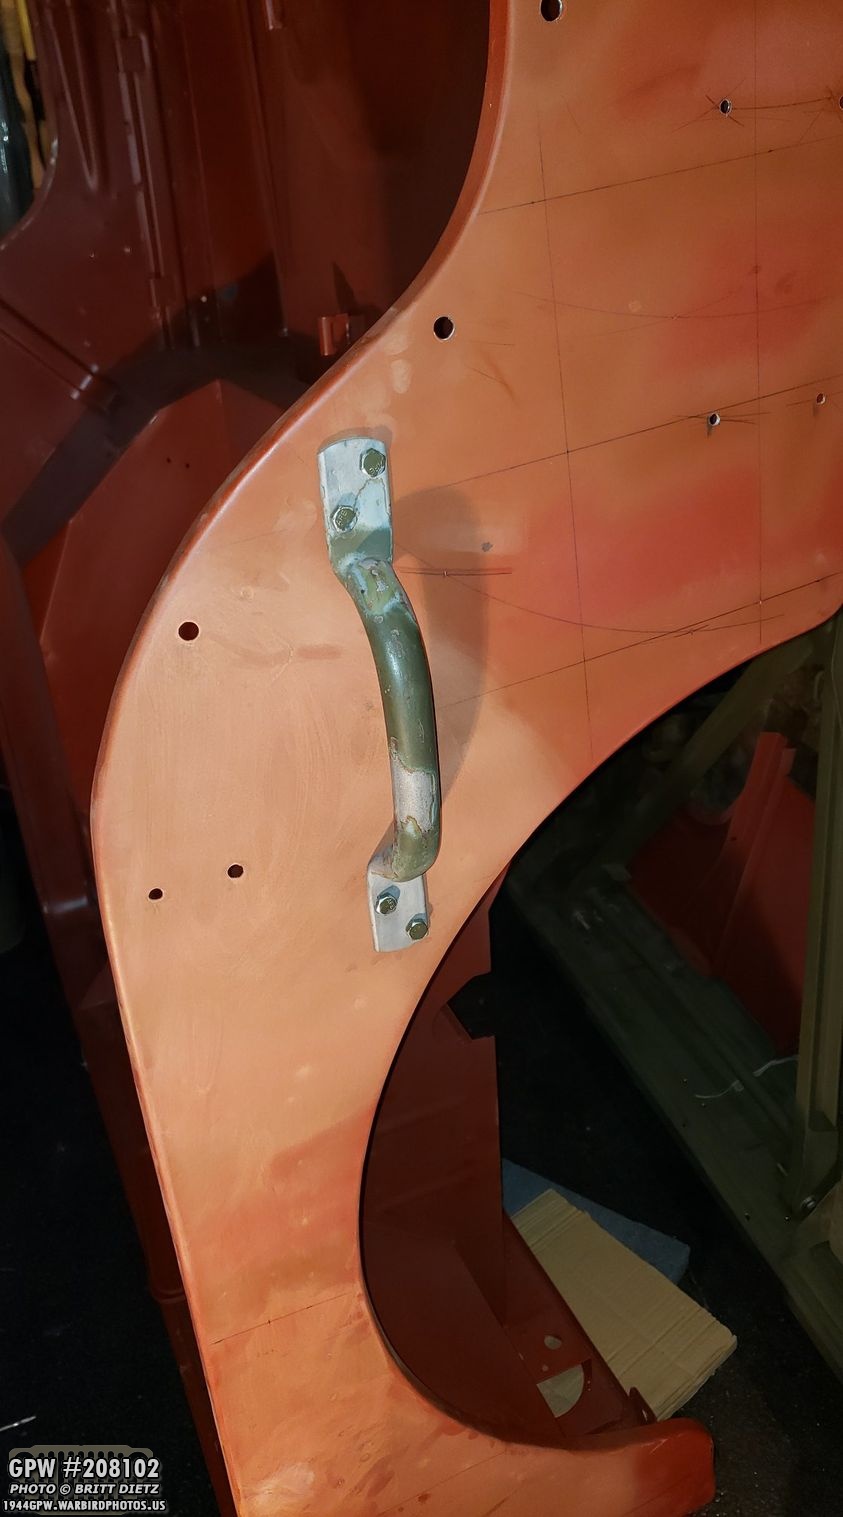
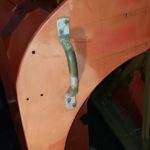
I decided to install one of the handles (this is an original GPW handle) and it fit perfect! YAY!
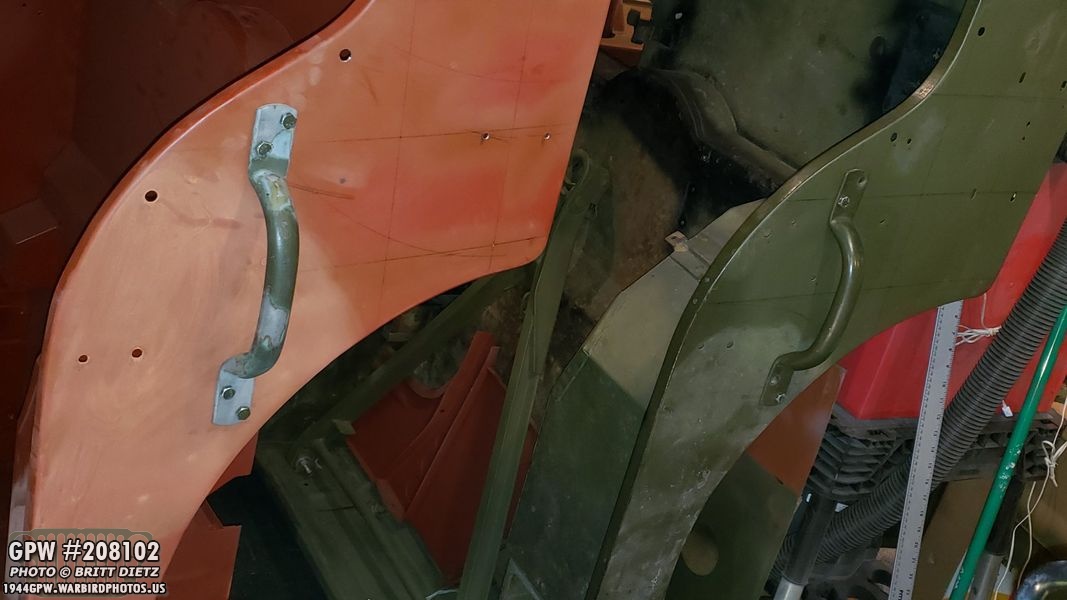
Finally, I decided to install the other side handle on the original tub to check my work, and they seem to be just about as perfect as I can possibly make them, so check that off as great! Lots more holes to drill, though, on both sides and inside the tub. So it’s not done by a long shot. So that’s where I left it for now until I start back up on the Jeep. See you all in about 3 weeks!