 Markings are finished!
As the New Year quickly sped past, the Jeep as entered what I’d call the final phase for the restoration and it so close to being ‘done’ that it shouldn’t be much longer now with the small projects left. This week I was able to work quite a bit on the Jeep, with the last markings being put on, continuing work on the GPW axles, and starting work on adding the trailer socket shield.
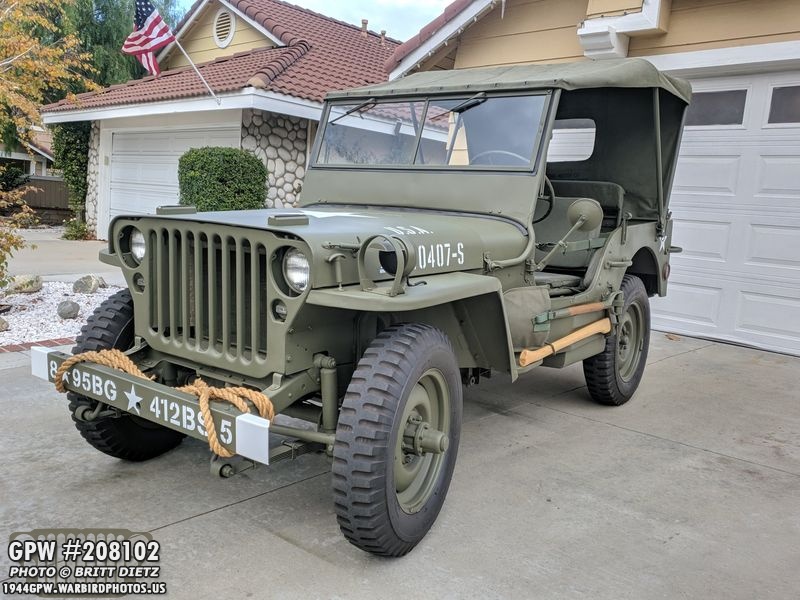
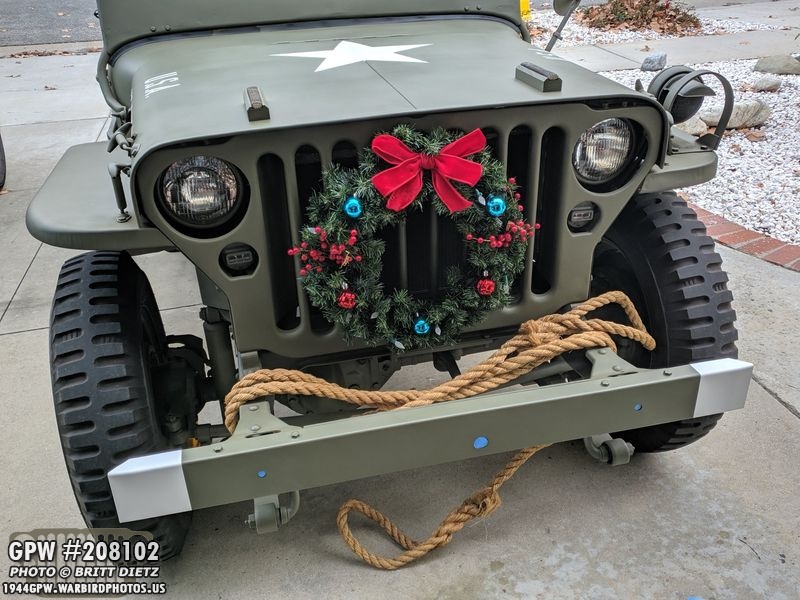
A look at the *mostly* done Jeep restoration! More on that soon…

If you read last week’s update, the stars on the rear of the Jeep were added after the bumperette markings. Now it was time to do the all-important hood numbers! Again, using stencils made by Military Stencils By Axholme Signs. Here, my girlfriend is helping me by removing the backing which sticks the stencil down. Using a flat plastic spreader, we push out the air bubbles and keep it flat.
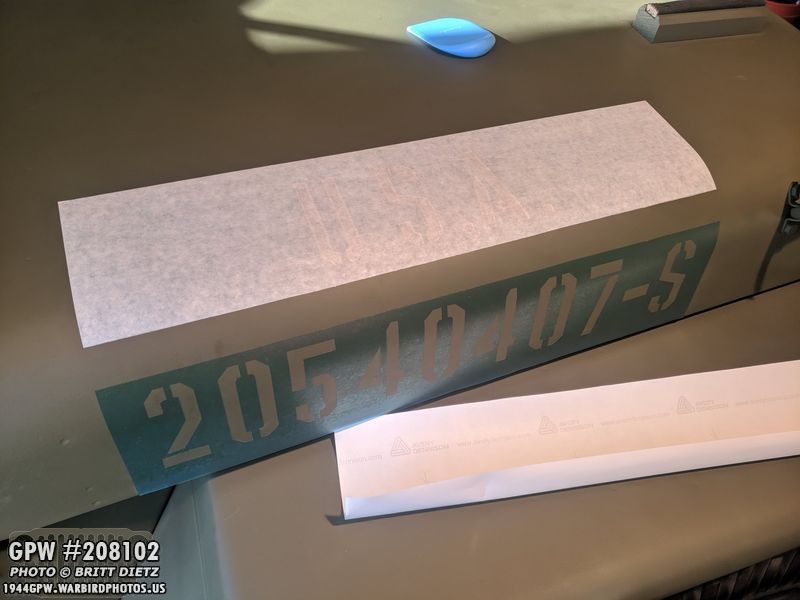
Now that it’s on, the top layer will come off revealing the stencil.
And now both are ready for masking and painting. The trick is to do this process rather quickly. You don’t want the stencil on the Jeep for too long, and you don’t want the paint to completely dry either.

Another look at the stencil. Both of these were actually one piece, but I decided to separate them a bit more based on AAF Jeep photos.

Using painter’s tape and lots of newspaper, I masked off the Jeep. The white paint gets everywhere, so it’s a good idea to mask it all well.

Two coats of Rustoleum pro white, then two thin coats of clear matte coating spray.
After the last coat is dry to the touch, it’s time to carefully remove the stencil… the moment of truth and quite nerve-racking! But this side came out really awesome!

Moving on to the other side, the process repeats. Here we have the USA positioned with blue tape so it won’t move as we peel the back layer off.
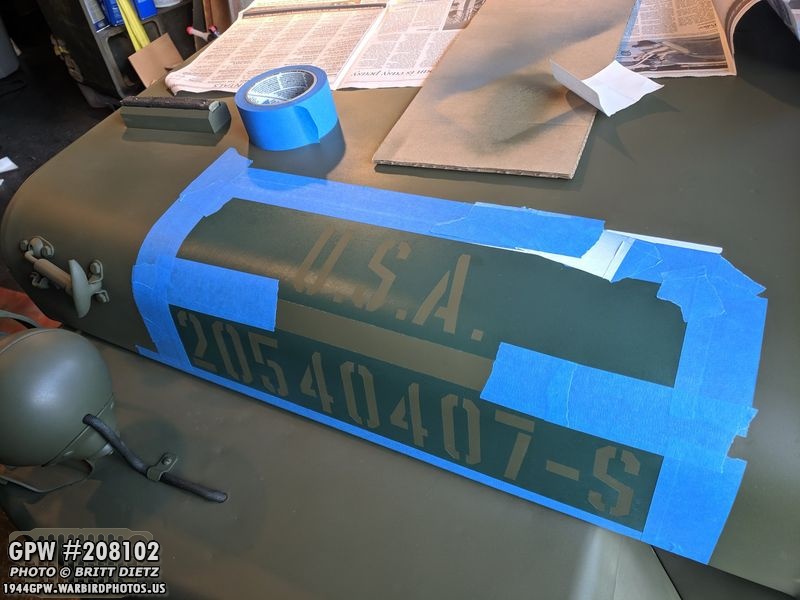
Stencils ready, and starting to mask off the area.

All masked, time for white paint! Here’s the paint I’m using for the white.

Again, 2 coats white, two coats clear matte.

And another GREAT stencil! I know, I know… there are those who say that it’s not a REAL Jeep unless it has overspray like they did in WW2. Yes, we do a 1,000% better paint job than the soldiers, kids, did in WW2. But with all the money on a good paint job, I’d rather it look nice.

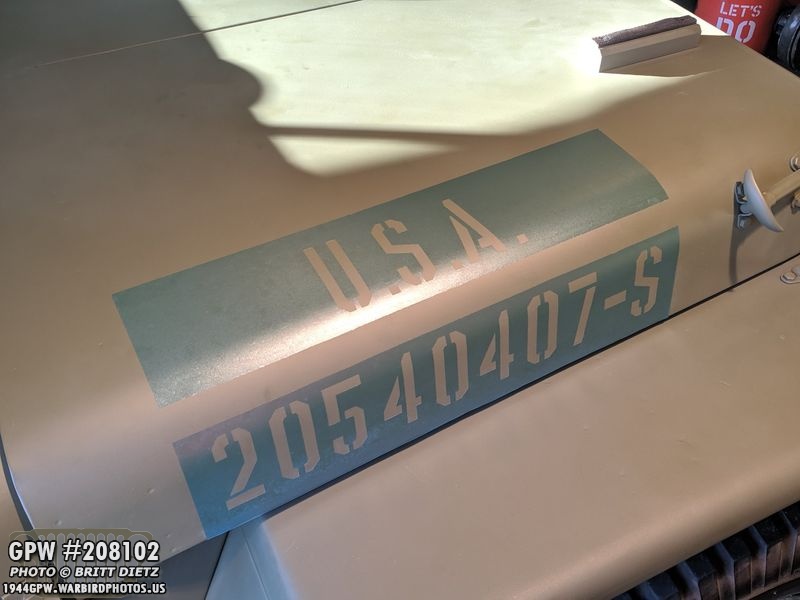
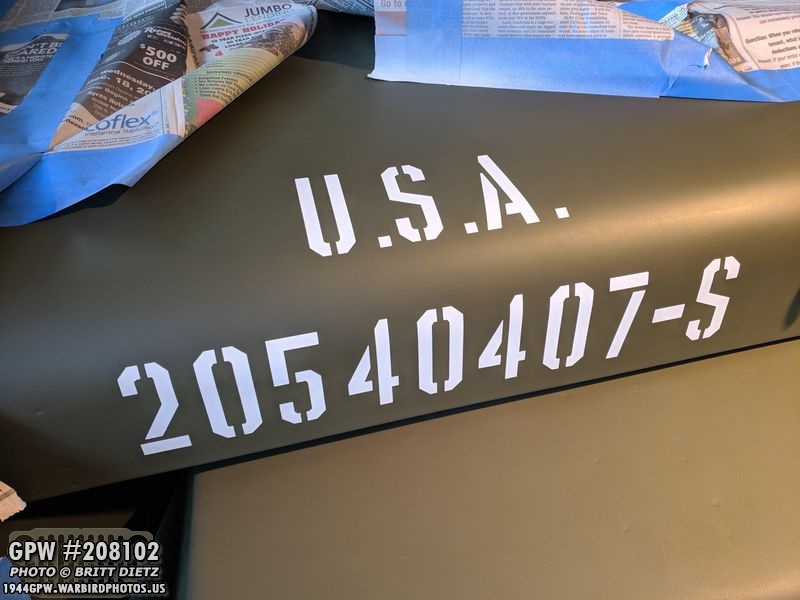
Close up of the number. This number is a guess, as many times these numbers are lost. There is a generator online that, once you put in the serial of your Jeep, it will give a rough estimate of your hood number. I went with that number since I didn’t have a number to go off of for the hood. The -S means the Jeep has radio suppression filters.
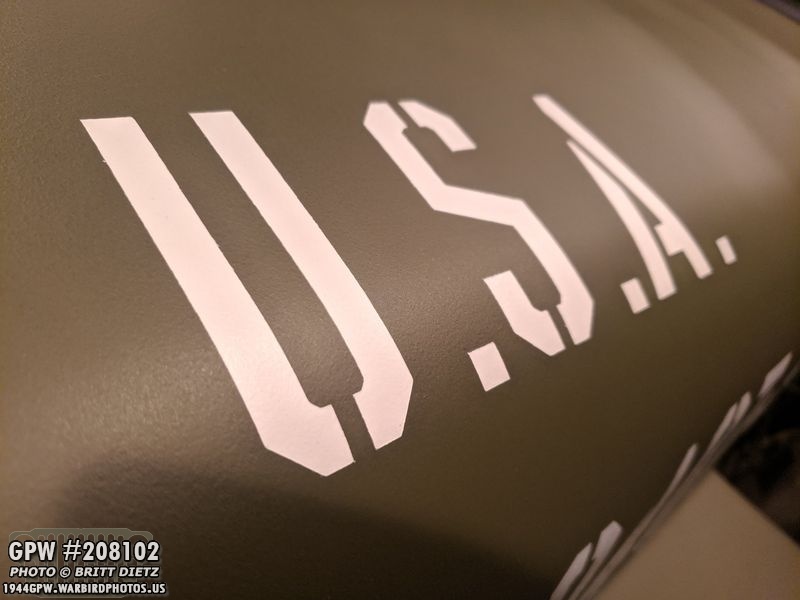
And a close up of the USA. The font, I found, for much of the AAF Jeeps was this tall skinny font.

Time for the center piece… the hood star! Now, technically, ‘spec’ says that the star should be 1 1/2 inch from the dash… so the middle of the star is on the hood hinge. The reason behind this is that when the windshield is up or down, you can see the star. But I decided (based on a few factors and even several AAF jeep photos) to put the star on the hood as close to the hinge as possible. The photographer in me often battles the perfectionist on this Jeep project, and the photographer who liked more of a central star won.

Stencil is down, time to mask!

All masked! The crease in the middle of the hood was problematic. I had to add some painter’s tape to help get the stencil to go into the crease and not rip.

Jeep looked pretty odd with all the newspaper on.

White paint applied!

Carefully peeling it off, it came out pretty good! The bottom middle of the star will need some touch up manually with OD Green and white. But otherwise, the stencils are working great!

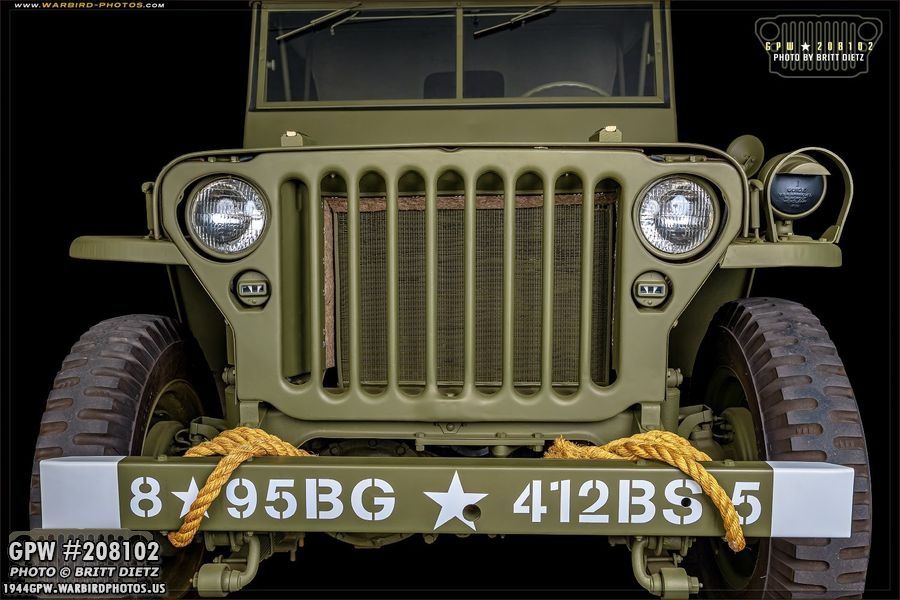
Another look at the star and the hood number.

I ran out of newspaper, however, and I still needed to apply the front bumper markings, so I took the Jeep over to a local Dollar Tree the pick up more.
Was nice having the star and hood numbers on, making it feel more like a military jeep!
After returning back, and racing against the setting sun and cooler night temps, I went to work prepping the front bumper. First step was to plug the three holes in the bumper and taking off the rope loops.

We had to really mutilate the bumper stencils to get them to fit. The first star didn’t line up right with the numbers, so we cut that apart on its own. Then we removed the 5 at the end, which was a bit too low as well. We also had to trim the top and bottom so it wouldn’t go way over the bumper edges.

I don’t often show the first step, but this is after we positioned the sticker and held it in place with painter’s tape. My girlfriend is helping again here, it helps to have two people! Then you use it as a hinge and remove the backing.
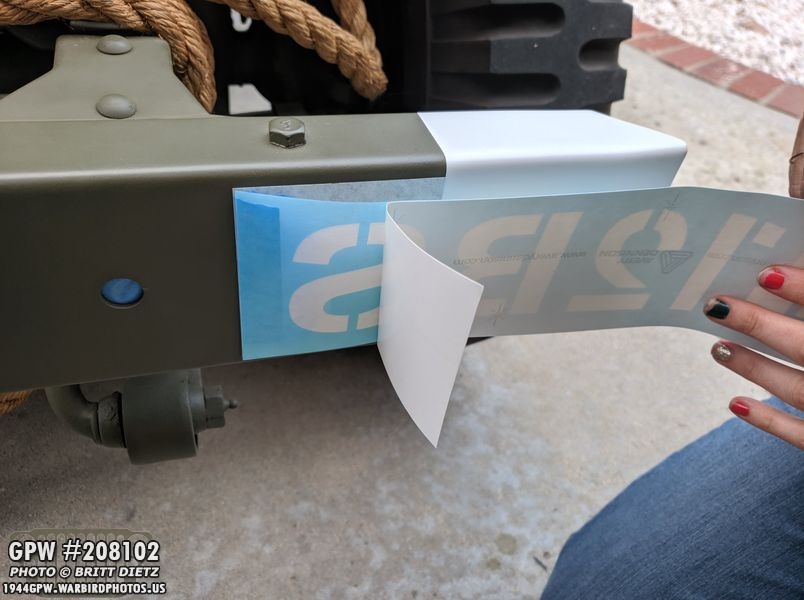
Here Crystal is starting to peel up the backing. The next step is to then bring it back over and start letting it stick as you use the spreader to keep it straight, push out the air bubbles, and make it stick.
After that is stuck down, you then peel off the top layer, which reveals the stencil.
All the stencils are applied, ready for masking and paint!
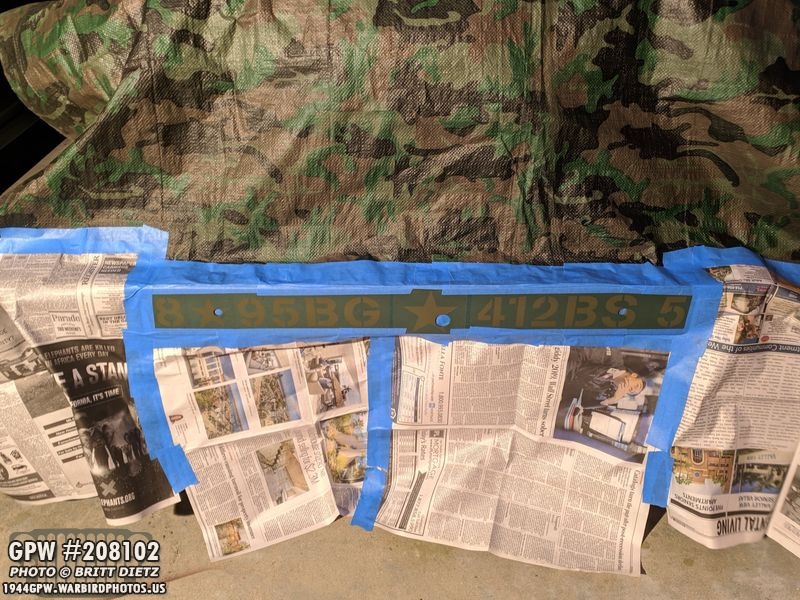
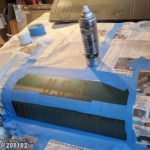
All masked, that took some time! Not easy to mask this one.
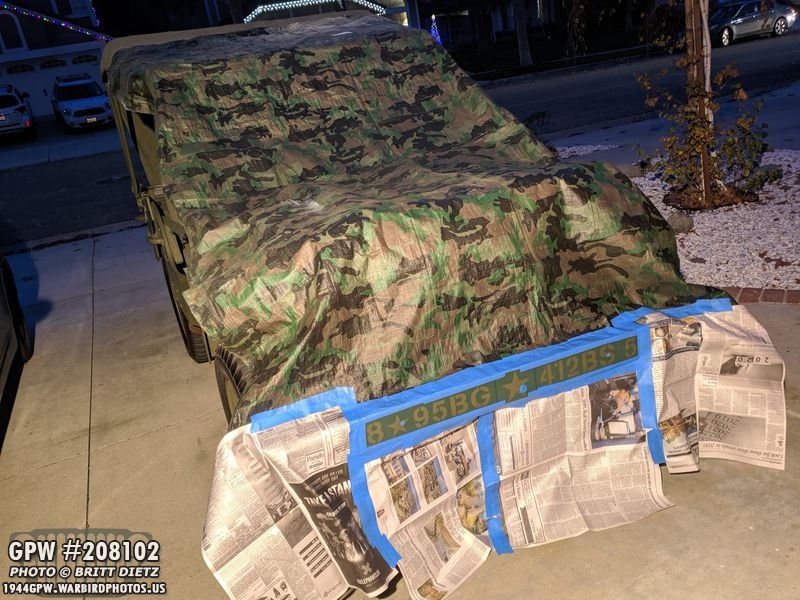
Thankfully I was able to use the tarp for most of the Jeep.

As the rest of the markings… two white, two clear coat.

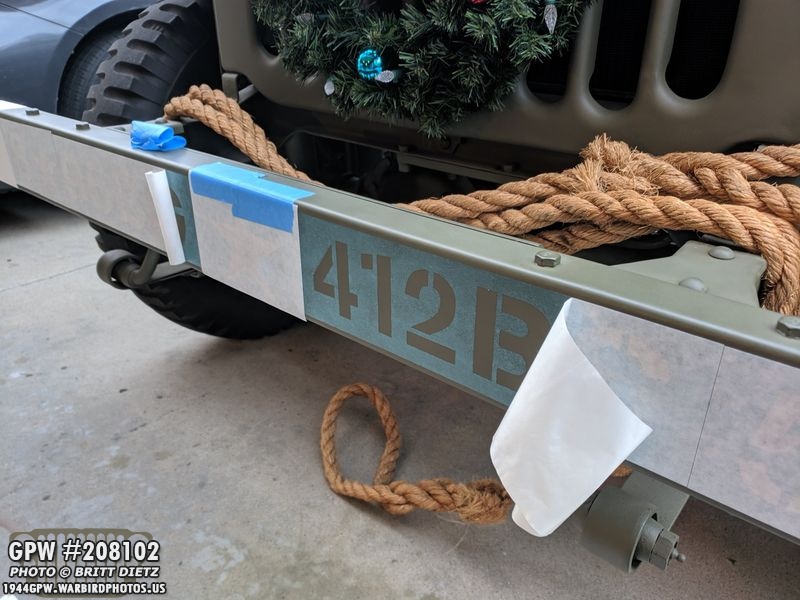
Masking removed, all that’s left is to remove the stencil… all the rest of them went so well, this one should as well right? Well… not exactly.

First look at it with the stencil removed, and you can see issue #1, which was totally my fault. I forgot to mask the area between the stencils. While most of them overlapped, the stencils for the 8, the first star, and the 5 at the end did not overlap… so paint got in leaving little white lines. But there was another issue.

The letters came out super fuzzy. I’m not sure why, as I pressed them down really really good. Not sure if it didn’t like the bumper texture, or what. But ALL of the letters had this fuz. I could leave it like his, citing the quickness they put them on in WW2… but this is where that perfectionist comes in. So, I got a tiny paint brush…

And I manually touched up the entire thing letter by letter.
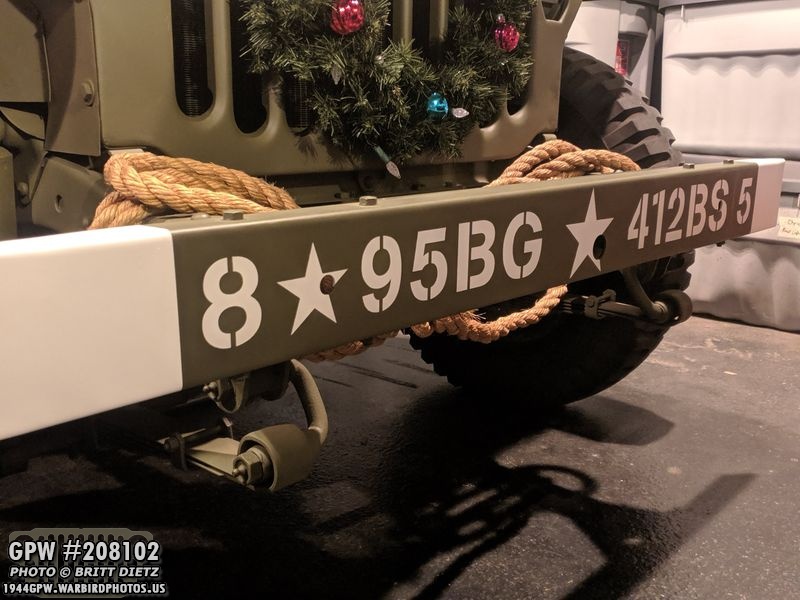
SO much better! Nice clean lines and no lines between them!

Closer look, you can see the letters are 99.9% crisp lines.

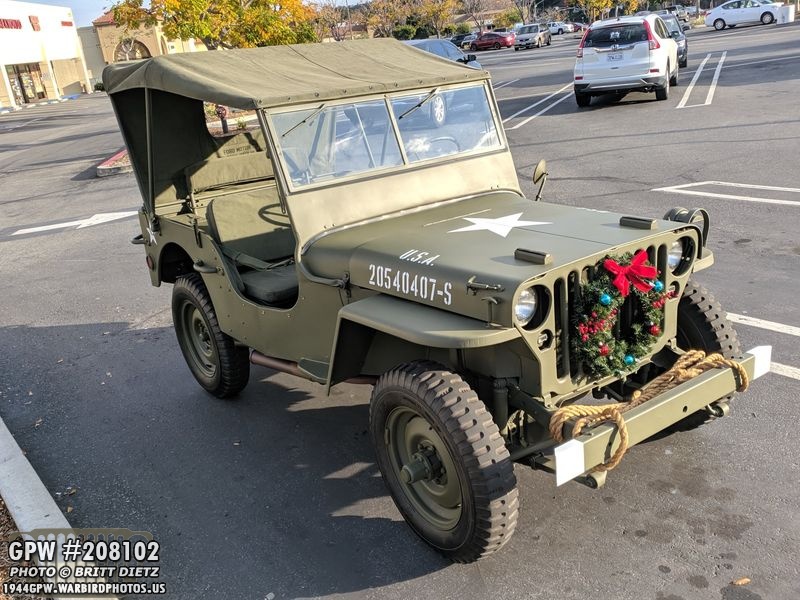
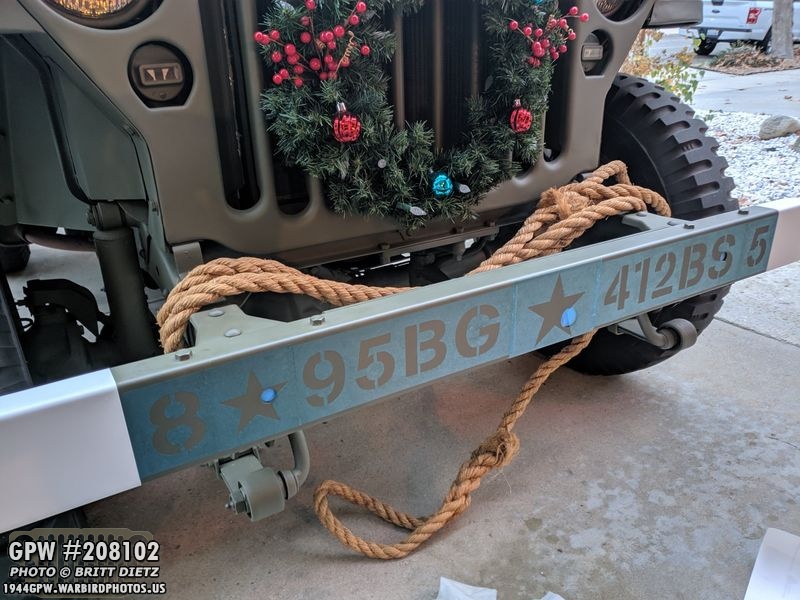
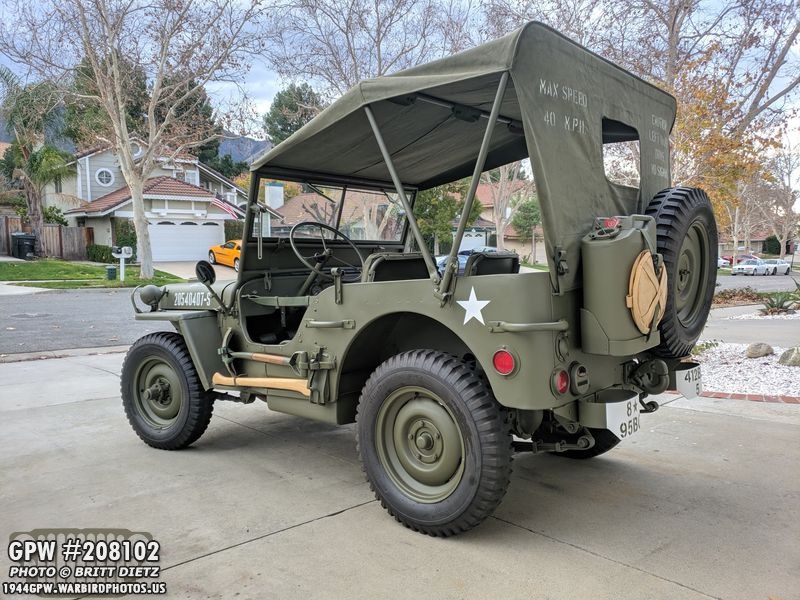
And here it is… the next day with all the markings COMPLETE! Really makes the Jeep pop! I did a mini-photoshoot that afternoon.

Driver’s side view.
Rear 3-quarter view.

Rear View

Rear 3-quarter view.

Passenger Side View

With the markings done, I moved on to other projects including the eventual replacement of the CJ2 axles on my Jeep with wartime GPW ones I acquired a few months ago. If you read the last update when I began taking apart the axles to check on them, you read that the rear axle had an explosion at some point that blew apart the spider gears and did a lot of damage to the carrier. I found someone on ebay who was selling a nice carrier (and a F marked GPW one!) for a great price. Here is the new one (left) with the damaged one (right).

You can see some of the damage here on the old carrier and the missing spider gear.

Compare this photo to the previous one and you can see what’s missing.

Here’s one of the quick F stamps I spotted on the new carrier, but it wouldn’t be the only one (more on this later)

The large gear would need to be removed from the bad carrier, which is held on with these 8 beautiful F stamped bolts. Even the clips that hold them in place had F stamps! But that would prove to be difficult, as they have been screwed in for 75 years.

It took a LOT of brute force with a breaker bar, but I got all 8 of them out. Here’s a look at the damaged carrier showing some of the Ford markings (GP). Seems like an earlier Ford carrier.
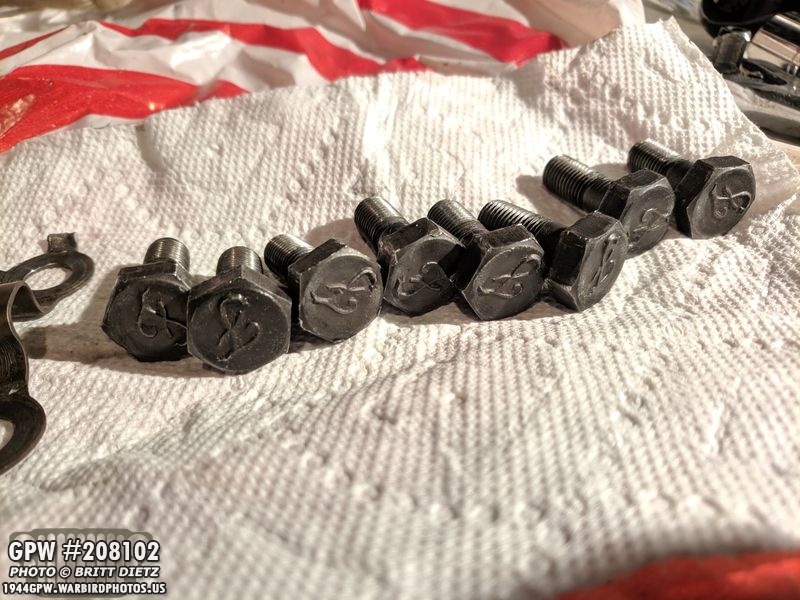
I dunked the bolts and Lock straps in tool cleaner for a few hours to get the oil off. After some cleaning up, they were ready to be reinstalled.
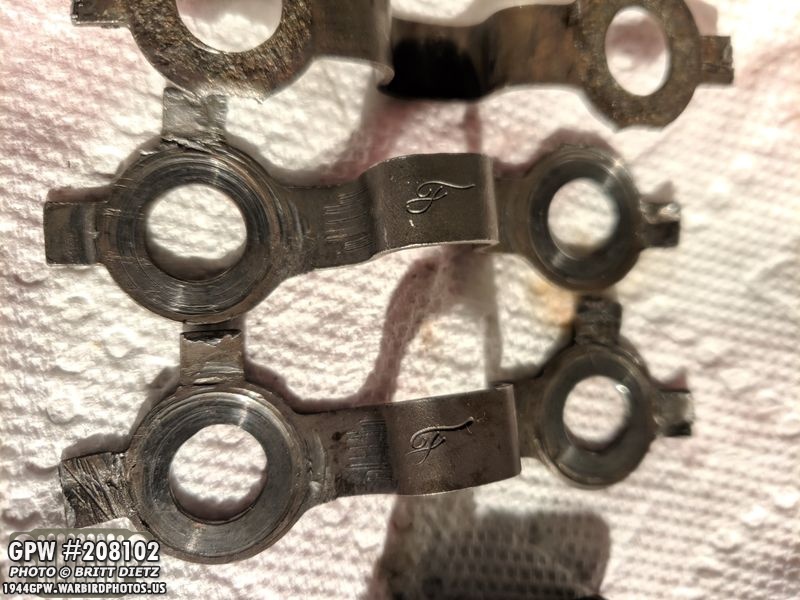
Here’s a look at two of the Lock straps with clear F stamps. I didn’t see any other the other two…
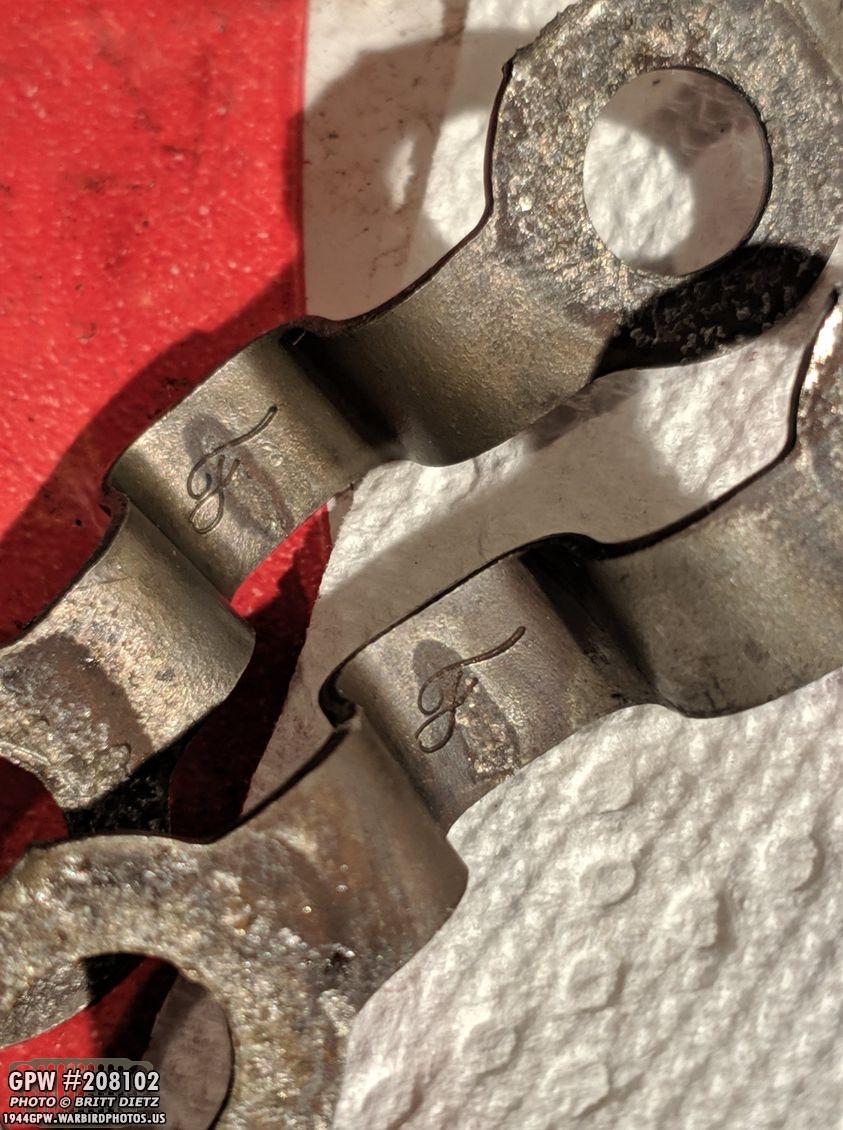
Until I turned them over and realized they had F stamps inside of them. Odd that they are not all the same.

With the bolts removed, it took a rubber hammer and careful tapping, but I was able to get the main gear free of the damaged carrier.
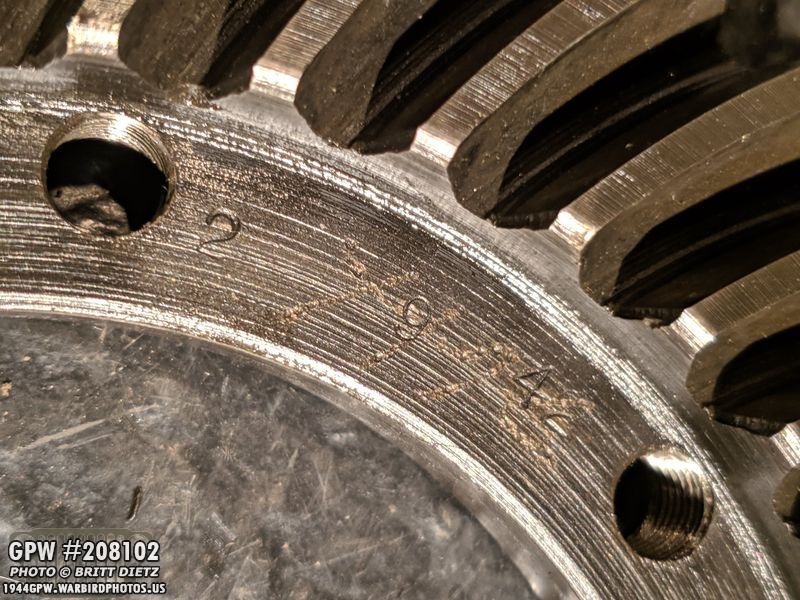
With the main gear free, I was able to inspect it and found some awesome markings. Aside from having hand-etched writing on it (makes me think about someone in a factory during WW2 writing them!) I found what looks to be a date of 2/9/1942!

Here’s the F stamp on the large gear, with 4-5 hand etched in.
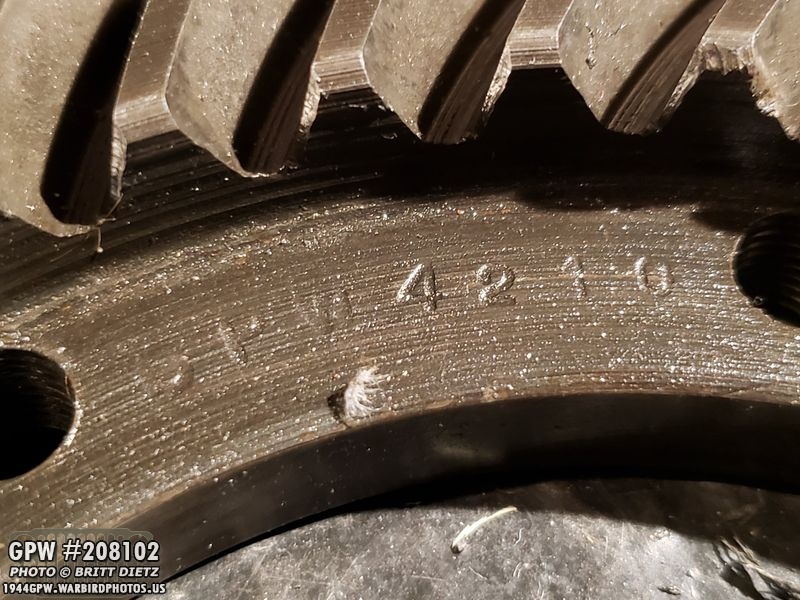
And the GPW part number stamp.

Switching to the new carrier, I found a pitted GPW and other markings that lead me to believe the carrier is mid-late war.

I also found this lovely F stamp and some odd stamp next to it on the edge of the main disk on the carrier.

First two bolts are in! They fit perfect. I pounded flat the Lock strap tabs and will be making sure they go back up when the bolts are torqued. Many of the tabs are broken, but at least one tab will be useable for each bolt to hold it in place and prevent it from unscrewing.

All bolts are in and the main gear is now mated with the new carrier! Next step will be to reinstall it in the axle and test it out.

Another project I’ve been putting off for many months is the trailer socket shield. Inside the driver’s side tool box, you’ll see this… the back of the trailer socket. There’s a special cover that goes over this that protects the socket and the wires from anything you might throw into the tool box.

Here’s a look at the trailer socket shield itself. I got it almost a year ago, but have been waiting to install it as I didn’t want to have to drill into the Jeep body anymore.
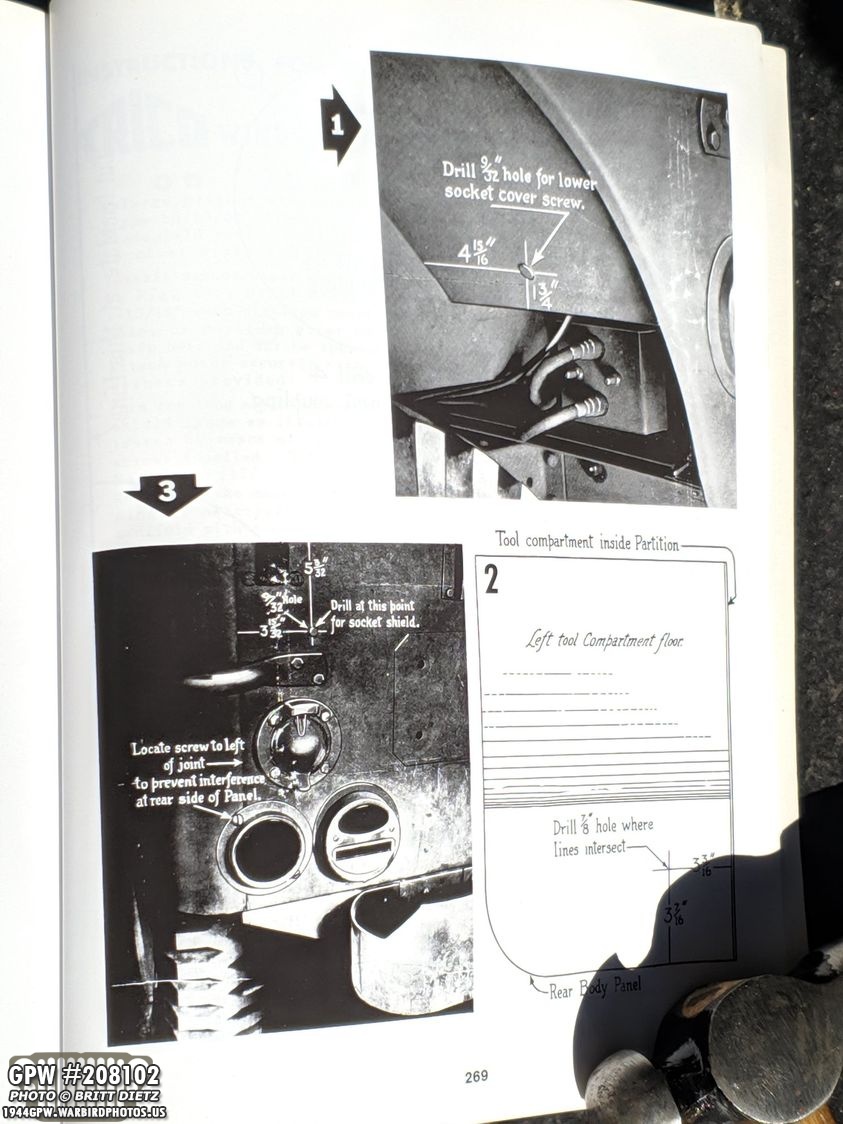
I first went by these diagrams and accompanying instructions in the book ‘All American Wonder’. I started with this as a reference when drilling the holes.
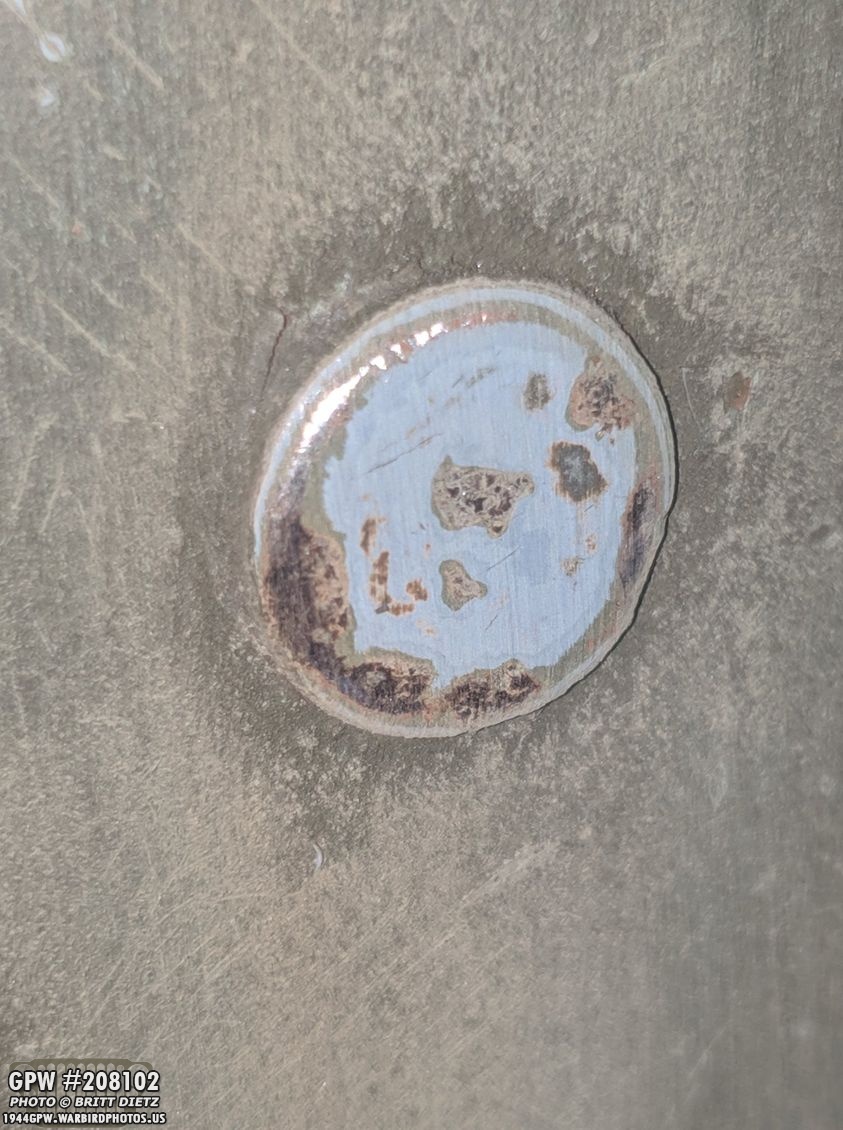
Now what holds that shield down are two flat head screws. A wing nut then goes on each screw and holds the shield down. These screws are either welded or glued to the body tub. This is a look at the screw head (on the outside of the Jeep body) on my original tub with original Navy paint from WW2.
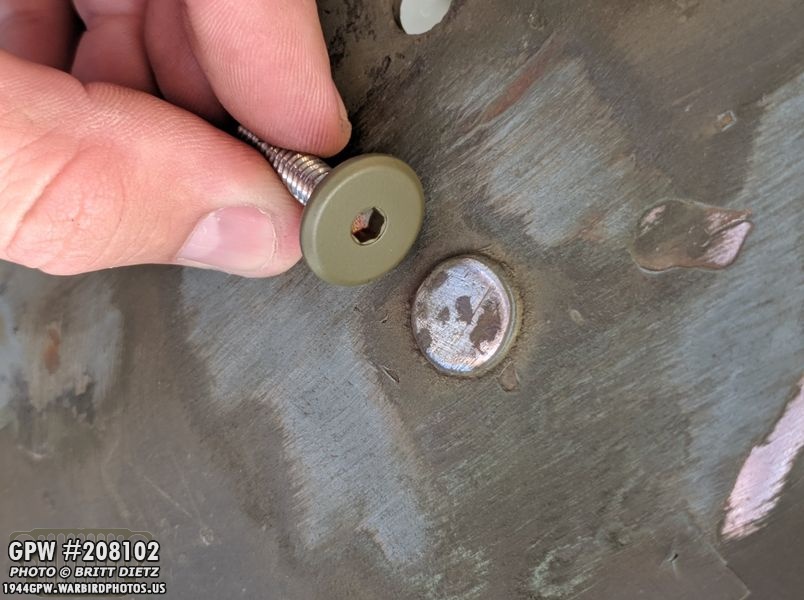
I hunted quite a bit for a screw that matches, and I found one that ‘almost matches’, enough to work. I’ll fill in that hex hole and it’ll look like a flat head.

Of course, the screw heads and the wing nuts need paint… Ron Fitzpatrick Jeep Parts Red Barrier III primer first!

And then Ron Fitzpatrick Jeep Parts 33070 spray paint!

Here I’ve added some bondo to seal up the hex hole. I’ll sand this down and it should look smooth.

Sadly, the MD Juan tub didn’t quite line up to what the ‘All American Wonder’ book showed, and the hole was drilled a bit too low. The top hole is where it should be. So, I’ll need to fill that hole.

I added some JB Weld Steel to the hole (see under the top hole). For the bottom hole, (bottom leftish) I marked it based on where the actual shield sits and got a much better hole.

After sanding the JB weld and paint OD green, it looks better. I still will smooth it out further and it should be hard to see the bottom hole anymore. That’s all I was able to get to on this project for today, so this weekend I’ll finish the installation of the shield. Look for the conclusion in next week’s update.

Needing some supplies, I took the Jeep to the local Harbor Freight Tools. This is the furthest I’ve driven the Jeep from home so far! Got a lot of looks.

Next up is a series of ‘studio’ photos I took of the Jeep yesterday (Thursday) with some studio lighting. I’m going to only share a few as I’ll do an update at some point with just the studio-quality shots. This is the recently completed and installed oil filter.
Here’s a look at the front of the Jeep with the studio lighting. The color came out a bit too green on this, which I think is Facebook’s doing.

Here’s a look inside the Jeep. This wide-angle makes it appear the Jeep is roomy inside!

And a close up of the passenger side marker light in the grill with the F stamp.

I also plan to have a post with a bunch of ‘before and after’ comparisons now that the Jeep is pretty much done. Jeep has come a LONG way since October of 2018!
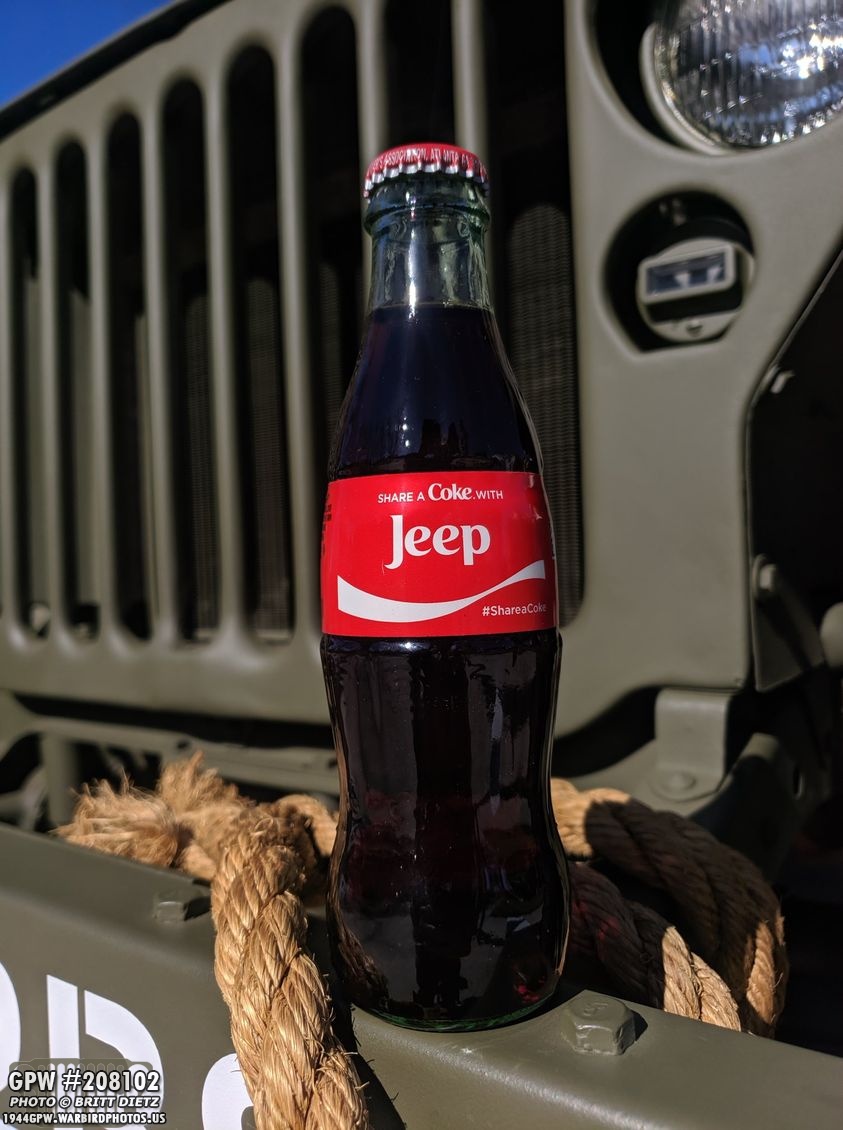
Finally, who says that significant others can’t care about a guy’s project like Jeep restorations? My girlfriend got the Jeep this personalized Coca Cola for Christmas. I’ll be drinking it on behalf of the Jeep (not sure Coca Cola will do so well in the fuel tank, after all). That’s it for this week’s big update! Till next week, Happy New Year!