 Military Vehicle Swap meet and Axle Work Begins!
PART 1: As I predicted, last week was the calm before the storm, and this past week it’s been one heck of a ride! In fact, it’s so much I have to split it into two parts! After attending a military vehicle swap meet, I came away with a horde of new items for the Jeep, including an original Sparton Horn which I completely restore in this update! Look for Part 2 on Monday!

This past Wednesday marks two years since I first got the Jeep! It’s come a heck of a long way since then and I’m nearing the final completion of the restoration! The ‘end’ is on the horizon!

Kicking off this week’s update, last Friday I went out to Lytle Creek where the Southern California Military Vehicle Collector’s Club was hosting their Fall rally and swap meet. There were two Jeeps there, including an amazing GPW (second photo down) which I was able to get a lot of reference from. I picked up a bunch of Jeep parts from the swap meet. As a special surprise, one of the vendors at the meet opened up their father’s ranch, which was chock full of military vehicles/items over a gigantic lot (bottom photo)! It was like searching for gold, you really have to look for things, and I struck some gold!

Here’s the haul I came away with from the swap meet and the ranch visit, for prices that were unbelievable! I’ll be going through each of these one by one in these two updates… but here’s the list: I FINALLY got an original GPW hood to replace the replica on my Jeep currently! I also picked up an original Sparton horn that appears to have been off a GPW! I also got a correct WW2 jerry can spout, some NOS GPW/Jeep items, an original generator bracket, an original spark plug socket, a 1944 Jeep grease gun for the tool bag, and an original GPW dipstick with tube!
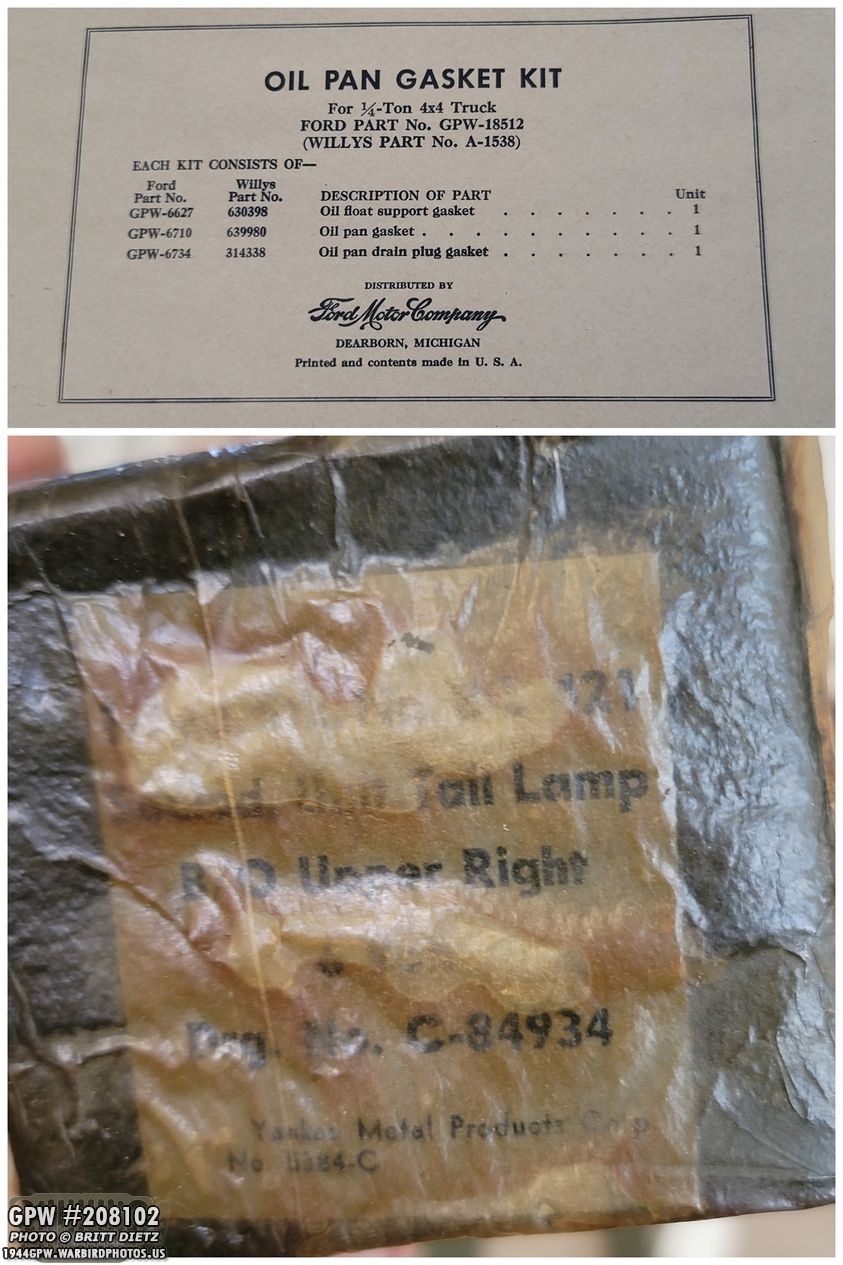
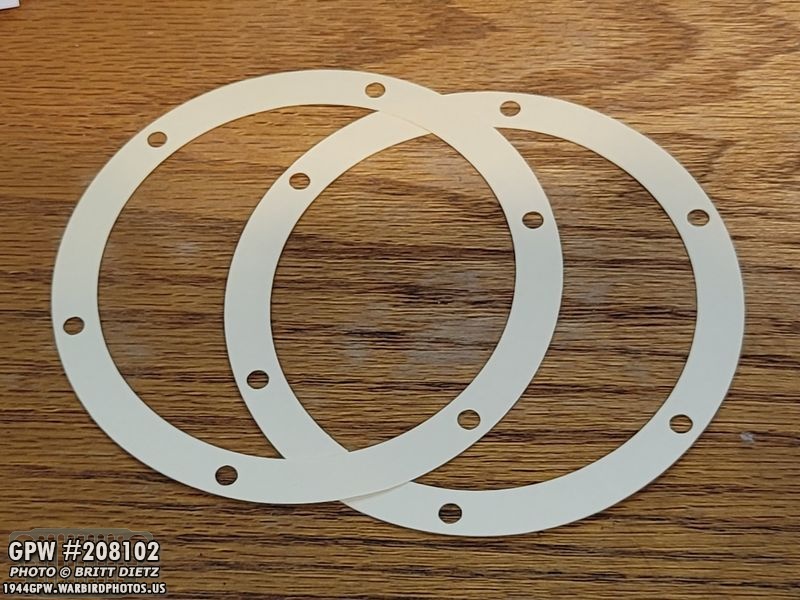
The two NOS items I picked up is an original GPW Oil Pan Gasket kit and a Jeep blackout tail light bulb still in box. The Oil Pan gasket set is probably too still to use (it’s cork) so I mostly got it as a display piece. The blackout bulb is in the original box that’s wrapped in wax paper, and inside the bulb is also wrapped in wax paper. I also got this as a showcase piece.

I’ve been hunting for a WW2 era jerry can spout for some time now. I’ve seen one at a flea market, but it was post-war… so I was excited to find this at the ranch just sitting next to some rusted out jerry cans. $5 for this thing!
Sadly, it turned out that this was as well a post-war nozzle. Totally my bad for forgetting the main rule… if it has a riveted stud in this spot, it’s post war. Wartime ones have screws. Dangit!

The screen at the end of the funnel neck is still in place, but the screen near the other end is missing, which is alright.

I decided to do some clean-up on it anyway. After some wire wheeling and WD-40, I got it looking nearly brand new! The neck also bends with ease now after the WD-40 soaked in there.

Under some of the OD Green paint, I found this! USMC, which isn’t US Marine Corps, but actually the United States Metal Container Company, one of the makers of Jerry Cans during WW2! There were some areas I couldn’t get to with the wire wheel, so I have this soaking in gasoline right now (to also clean up inside the spout as well). I’ll post an update on how it turned out next Friday!

Moving on, here’s a look at the original spark plug socket! No markings on it, and it’s missing the handle piece that slides in the upper hole to turn it, but that’s nothing a screwdriver can’t do! And the price was too good to not pick it up. This will go into the Jeep tool bag in the toolbox, but not before some restoration work.
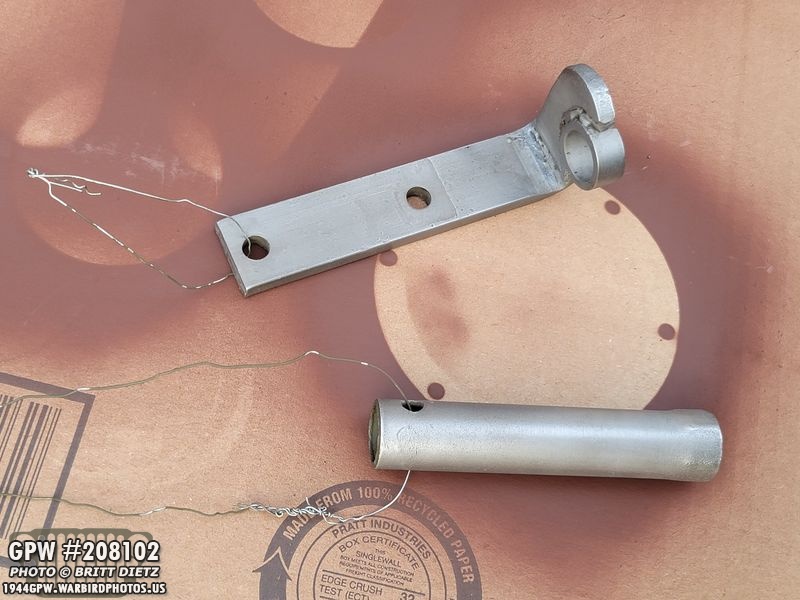
Here I’ve sandblasted the generator bracket (which I forgot to take a ‘before’ photo by itself) and the spark plug socket. Time for paint!

After some Ron Fitzpatrick Jeep Parts Red Oxide primer, I then used a scotch pad to scuff up the primer and painted the generator bracket with the VHT Ford Engine Gray (to match the engine), and the spark plug socket the same 33070 OD Green as the Jeep. More on the generator bracket in Monday’s Part 2!

Next up is a 1944 mini grease gun found commonly in Jeep tool bags. It’s in pretty good shape and still has a good amount of grease in it.

It’s made by Alemite, and made in the USA.
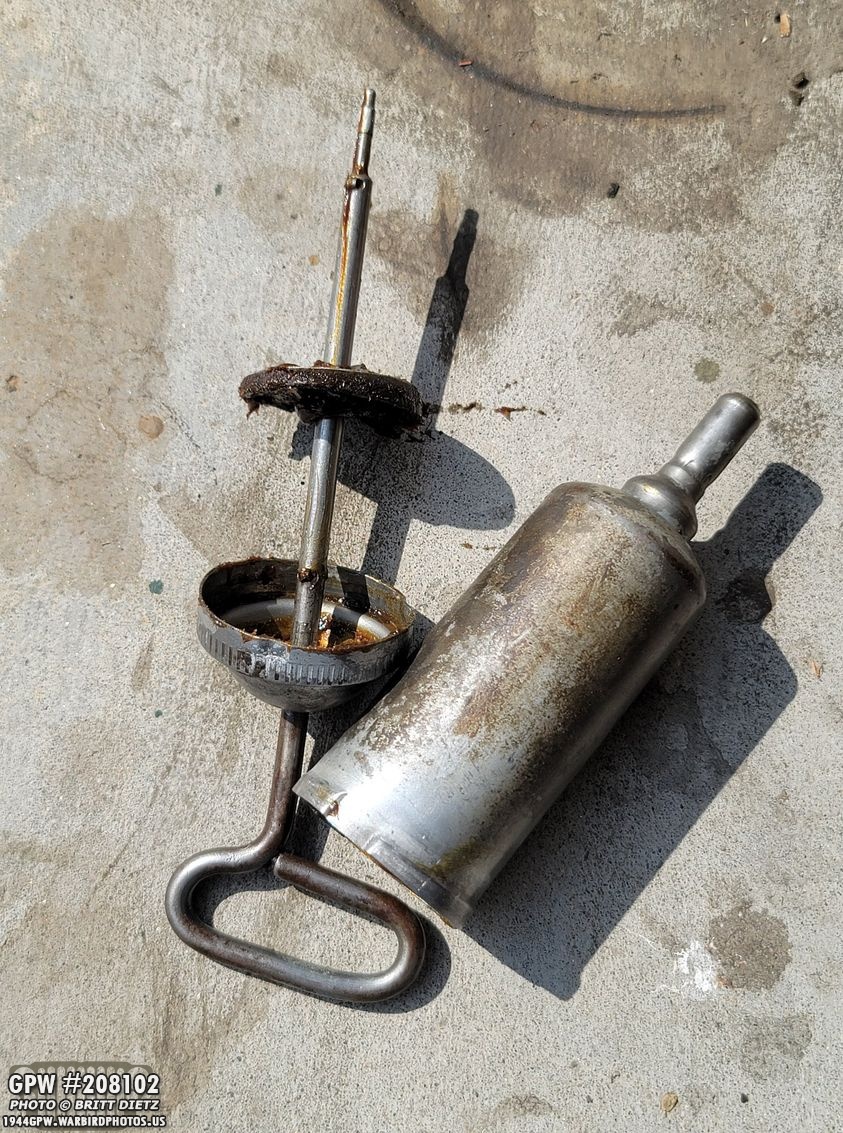
Taking it apart (not much to it) you can see the main case, along with the handle that has the cap and plunger.
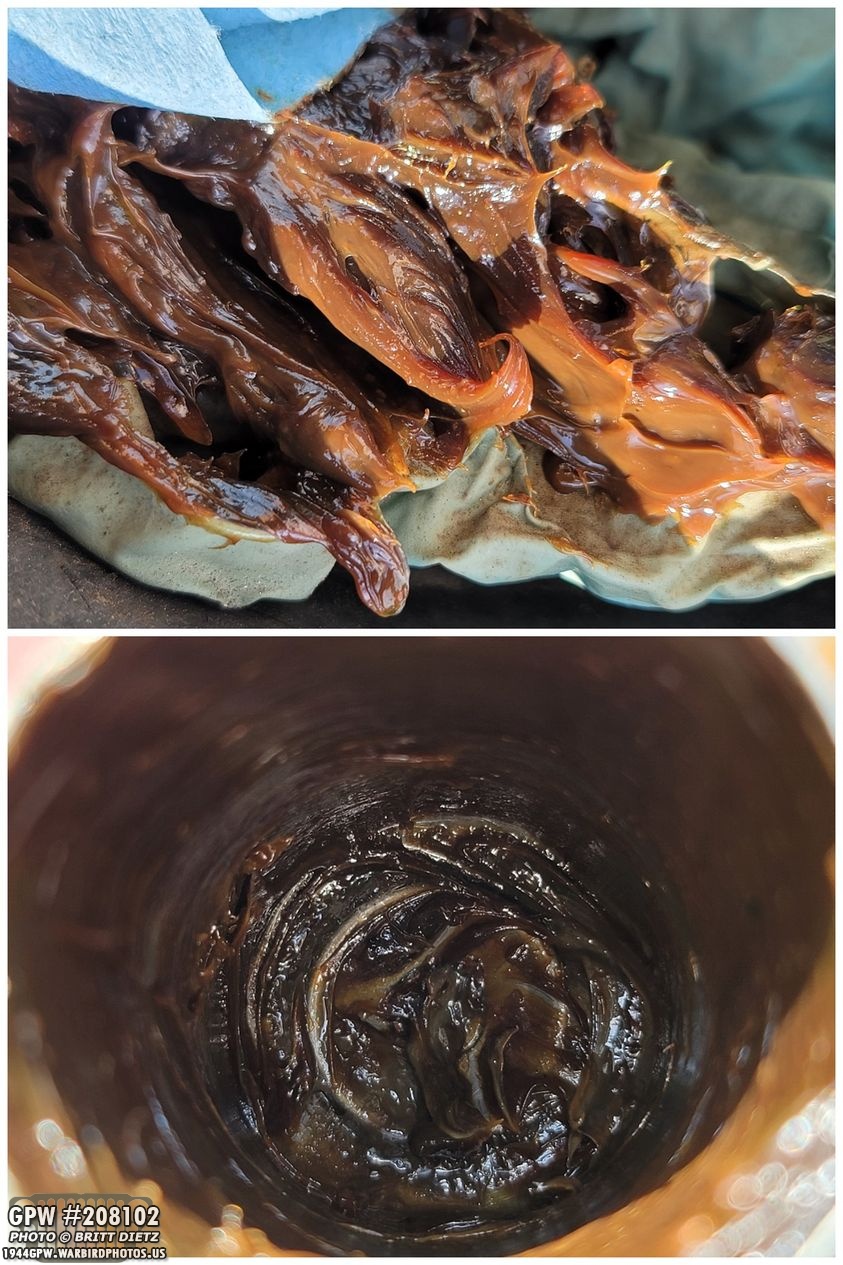
I decided I wanted to clean it up and restore it back to looking new. That meant removing all the grease. Not sure how long it’s been in there, but it was like thick slimy chocolate. After I squeezed out as much as I could, I used a screwdriver to remove the rest.

And then I threw both parts (with the jerry can spout) into my ‘bucket-o-gasoline’ to soak for a few days. This should help break down the grease and clean it up pretty good. Look more the results on this next Friday!
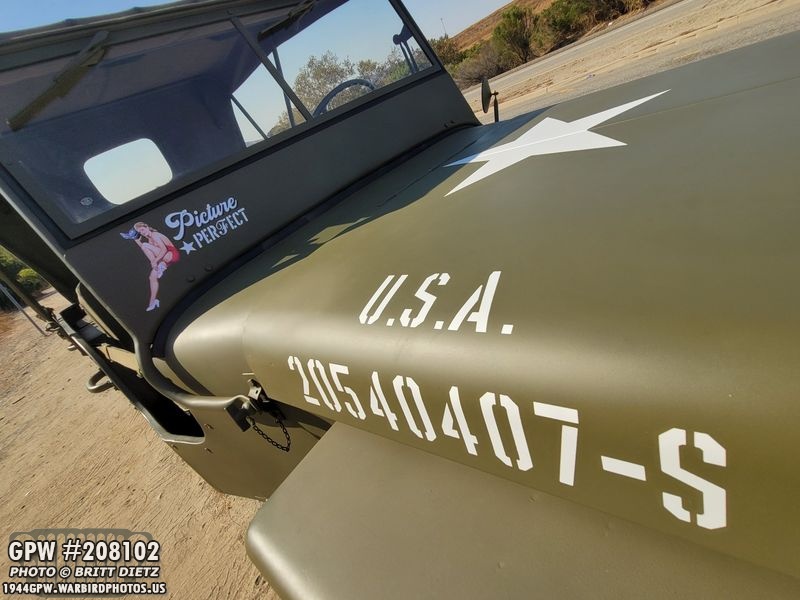
If you’ve been following for the last year, I’ve been on the hunt for an original GPW hood. Why? 1) My original hood is too far gone to replace the ‘droop’ and cancerous rust in the hat channels. So it’ll be preserved with my original factory numbers I found while wet sanding as wall art. 2) I’ve had an MD Juan hood on the Jeep, but I wanted an original instead. 3) I also have incorrect numbers on the Jeep, as I used the online estimator to get 20540407, but after uncovering my original factory numbers it should be 20540356, which amazingly is only 51 numbers away from the estimator! But I decided not to change the number until I found a new hood.

And here it is! An original early GPW hood. It has original hardware on it, including early hood blocks! It looks rough, but it’ll clean up like new. Rust is minimal, and mostly just surface rust. I got this at that ranch… originally they weren’t going to sell it, but I convinced them! Super score! I had gone to the swamp meet hoping to find a GPW hood, and I’d say: mission accomplished. Let’s take a look a the hood…

The hood catches and latches are all original and GPW. I’ve mentioned this in the past, but the best way to tell us the latches, if they have a D shape to the body (which you can see better in the bottom photo with the flat area facing the hood), then it’s WW2. I don’t see any F stamps on the catch bolts (a big form of debate), but we’ll see when I get them all cleaned up.

Here’s a look at the original hood blocks, which appear to be rubber. I’m guestimating that this is an earlier GPW hood because of this.
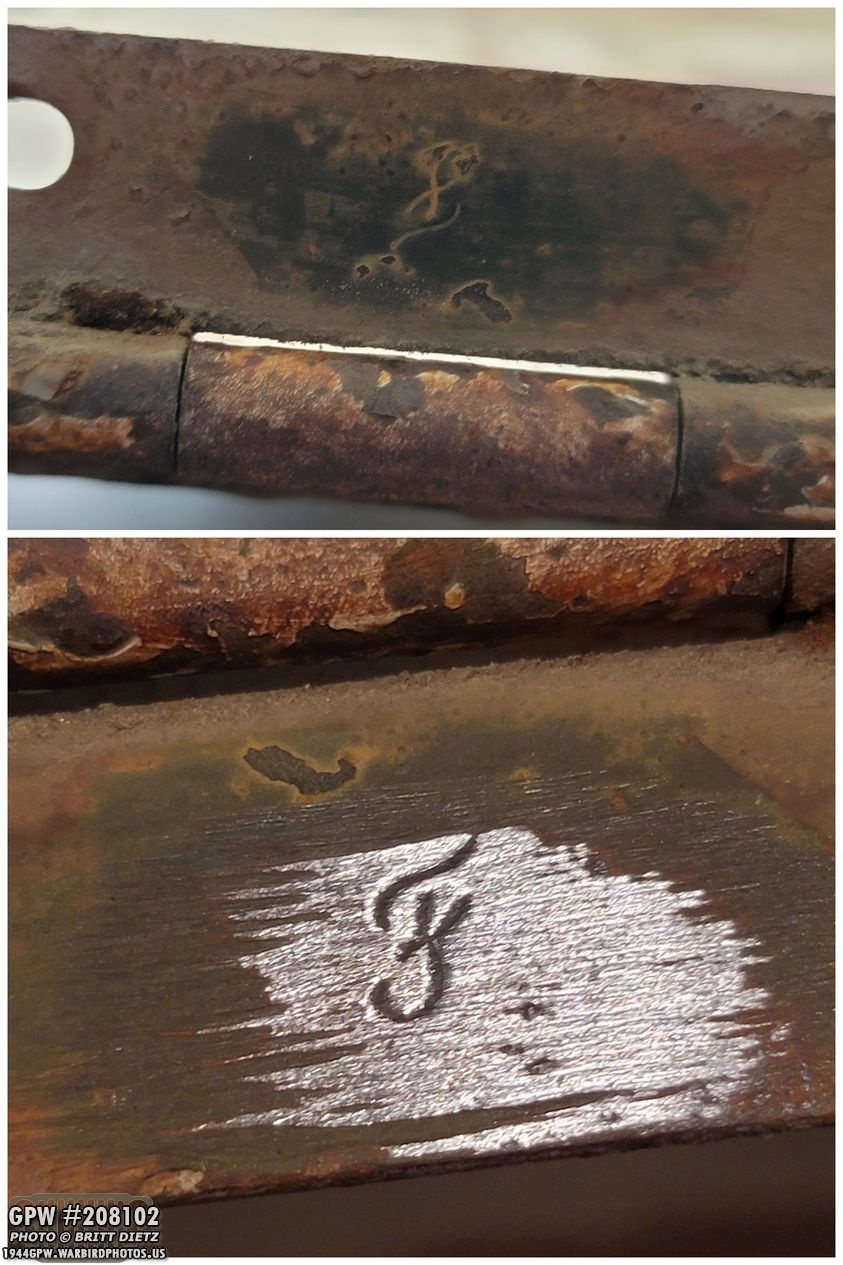
And, of course, the tell-tale sign of a GPW hood is the F stamp on the hinge, which there is! The top photo is just a quick rub with a cloth, then a quick hit with the wire wheel. I will be wet sanding this hood to see if I can find any markings, for fun!

It even has pieces of the bond stamps on either side under the hinge. I’d imagine those are original bolts as well.

Now for the damage, there’s two spots needing some TLC. The hinge has a break on one end, but it’s a clean break and will easily weld back together brand new. The other issue is the channel on one side, it’s coming away at a seam (which is common for hoods). This should be an easy fix as well to tac it back together. Overall, not bad!

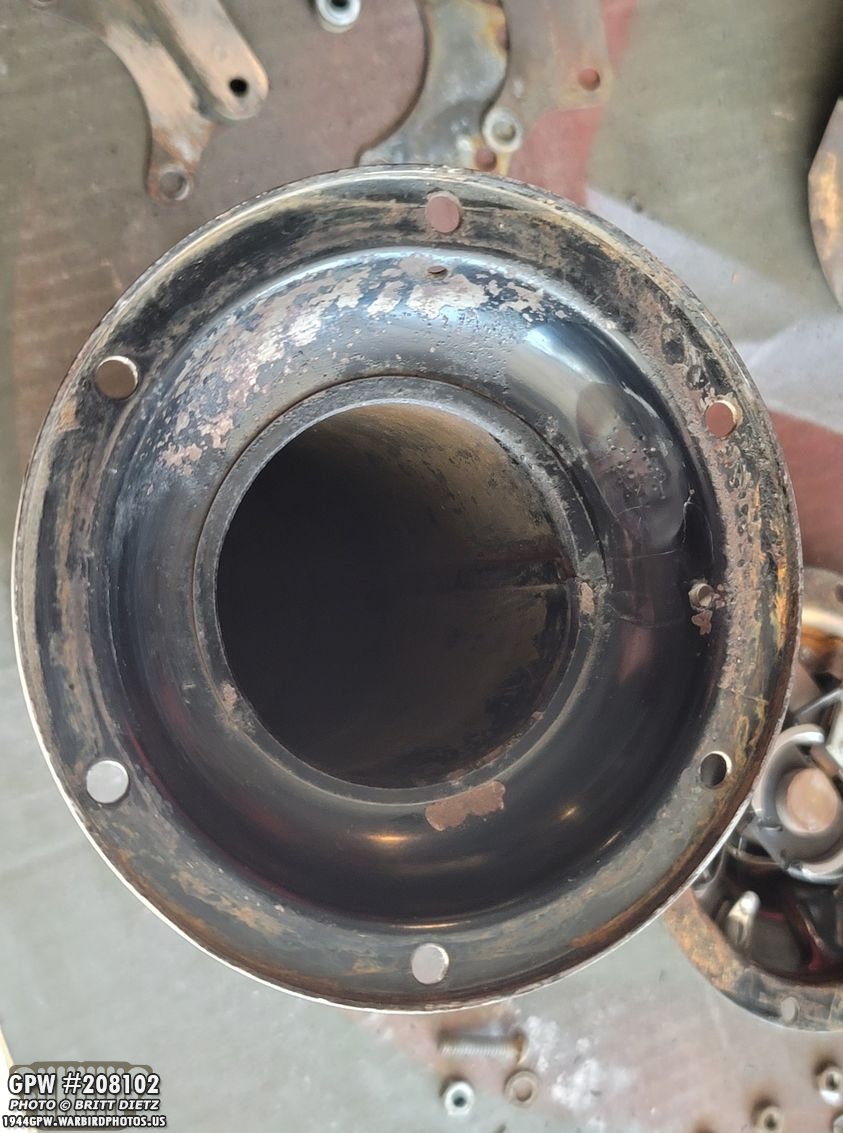
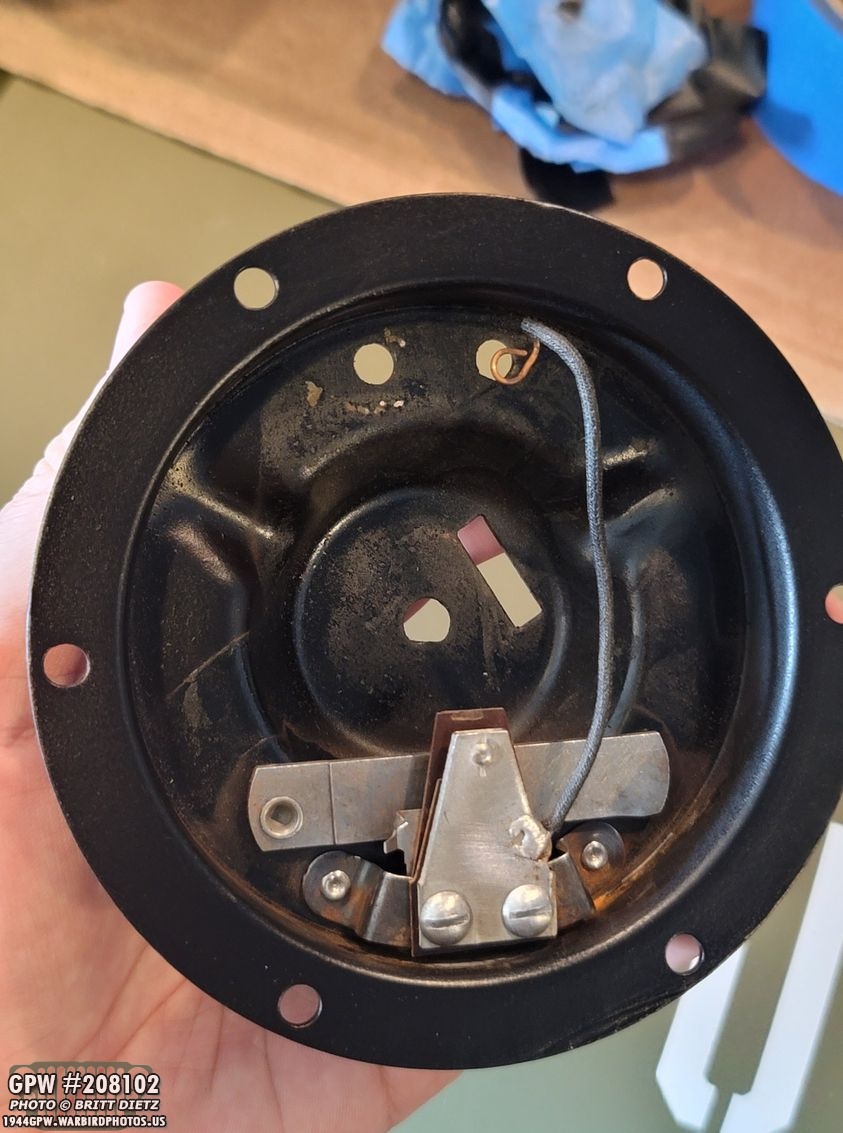
Now, moving on to another ‘star find’ during the trip to the ranch, what appears to be an original Sparton Horn. It was in a box, in a van sitting on the ranch full of various parts, books, etc. I wouldn’t have even seen it except something else caught my eye and I spotted the trumpet. Everyone was eyeing my find the rest of the day I was looking around the ranch! And the most amazing part? It was $15. Let’s take a look…
Looking at where the Sparton marking should be, we can see there are none. Nothing at all, and it appears someone tried to look for it at one time. It looks exactly like a Sparton horn in almost every way (there is one difference I’ll point out in a bit).

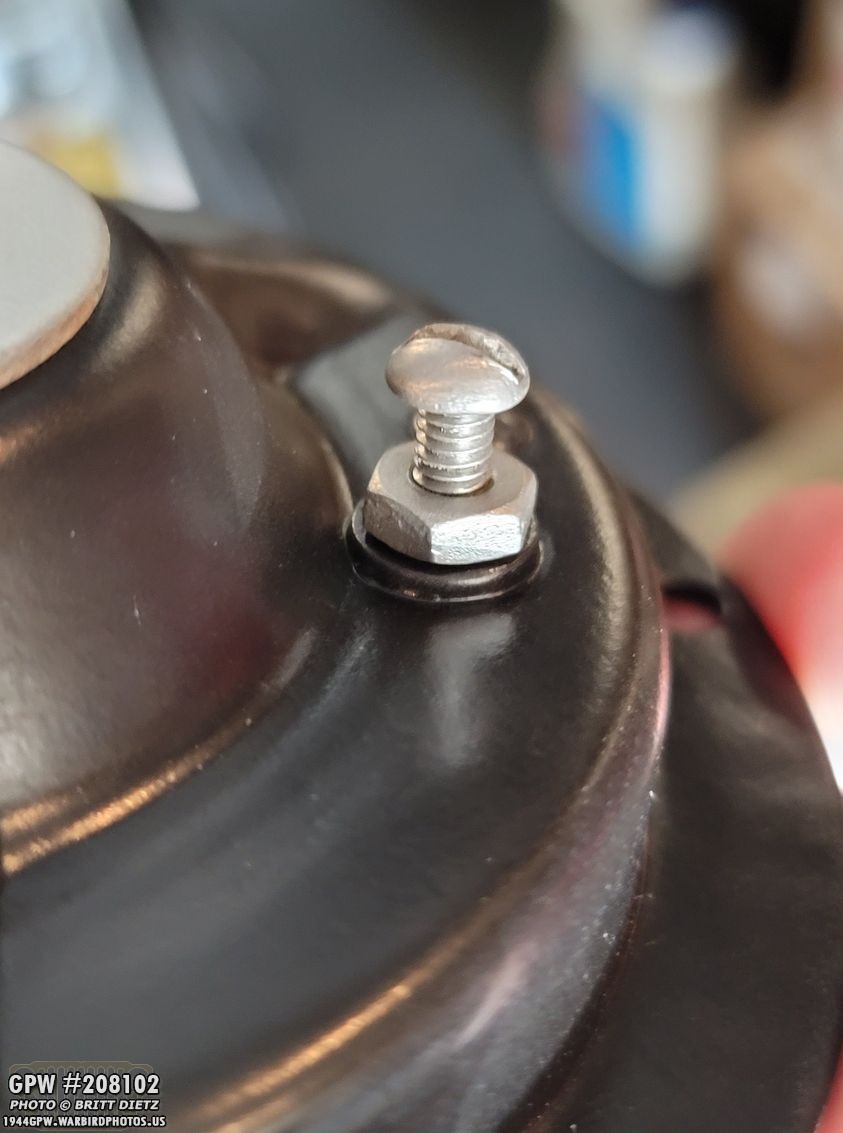
And here’s the super exciting part… what do my eyes see on the Horn vibration mount? A very original F bolt! Now, this bolt could have come from anywhere at any time, but judging by how the markings are, I think it’s original to this. This could very well be a horn that came off a GPW Jeep! Heck, it could have come from the same Jeep as that hood! Now, this is a MB style vibration mount, not to say that GPWs never had them.

Looking at the backside, the horn is exactly like the Sparton horn in every way but one… on the repro Sparton horns (and in photos of originals), there are raised ‘ribs’ that go from bolt hole to bolt hole on the outside ring. These are not on this, and I’m not sure why. Everything else, down to the rivets, match up otherwise. This is a Sparton horn for sure. Perhaps an early one?I regret not taking a photo after this, but I decided to try and see if the horn works. I hooked it up to a battery, and touched the contacts… HOOOOONK! It works!!!

After hearing it still worked, I decided to do a complete restoration of this horn, as I wanted to use it on my Jeep and take off the MV Spares repro I have. I know some purists will not be happy I didn’t leave the original paint and patina, but I like making things look new. So I went to work with a less-abrasive nylon wheel to remove the paint after I carefully looked for any sign of any markings on the trumpet. There are NO markings, nor any signs there were any ever.

I decided it would be easier to remove the trumpet to clean the paint. As I started to remove the black paint, pretty clear to see no markings. Even if they were worn away, you’d still be able to make out ‘something’.
Here’s a look at the inside of the trumpet. Original paint, still in pretty good shape, but cracking. A little bit of rust.

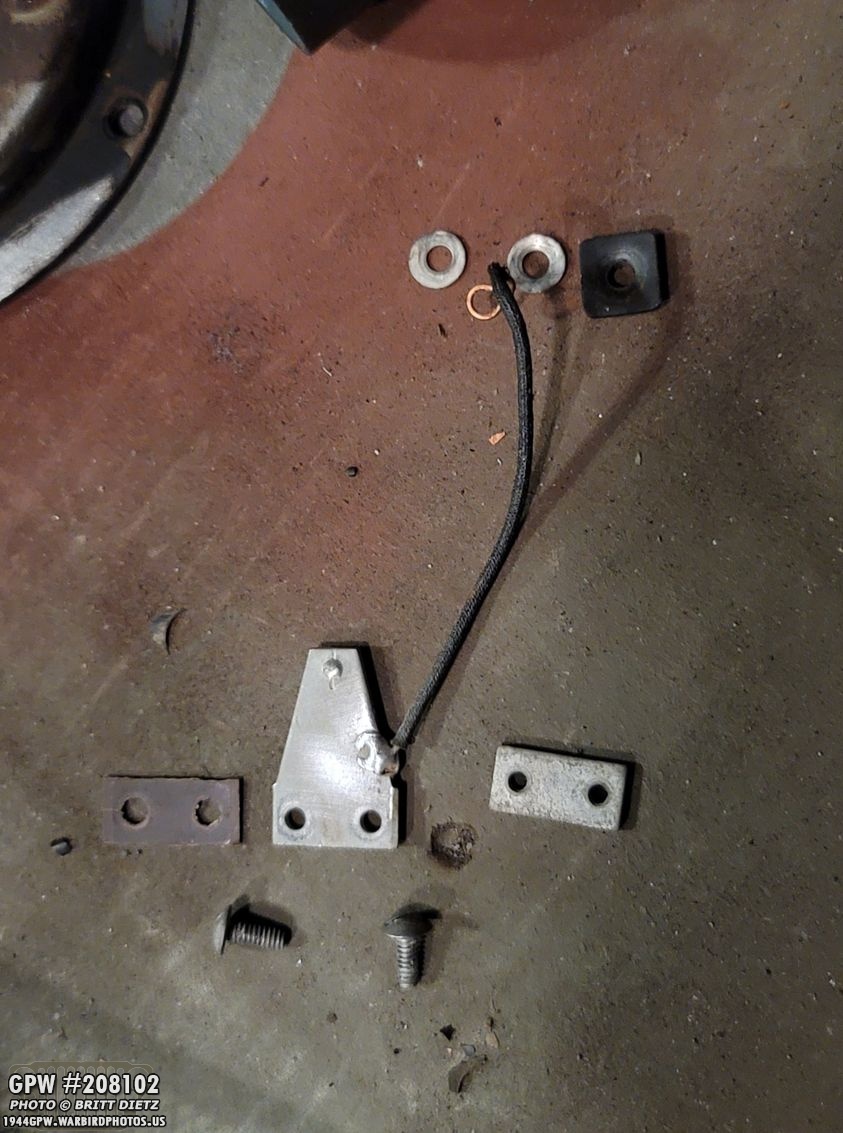
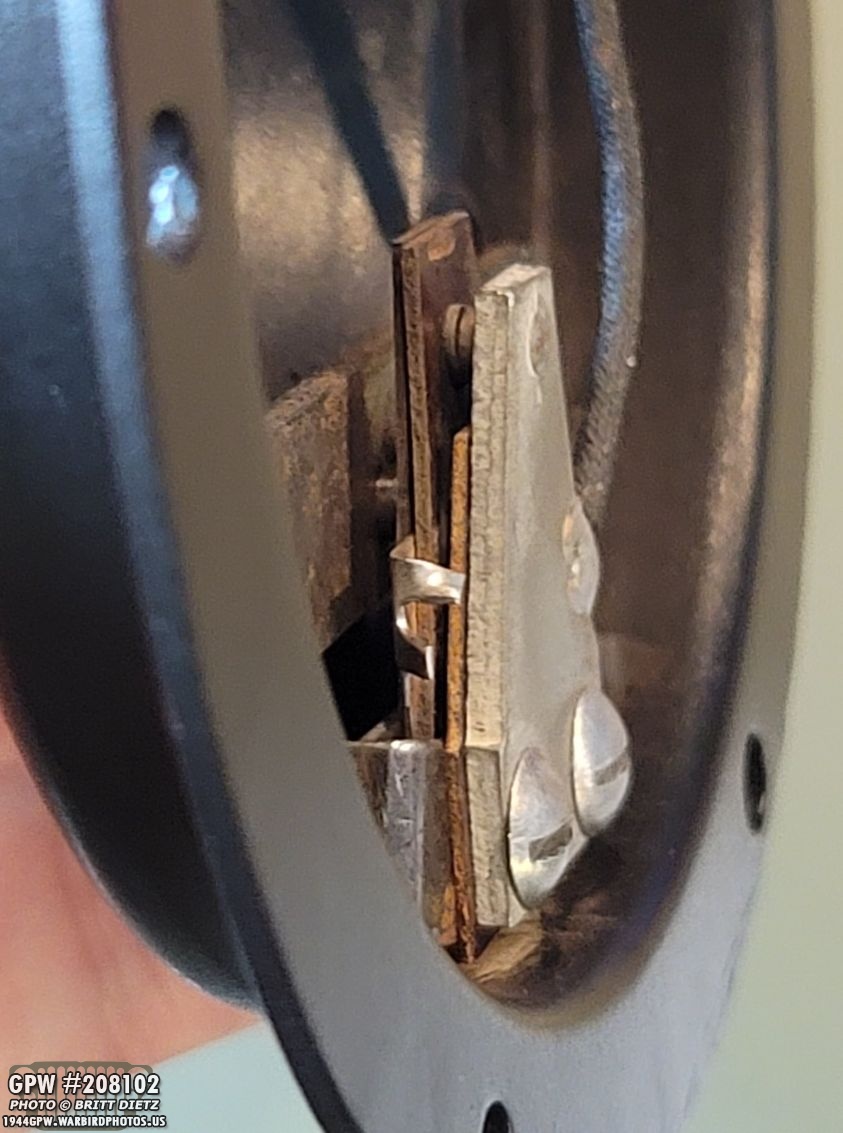
I took apart the horn vibration mount, and here’s all the pieces.

Looking at the horn itself, here’s how it looked once I opened it up. If there were any paper gaskets, they have long since rotted away. Bit the horn still sealed pretty nice and only minimal rusting inside. Looks original, and in GREAT shape.

Here’s the basic parts for the other half, with the four rivet screws, and two vibration mount screws.
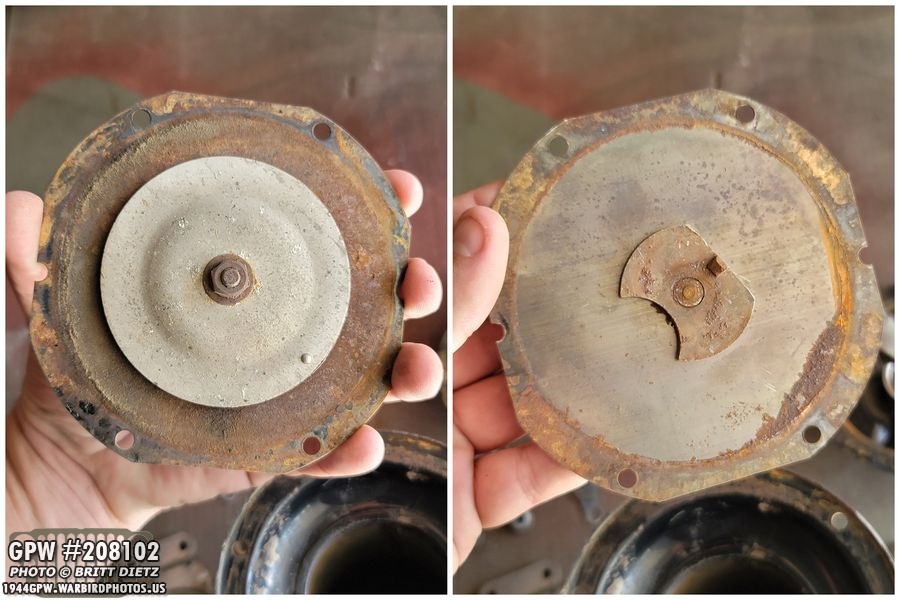
The middle plate had the most rust, but that’s a very easy fix!
Here’s all the pieces for the terminals and the adjustment screw. Each terminal has insulators on both inside and outside the horn.

And here’s a look at the entire horn taken apart in it’s basic form.

I threw the trumpet, the disk, and other parts into the sandblaster and got rid of that pesky surface rust!
Trumpet looks brand new! And again, no markings whatsoever.

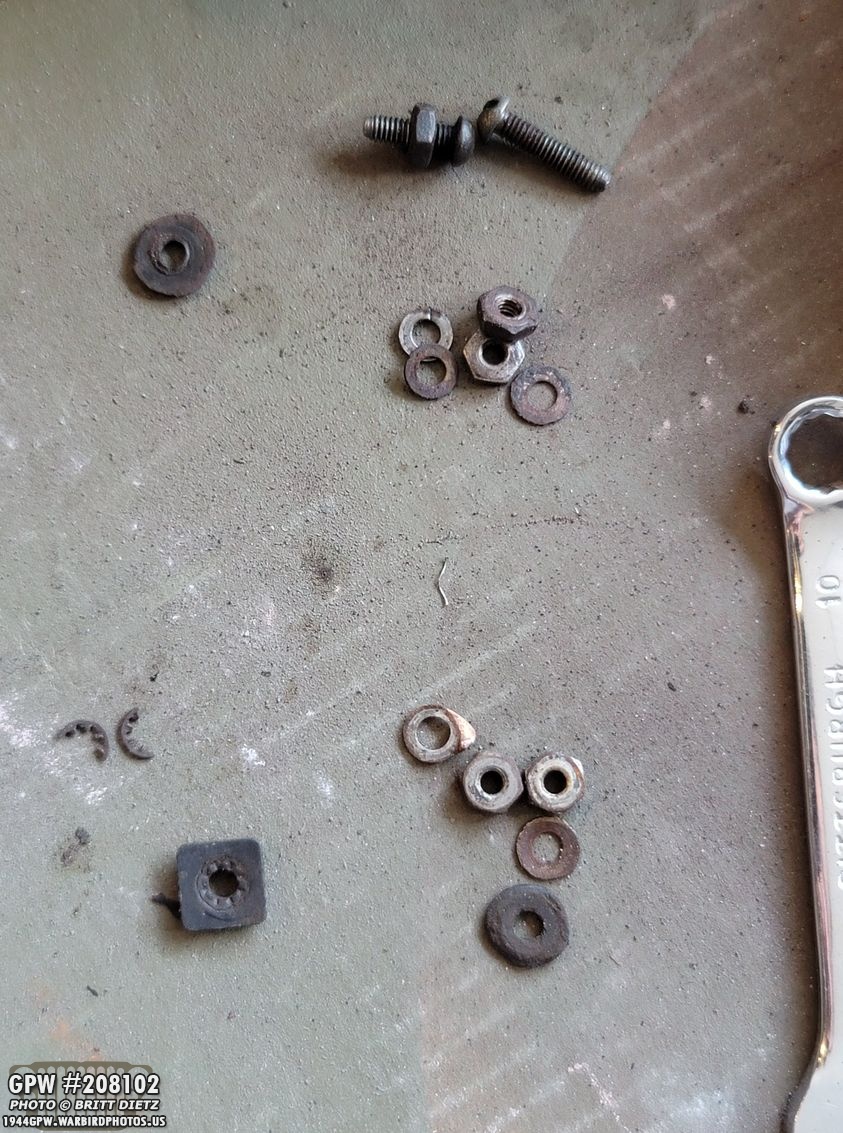
I also sandblasted all the screws, lock washers, and nuts.

And here’s a look at that F bolt! It’s a rare 1/4 x 5/8 fine thread bolt with a tapered end. Anyone have one of these I could buy of you to make a pair? Would be much appreciative!
I decided to go one step further and removed some of the internals of the horn so I could get in there and remove some of the rust. I wasn’t going to go as far as removing the riveted items, so here’s all I ended up taking out via the two screws.

After nylon wheeling the back of the horn, here’s how it and the trumpet look. Nice and clean!

Sandblasting and some light wire wheeling made the disk come out looking great.

On the disk, there was this L stamped next to one of the holes. Why? I have no idea. That’s the ONLY stamping on this entire horn.

After a good cleaning (and masking off the internals that are riveted on), it’s time for paint!
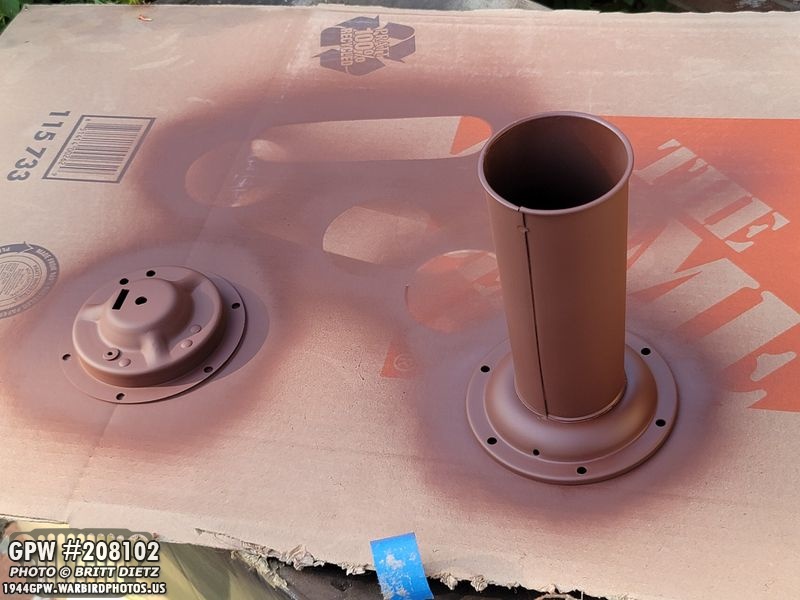
I used the Ron Fitzpatrick Jeep Parts Red Oxide primer for these as well. Dries fast, has a great finish, and adheres well.

And the inside of the back plate, with the riveted items masked off.

After they were dry, I scotch pad sanded the primer for better paint adhesion.
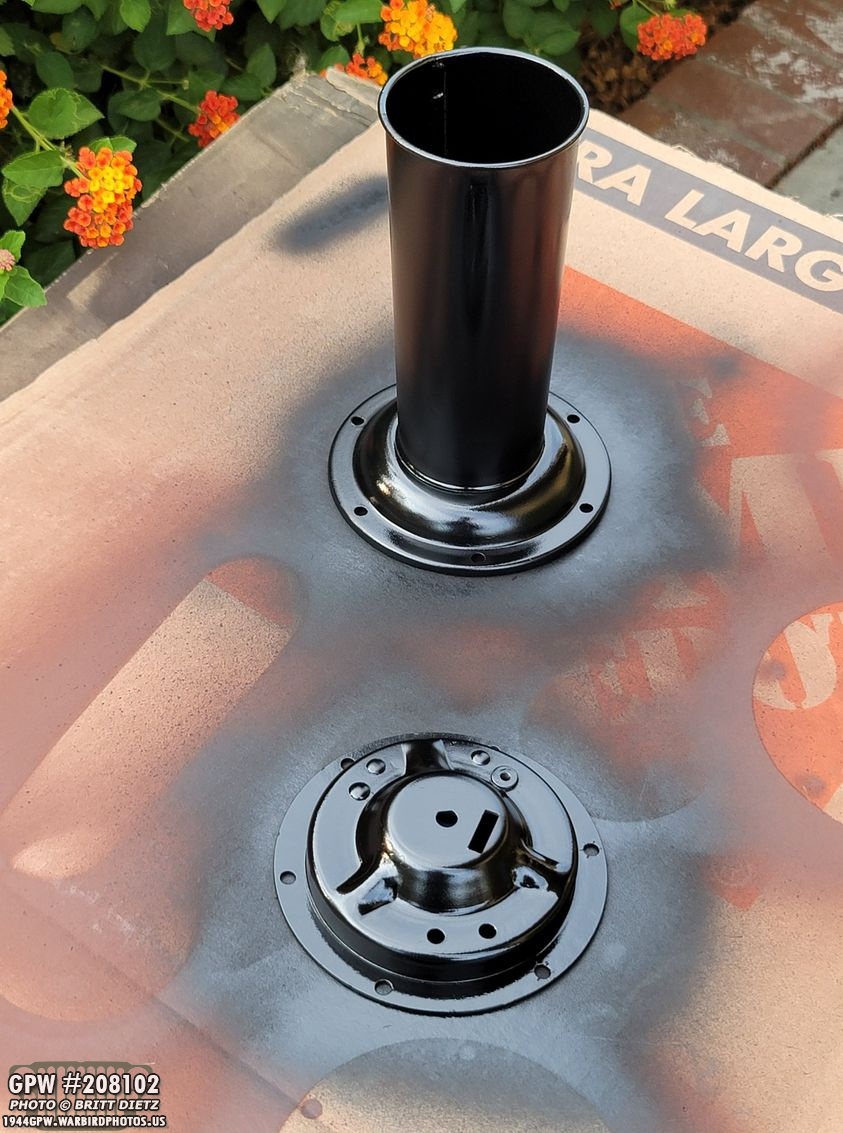
Just look at that beautiful black satin finish! There’s just something about seeing that paint go on after you’ve spent some time cleaning something that just feels so satisfying!

I also painted the large round disc on the disk black. I had seem some photos of this appearing to be painted that way on Sparton horns, plus it’ll protect the bare metal.

And a few hours later, I painted the inside. I also sealed it all with some satin clear finish to protect the paint job.

But then, disaster… once everything was dry, I noticed that my fingerprints were ‘pressing’ into the paint and leaving indentions. Whaaa?! The Rustoleum paint I was using just didn’t like something, and instead dried into this rubber-like quality. UGH! So I took the nylon wheel back to the backplate, and you can see here how it’s become almost a rubber-like state.

So this time, I used the Red Oxide Primer, a different matte paint that dries super fast and goes on well, then the satin clear coat which gave it that shine I wanted. A half day’s delay.

Now, for the paper gasket, my friend Roger mentioned that I should make my own. So I took the backplate and traced the outside circumference along with all the screw holes (right). I then took my digital caliper and measured it all and designed it in photoshop exact as I could make it. I then printed it out (left) and found it lined up perfect!

If you know me and my updates, then you might have guessed where I was going with this… my Cricut machine! I made the templates from photoshop and uploaded them to the Cricut design studio to cut out. It would cut them a million times better and perfect than I could!
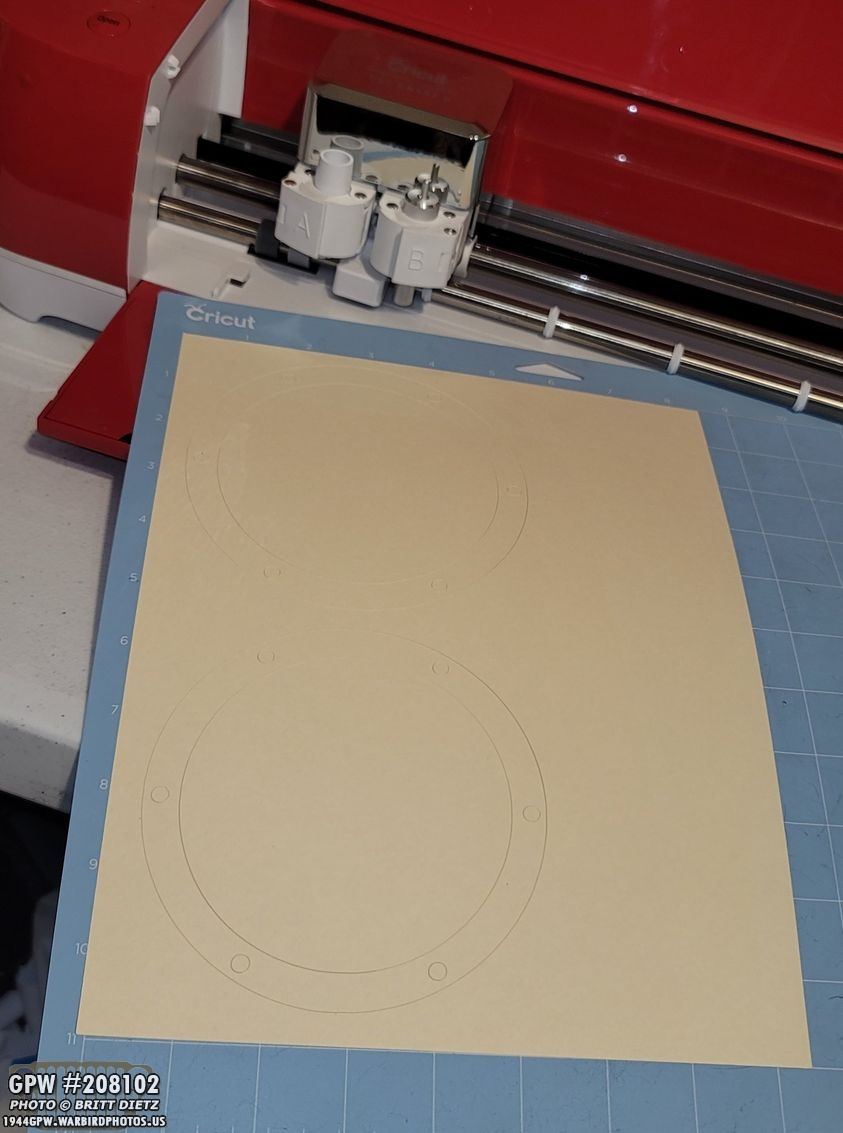
I used a thicker paper to have them cut out, as shown here. It’s not as thick as a manilla folder, but like a very light cardstock. Here are both gaskets cut.
After peeling them off the mat, perfect gaskets! But the big test… do they fit?
And the answer is they fit like a glove! Woohoo! Instant horn gaskets!

With everything painted and the gaskets done… it was time to put the horn back together!

I regret taking this apart, this was a PAIN to put back together as there are several layers of items that must be put back in a specific order. It took a while to line up, and I found I was able to use a long screw to get one side held in as I screwed in the correct screw on the other side. then I could swivel over the top two plates after removing the long screw and replace it with the correct screw.
There’s about 9 layers of items on there! These layers are what ‘vibrate’ causing the noise of the horn.
With them all put together, it was time to put the coil (which goes in the middle) back in and hook back up the terminals (up top).
And I mentioned before how the terminals have insulators on both the inside and outside. The top has the two square insulators that are inside (before I put the screws in), and the bottom shows the outside with the screws in and the circular insulators.

All hooked up! Coil is back inside in the middle and the terminal connections are all hooked up.
I then put the adjustment screw in. This pushes on one of the riveted items, a metal bar, which brings items closer or further apart changing how the vibration (or tone) of the horn sounds. I tried to leave it at where it was screwed into that nut so things wouldn’t change, but I’d have to adjust it anyway.

When you put the large middle disk back on the backplate, one thing to remember is you have to put it back in a certain way, so a raised notch on the disk lines up with those various layers on the backplate. So that raised lip should rest on them, which is part of the vibration that makes the horn sound.

I decided to use one paper gasket on either side of the middle disk, so it’ll protect either side from any moisture.
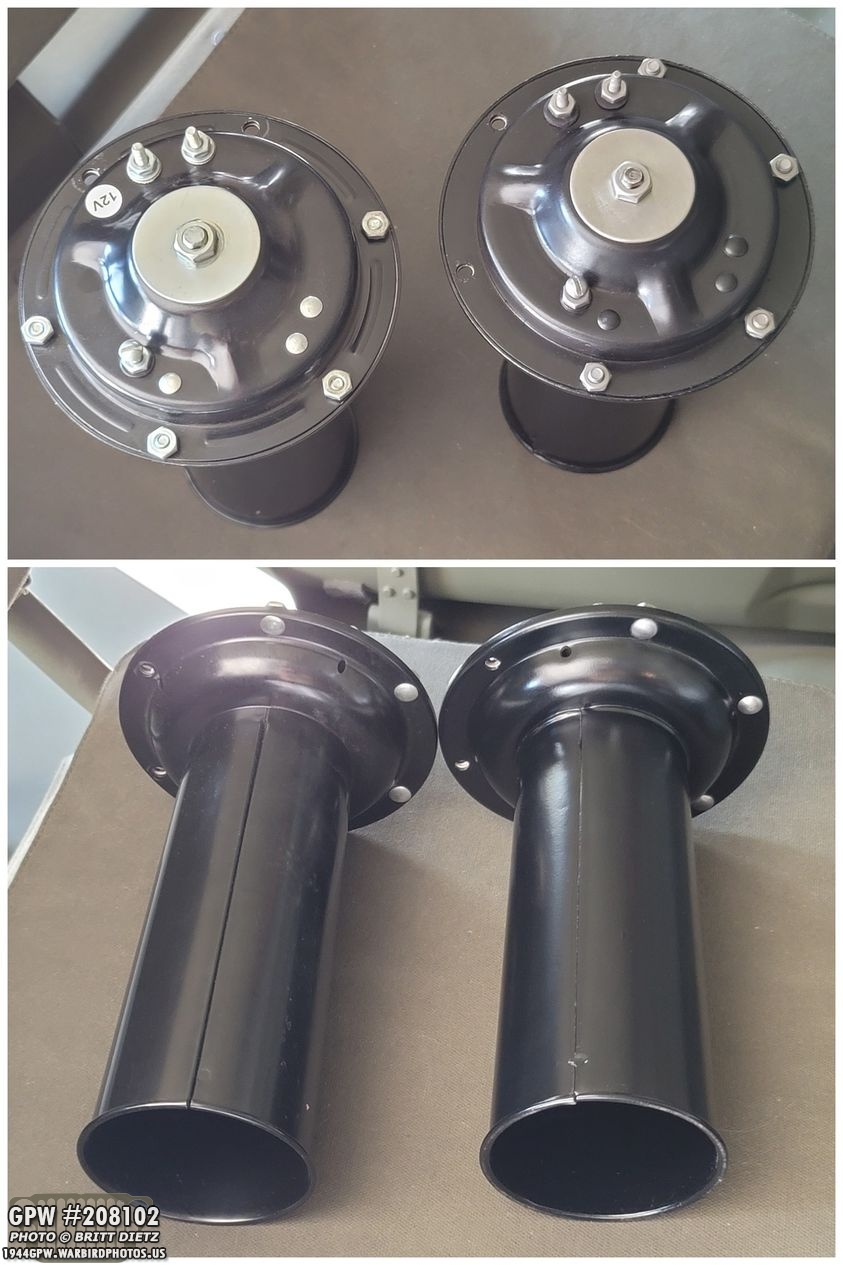
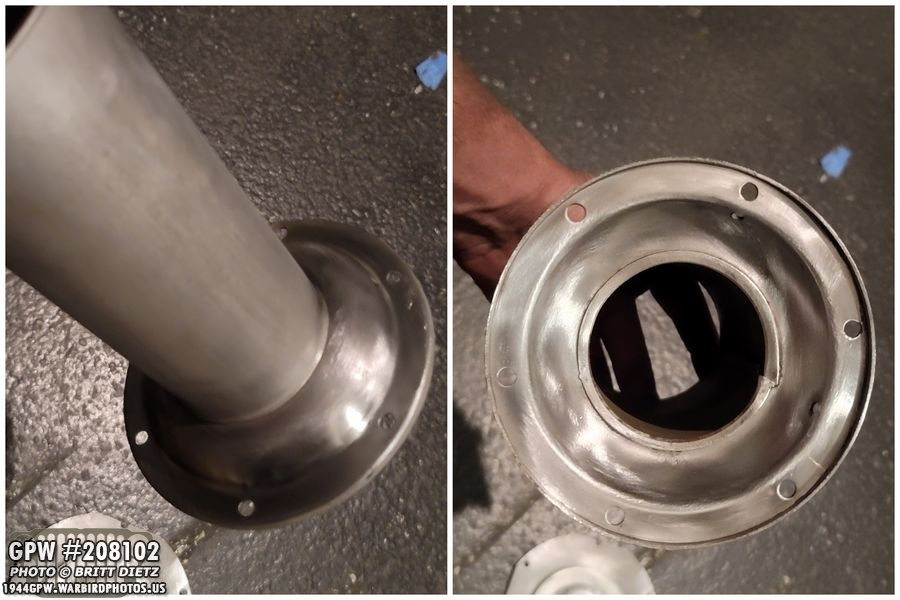
Putting it all back together, here’s a look at the MV spares 12v horn on the left, and this original on the right. You can see in the top photo the missing circular ribs between the nuts on the outer plate vs the original. And yes, you might be saying… wait, if that’s original, it’s it a 6 volt horn? That’s correct, and my Jeep is 12 volts. You can use a 6v horn on a 12v system, but it will sound very loud, very fast, and could burn up if you hold the horn down for a bit. More on this in a bit…

Here’s a look down the trumpet on both horns… the original on top, MV spares 12v on the bottom.

So, knowing that I was going to have a 6v horn on a 12v system… I had an idea. I remember that I had a spare 12v to 6v reducer that I had gotten with the Jeep from the previous owner to try and use on the original 6v gas gauge (which didn’t work anyway). So I took that, hooked it up to the live wire (it’s just wrapped around the terminal) and gave it a go… SUCCESS! A more correct sounding HONK! Not crazy loud and super fast (the double voltage of 12v makes it vibrate twice as fast). So, the question is… how can I add this reducer?

And that gave me an idea, it’s so small, why not add it inside the horn? I can attach it in a way that’s not permanent, won’t destroy anything, and it won’t be seen by anyone! So I put an eyelet on one side of the reducer and wrapped the other end around the original eyelet and wrapped that in electrical tape to insulate it.

Here it is all hooked up. No one will know unless they open the horn up, and if I ever need to make it original again, I just undo the electrical tape, unwrap the wire, and take out the reducer! Win win! Since the horn isn’t used that often, I’m not worried about the reducer getting too hot either. Perfect solution without having to either rewind the coil to make it 12v, or replacing internals.

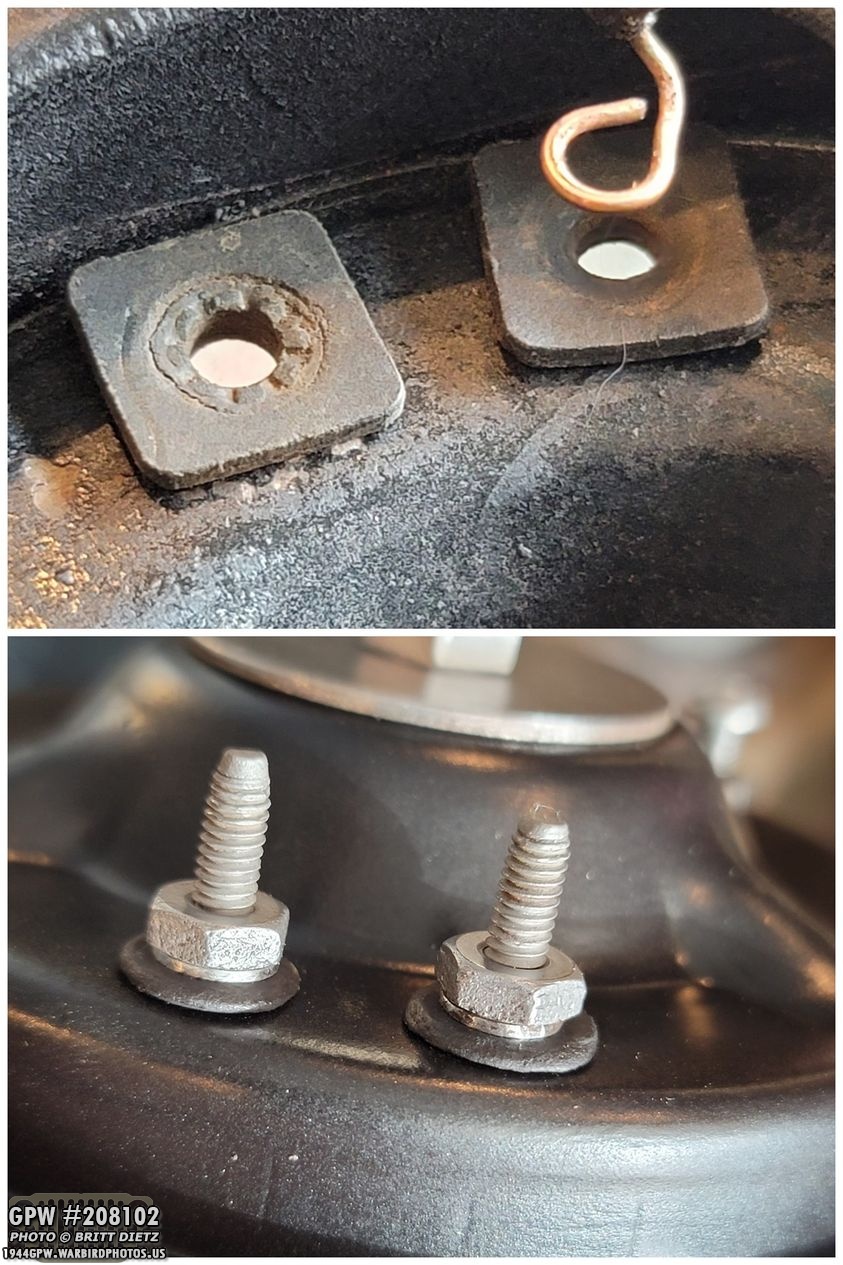
I wanted to show a quick comparison between the GPW horn vibration mount (top, on my Jeep already), and the common MB vibration mount (which was with this original horn). You can see the differences between the two of them. Side note, I realize my GPW mount is on backward, and I fix this later on. Update: See Bill Mullen’s comment below!
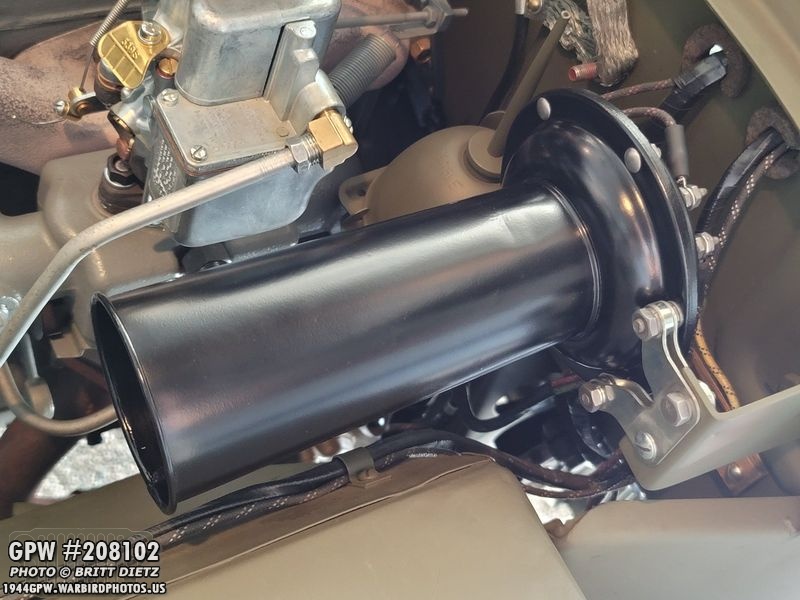
And here the original horn is, all hooked up into the Jeep! After this photo, I took some time to adjust the horn’s tone with that adjuster screw. Took a few turns in both directions till I got a sound I liked and thought was right. It’s slightly raspier sounding than the 12v MV Spares, but as Roger pointed out… it’s also a 75+ year old horn!

And here’s a look at the vibration mount (mounted the correct way now). And I used that original F bolt… along with a slotted screw until I can find another 1/4 x 5/8 fine thread with taper F bolt (again, anyone have one?!)

It’s pretty cool to have an original horn in the engine bay! I’ll have to record some video of it honking and post it sometime! Not bad for $15!

This concludes concludes Part 1 of this large update! Look for Part 2 on Monday, which includes the axle work I did last weekend (including setting the ring and pinion and how that works) along with starting the restoration of a correct Fire Extinguisher! Till Monday’s Part 2…