 New Oil Filter and more markings!
Hope all had a great Christmas! It’s been two weeks since the last update, and while I’ve been quite busy with various things keeping me away from the Jeep, I managed to get a lot of work in here and there spread out, especially restoring a new oil filter for the Jeep and applying the correct Ford decals! This is the type of work I really enjoy doing.

Merry Christmas and Happy Holidays! Hope everyone had a good holiday!

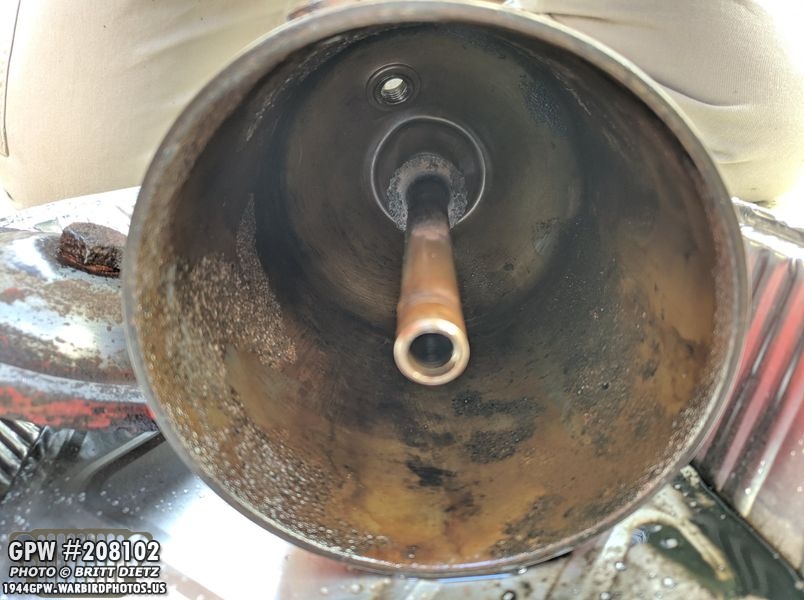
So the big project of the week was a new oil filter. Why did I need a new one? Here’s a photo of the one that was on my Jeep. As you can see, the lid never closed. I got it to ‘almost close’ without a filter in it (which was alright since I bypassed the oil filter anyway, so it’s more decorative) but I wanted a correct one. At the time I still wasn’t sure why it wasn’t working, but I eventually figured it out this weekend while working on the new one.
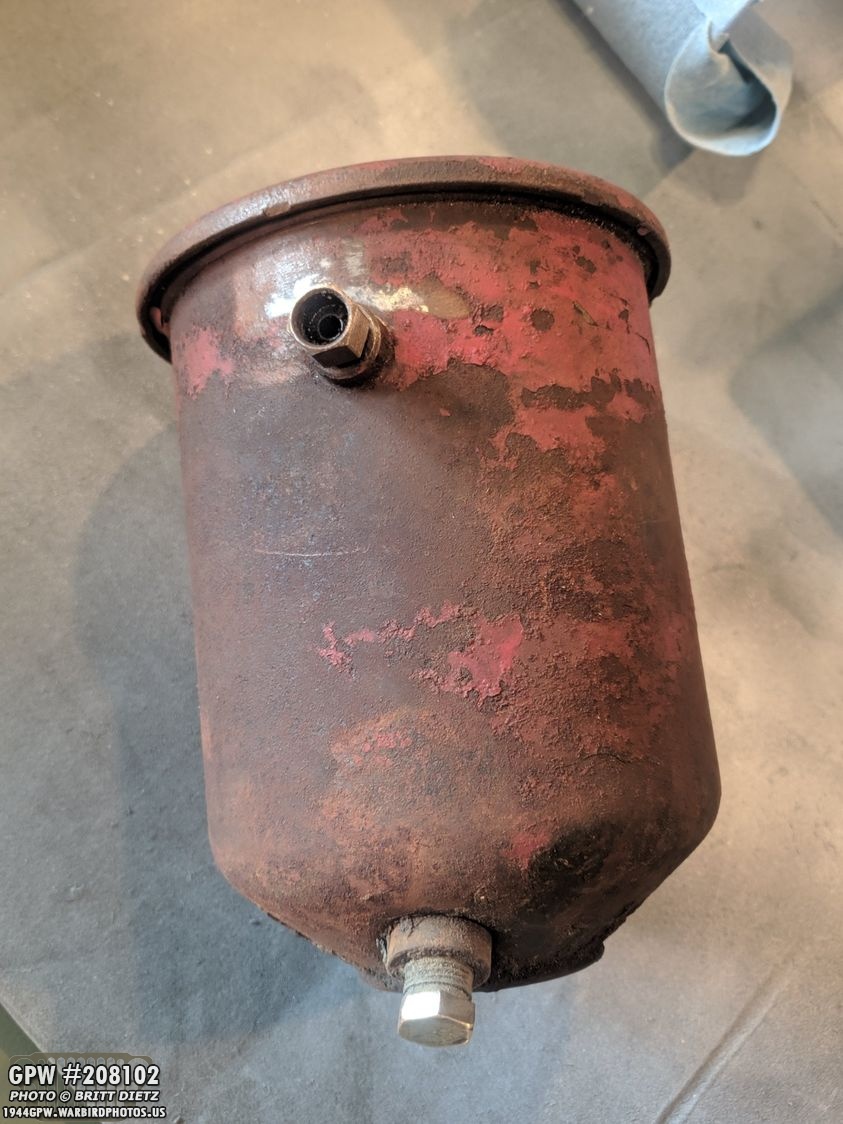
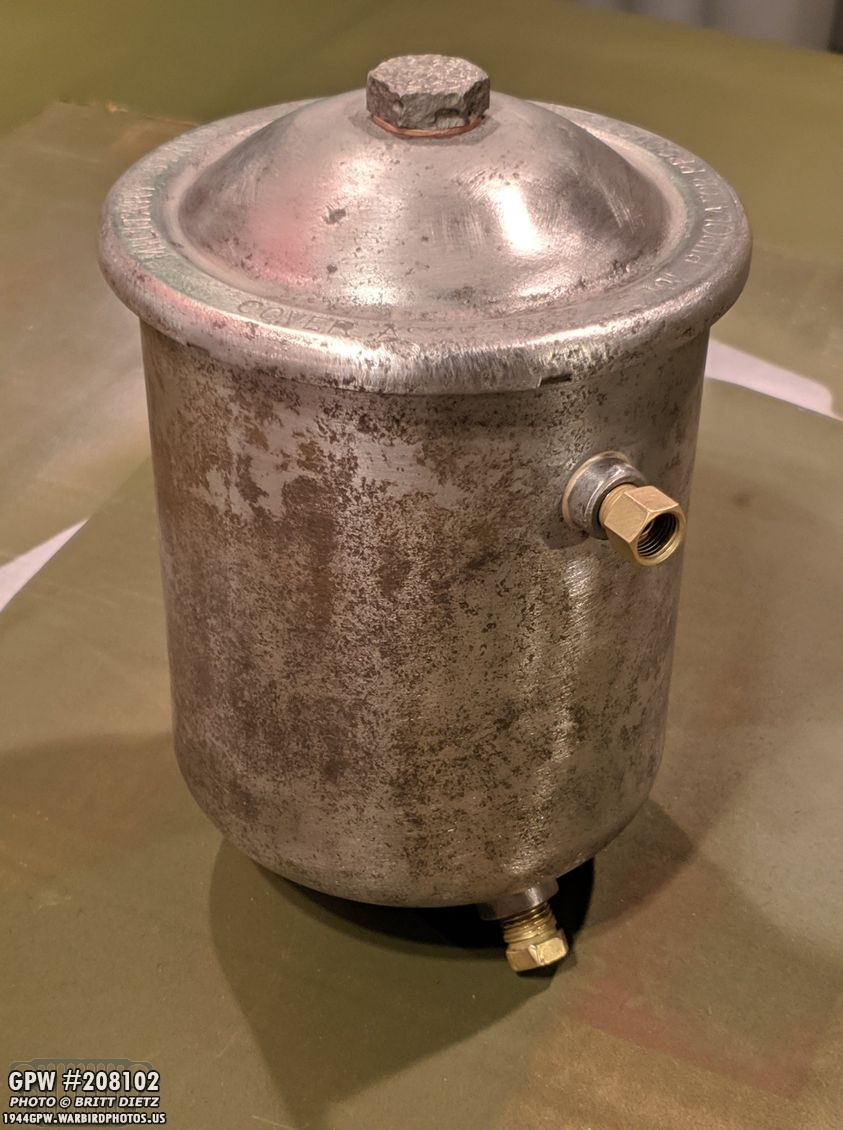
Here’s how the new one I got via a Facebook listing arrived. A jeep enthusiast had, sadly, passed away and his daughter listed his vast assortment of extra Jeep parts for new homes. This oil filter was one of them in the ‘take-off’ condition (meaning it was on a Jeep at some point and was removed). It had partial red paint, was very dirty, and had quite a bit of rust. But I was looking forward to making this look nearly brand new when all was said and done! So take a mental snapshot of how this looks to compare to the end!

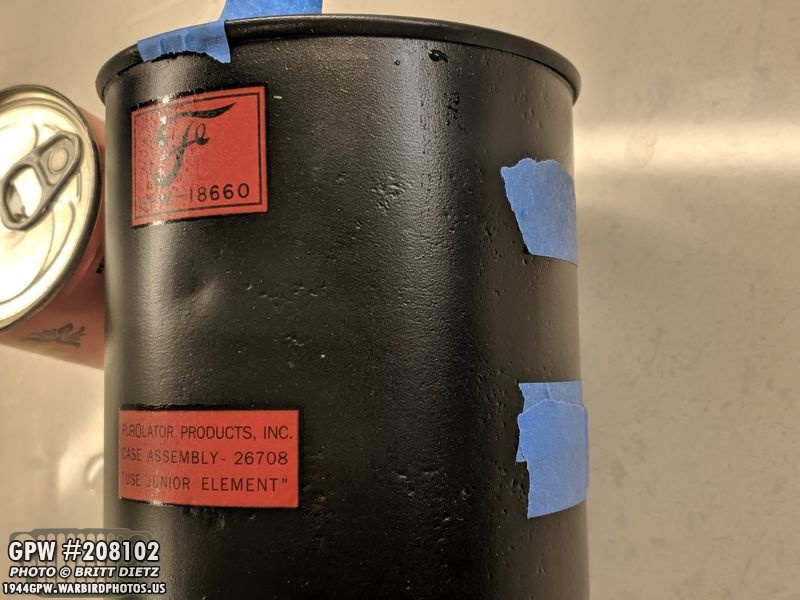
First thing I did was to start hunting for makings to make sure this was the correct wartime Pur0lator filter for my GPW. After wire wheeling the bottom, I found the correct OUTLET engraving under the paint and grime.
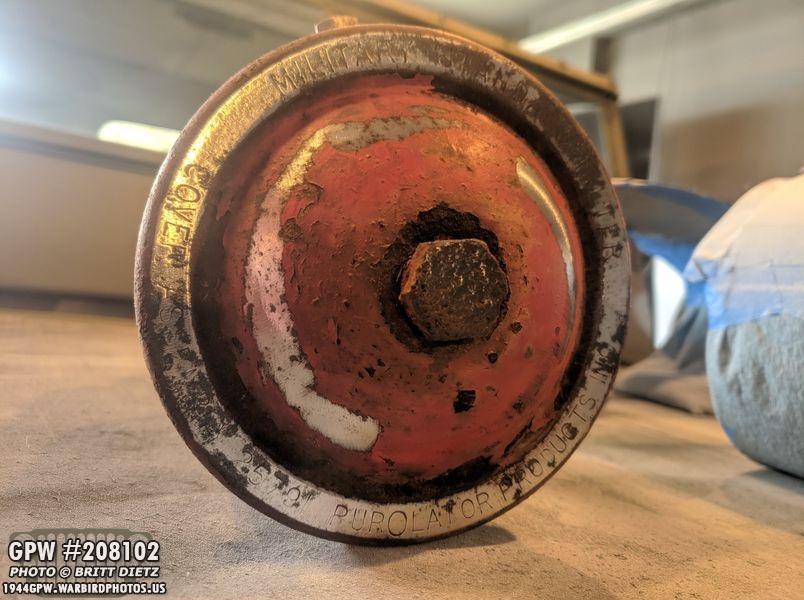
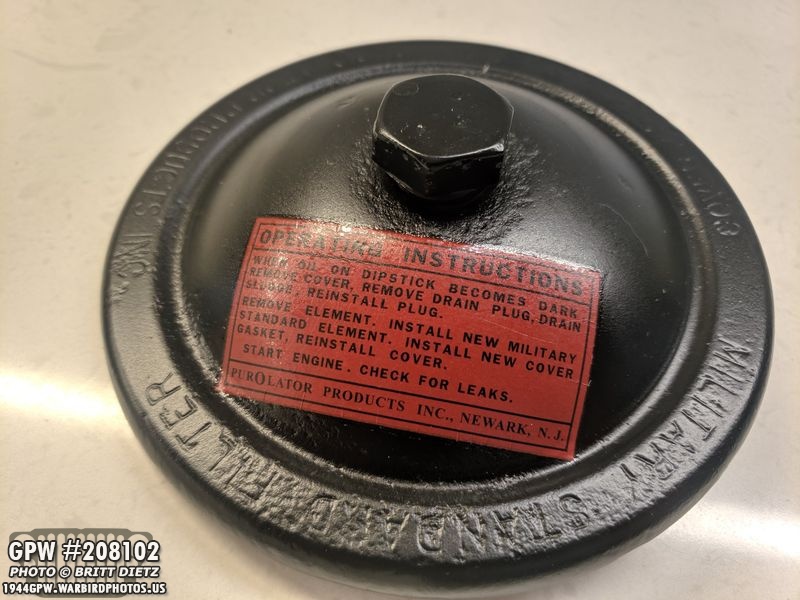
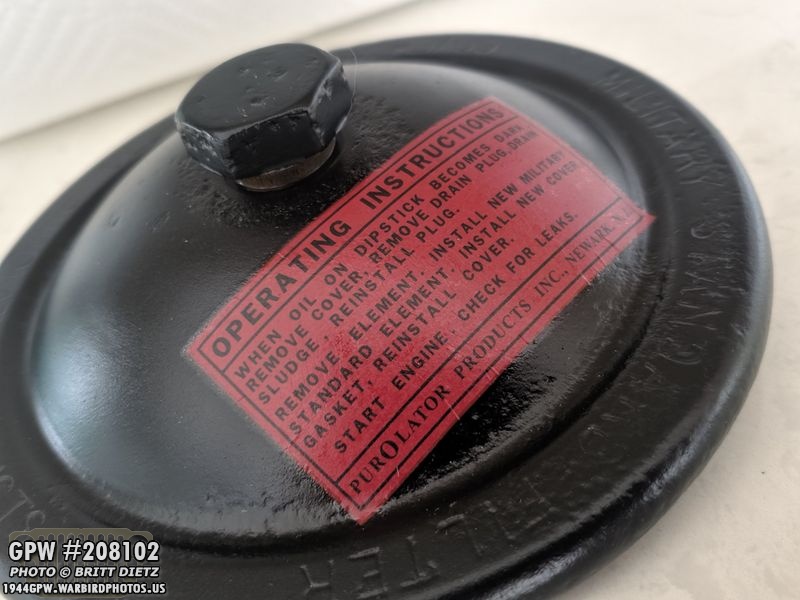
I then used a wire wheel to check the lid (which closes all the way and was actually stuck on there). Sure enough, I found the MILITARY STANDARD FILTER markings for the Pur0lator. YAY! While pitting and rusted, it has MUCH better markings than the oil filter I had.
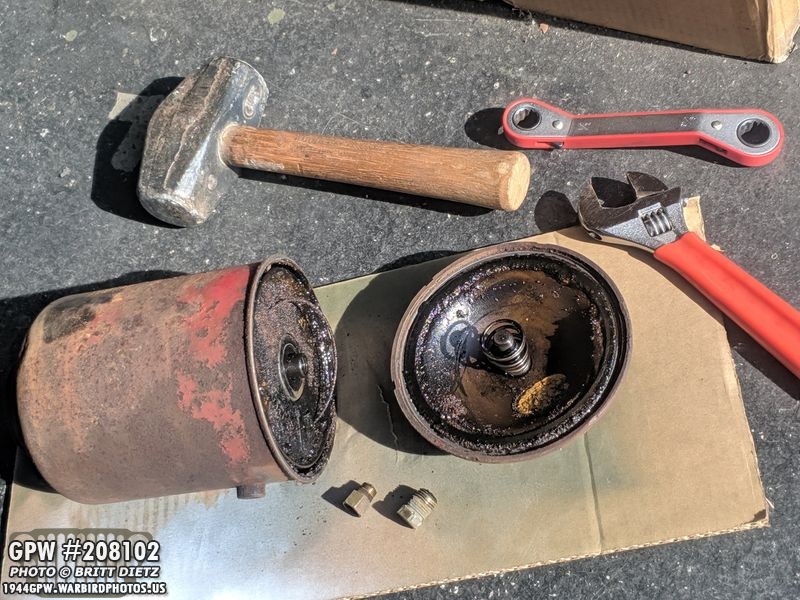
It took a wrench and a large metal mallet to get that lid screw loose. It wasn’t easy, but it finally broke free and I got the lid off.

It took a bit of work to get the filter out, which was covered with sludge oil, water, rust, etc. Yuck.

The inside was covered with thick sludge oil. Water had gotten in the oil filter over the years and rusted the sides. So now it was time to clean it… remember this photo.

So, to get it all cleaned up, I went to Home Depot and got a large bucket. I filled the bucked with a few gallons of bad fuel I had (from the fuel tank when I first got the jeep) and I submerged the oil filter canister and lid in the fuel for about 2 days.
Look at the difference it made, that fuel removed all the oil and cleaned it up pretty good! You can see the pitting left from the moisture that had gotten in the filter. What a difference from before it went into the fuel!

It had also eaten away a lot of paint as well, but there was still a lot of rust and paint left to remove. After this shot I cleaned the fuel off as best as I could.

And that revealed a lot of the rust that was on the canister. So, the next step is to start cleaning it up.

Another look inside the canister showing how rusted it had gotten. It should be fine, even if I was going to really use it as an oil filter.

First up, sandblasting! And look, already it’s starting to look brand new. It’s always amazing to me just how well sand blasting works.

The rust in some areas was pretty tough to remove in others. I opted to wire wheel the lid instead of sandblasting it as the rust was just not coming off in the sandblaster and it was taking a long time. Sadly, the main bolt for the lid was just eaten up by the rust.

After sandblasting and wire wheeling, I took the canister and re-tapped the threads for the brass fittings to get nice clean threads.
Everything cleaned as best as I could get it. The rust on the canister was super thick, so this is good enough. The primer paint I use will stop any further rusting.

Here are all the pieces of the oil filter, but I still need to get the bolt out of the lid (which is held on with a spring).

Took a screwdriver and pliers, but got the spring off and the bolt out. Again, I realized the bolt from my previous oil filter, which was in great shape, was the same size as this one (adding some more mystery as to why the lid wouldn’t close). So I decided not to use this bolt and instead use the nice one from the other filter.

Here’s a look at the two lids… the old oil filter (painted) and the new one (not painted). Both lids are exactly the same. Though you can see how much better you can read the writing on the new lid. You can only make out some of the letters (partials) on the old lid.
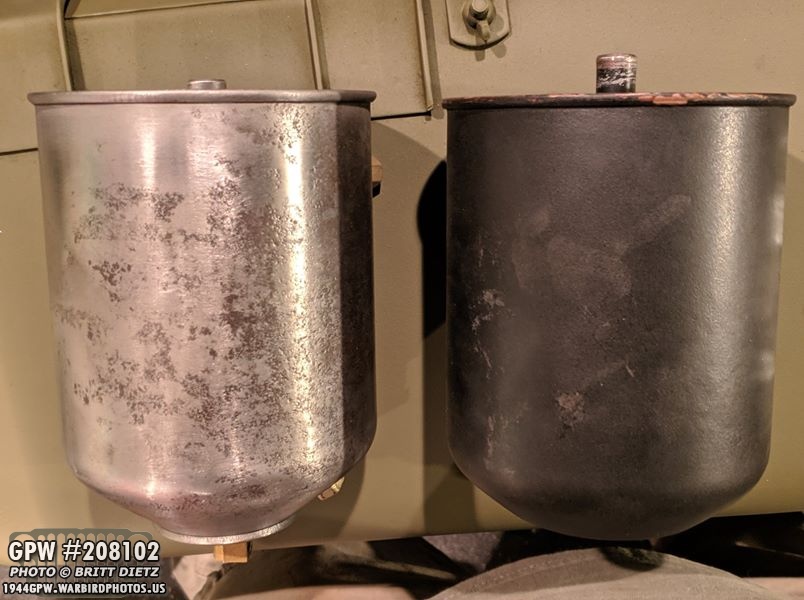
It wasn’t until I put the two canisters side by side that I realized the difference. If you look, the center tube that is taller on the old filter (black) than the new one (silver). It was then I realized… the old canister is a Willys MB style FRAM oil filter with a Ford GPW style lid. No wonder the lid didn’t work! The FRAM lid is much taller for the longer tube.

After that, it was time for paint! First up was primer with the Barrier III Red Oxide from &Ron Fitzpatrick Jeep Parts

And the lid nice and painted. Really makes the markings stand out!

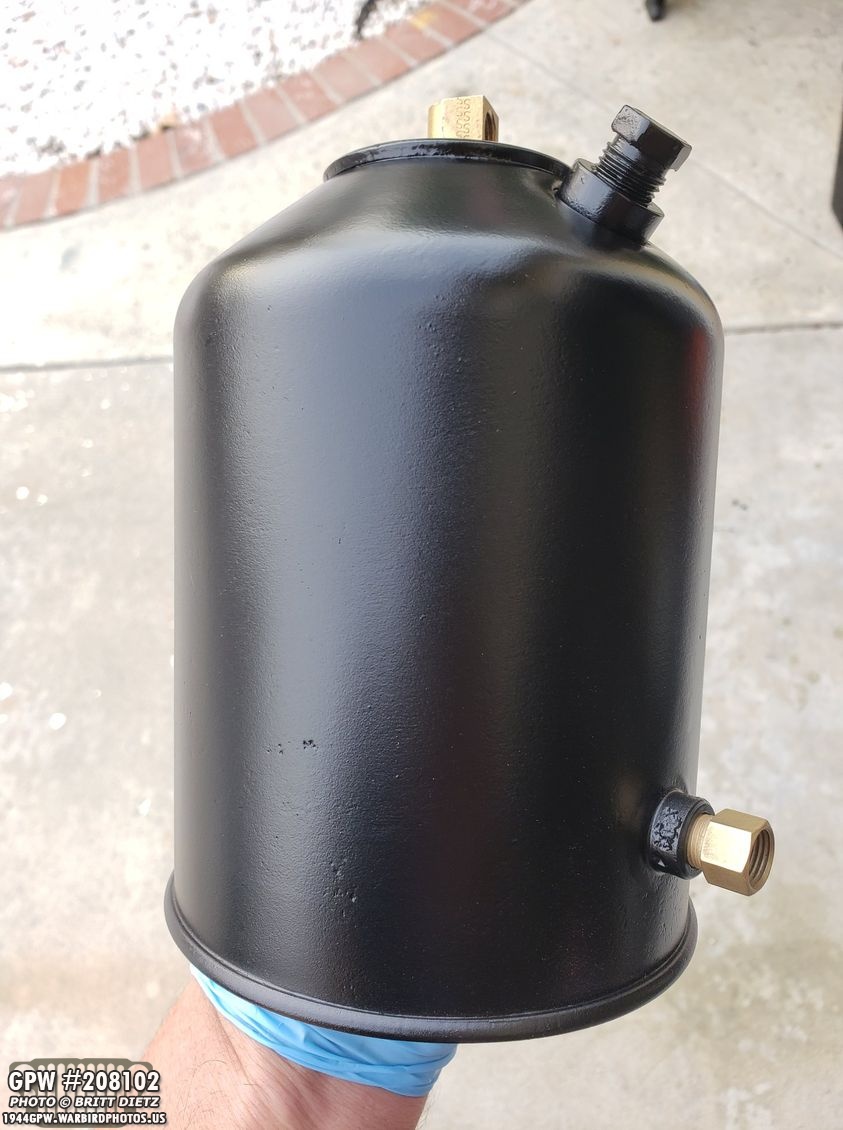
Then it was black paint. I used Rustoleum Pro satin black.

And the lid painted as well. It might seem super glossy, but it’ll end up less once it dries. Plus, I will hit it with some clear spray to dull it a bit more.

I had originally not painted the lid bolt on my original oil filter, but after looking through several wartime GPW engine photos, it seems some were painted black, some were left plated silver. So I went with black. But first, primer!

Here’s the lid bolt and the drain plug getting black paint.

I also painted the inside with Rustoleum rust converting black to stop the rusting and pitting.
Here’s the finished canister with the brass fittings put in (and they went in nice and easy with the newly tapped threads!)

With the lid done (and you can see how much less ‘swiss cheese’ the old oil filter bolt head is), it was time to apply the GPW decals. Someone asked me a few months ago in an update if I was going to apply these since I seemed to be really into the details. The answer is YES! I had been waiting till I got a good oil filter so I wouldn’t waste these decals as I got them in France at a Jeep store during the 75th anniversary of D-Day.

They are water slide decals, which, I should mention that I HATE with a passion. I never liked them when building models, and I still hate them. I started with what I should have saved for last… the lid decal. Putting the rectangular decal on a domed shaped lid is pretty much impossible to get straight… as I figured out after mucking with it for 15 minutes. I had to go online to find a solution, as this looked horrible.

The solution was this liquid called Micro Sol. I raced to my local hobby store as Crystal kept the decal wet (so it wouldn’t stick). I got back asap and first applied it to the lid under where the decal would go, then after moving the decal on top of it, I applied some to the top. What it does is soften the decal and allows it to be more malleble to shape it to any surface.
After using more of the liquid to ‘paint’ out the folds, this is what I ended up with. MUCH BETTER! There are still some tiny tiny folds, which wouldn’t have been there had I known about Micro Sol from the start, but it’s much better and flat!
Here’s another look. Maybe one day I’ll redo the cover decal, but it’s good enough for now!

Next up was the canister decals. Here’s a look at the crude kitchen setup. Thanks to several chili cans for holding up the canister! I had a small Tupperware filled with luke-warm water for the decals to soak in for about 40 seconds to separate from the backing.

Here are both decals applied. They have to be placed in a way that they won’t be under the two brackets that hold the oil filter to the engine bracket. So I had to measure all that (see next photo). I centered them to be exactly 180 from the inlet fitting using blue painters tape.
For the two brackets, I measured and used painter’s tape to show where the bracket edges. The tape signifies where the empty space is.
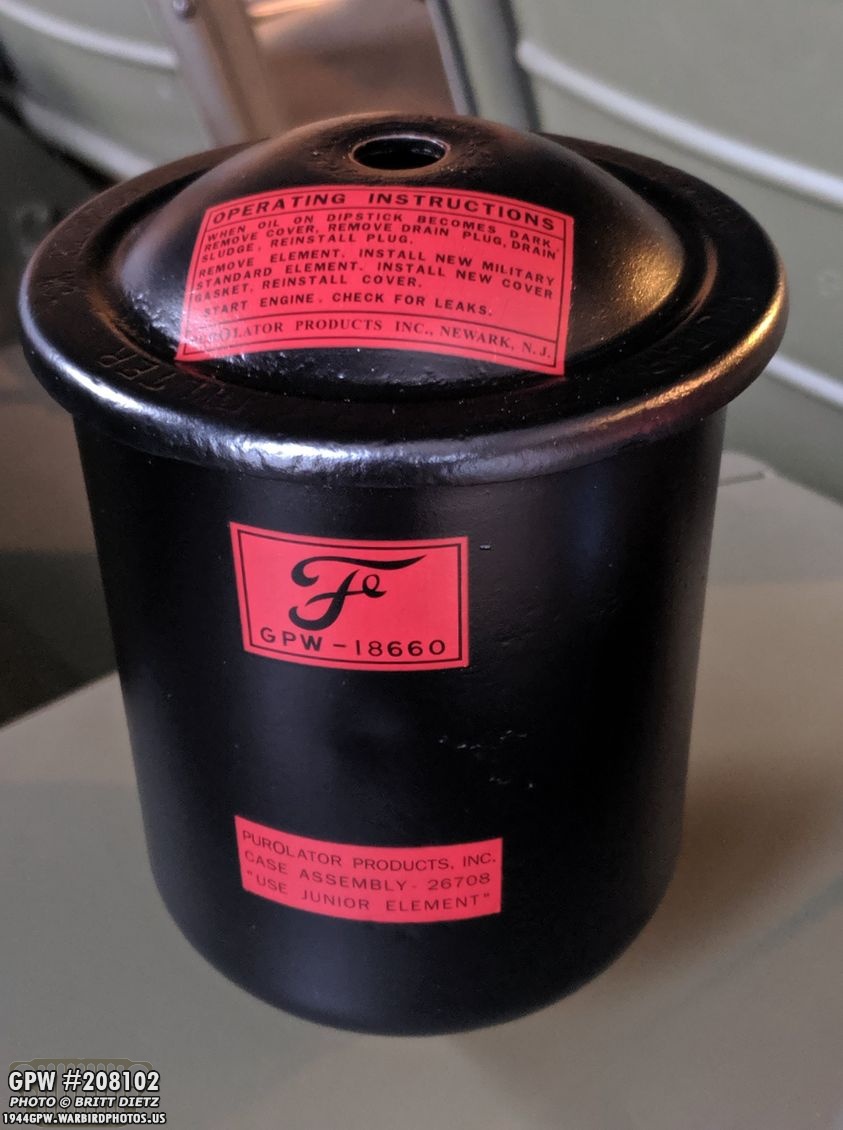
And here is the lid with all the decals finished! As a final step, I sprayed another layer of clear matte spray to seal in the decals and protect them. All finished!

I carefully unscrewed the two brackets so they would open wider, and pulled out the old canister. This way I could put the new canister in and just tighten it, rather than having to undo them from the bracket (it’s hard to get that oil dipstick tube bracket to align with the oil filter brackets).

And once installed, I hooked up the lines. Again, mostly for show. Here you can read the OUTLET letting, which you couldn’t see previously with all the paint and grime!
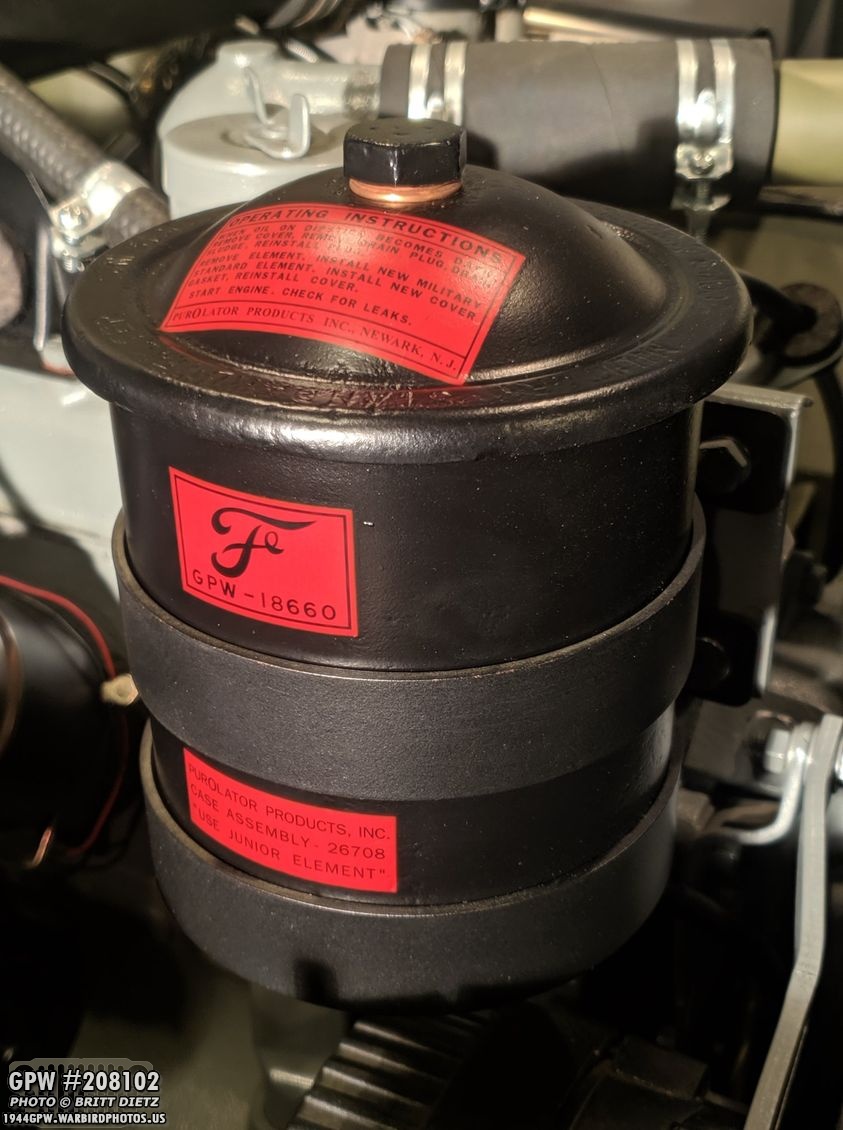
And there we go, here’s how it ended up! Looks wonderful in the engine!

The canister stickers lined up perfectly with the two brackets.

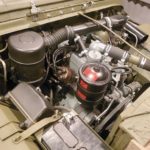
It really adds that extra detail to the engine!

With the oil filter finished, the engine is completely done! Only thing I need to really do is replace the carburetor since I still have a borrowed one. But other than that, the engine and engine bay is finished!

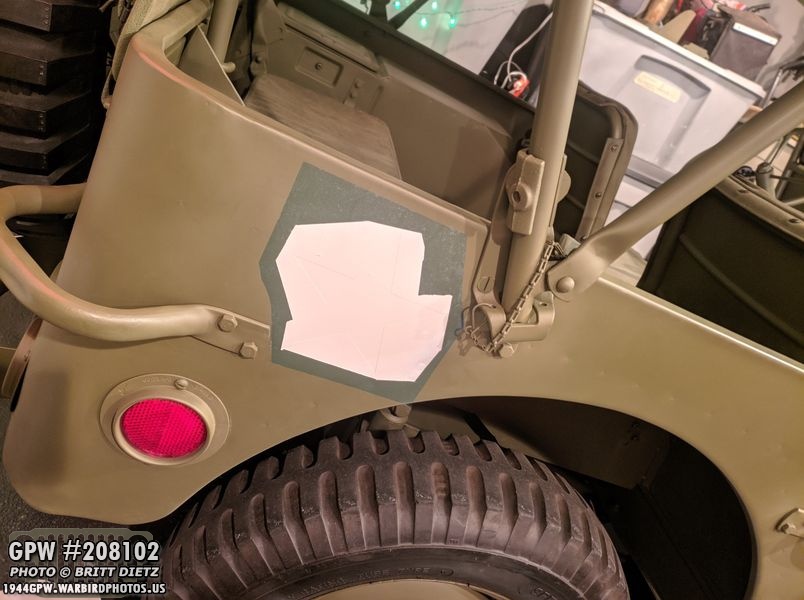
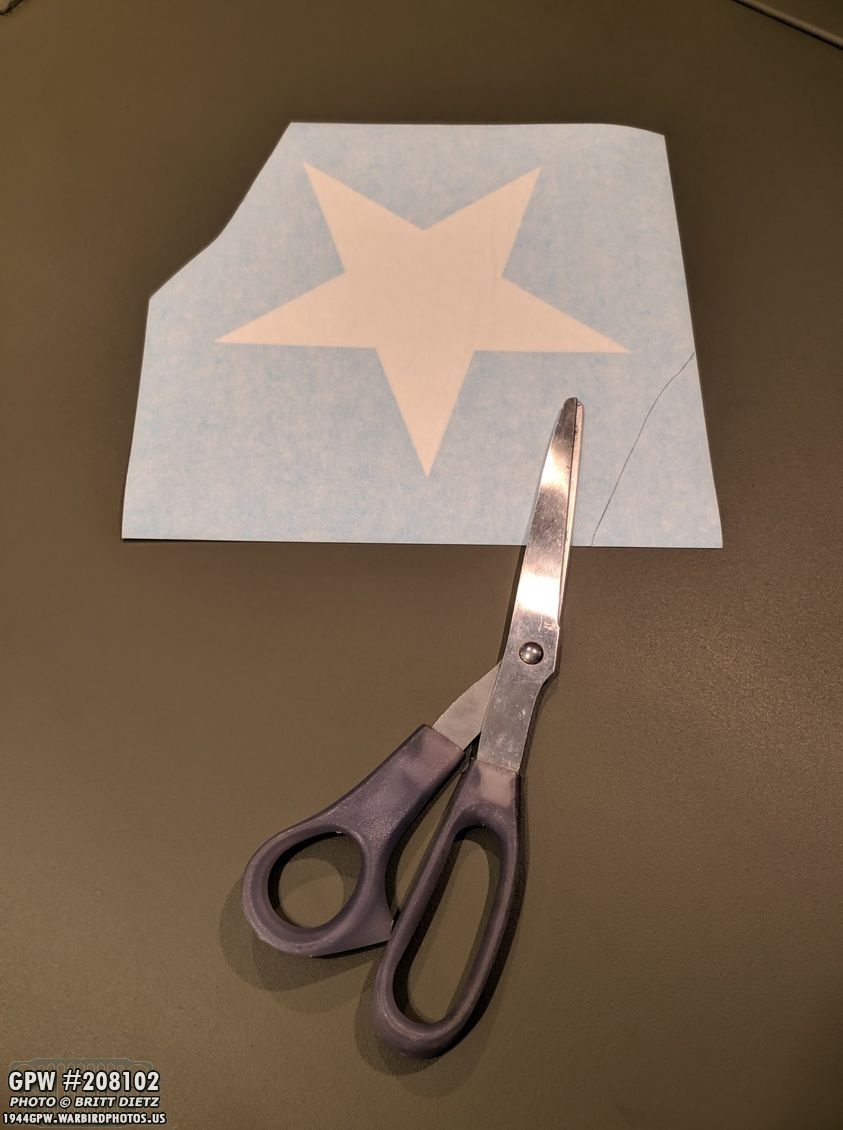
My other big project has been getting the markings done before the New Year. Here’s a look at the stencils from a few weeks ago. I got the bumperettes done, so next up were the stars on the rear of the Jeep. These stencils came from the UK via Military Stencils By Axholme Signs

I kind of skipped ahead and forgot to take a photo of the process, but here’s the stencil applied after I removed the backing and the top layer. I researched the alignment of these stars, and I think every since photo of a wartime AAF Jeep I have shows the star in different spots with some being even tilted as much as 45 degrees! I went with the middle of the area between the rear handle and the top bows bracket.

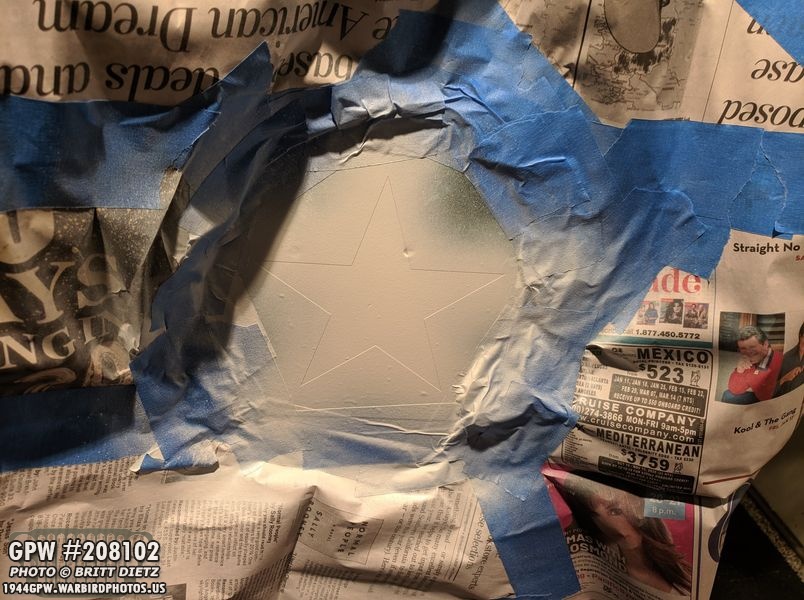
Using newspaper (that white paint gets everywhere and really shows up on white, so mask it well) I masked the area around the star as much as I could.

I put two quick coats of white paint on, only allowing enough time to get dry to the touch. I then applied two thin coats of clear matte overspray to protect the marking and help keep it clean. I did the same for the bumperettes, and it’s helped keep them super clean. The clear coat also blocks UV rays so the paint won’t yellow.
Here I’ve removed the newspaper and am about to remove the stencil. You don’t want to keep it on long… as it can remove some of the paint if it completely dries before taking it off.

A perfect star! I’m impressed at how well the stencils from Military Stencils By Axholme Signs are!
For the other side, I cut the stencil the same way (but in reverse) so it would fit around the handle and top bow bracket.

Here it is applied. This one was a bit more tough as one of the welding divots was right on one of the lines.

I was able to reuse the newspaper from the otherside and just add some more tape to make it sealed.
Painted again with two coats of Rustoleum pro white and two light coats of clear matte overspray.

All done! Again, a perfect star! Yes, there would be overspray most of the time during the war, but I’m not going to that much detail. After all the work I put into this paint job, I wanted nice stencils. Plus, most of the public has no idea how sloppy most of the markings were during WW2, so it would just look like I made them sloppy.

A look at the star… now there are two sets of markings done! Bumperettes and rear stars!

Next up today (Friday, which will be in next week’s update) will be the hood serial number stencils!

With the engine sounding pretty good and the shifting working better, I decided to put the cover and ring back on the shifters and properly bolt them down. The bolts lose a lot of paint being removed and put back on.

But after some touch-up paint, they look all better!
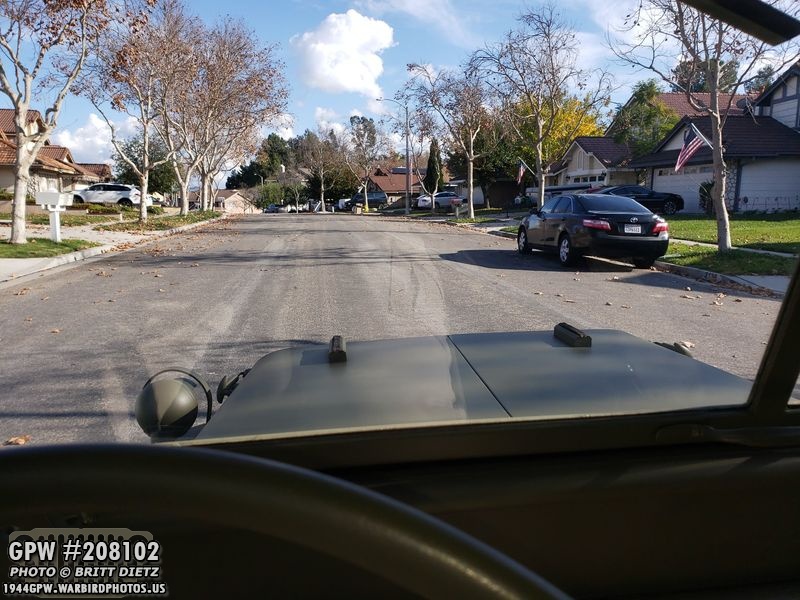
With some dry weather in between rain storms here in Southern California, I’ve been able to take the Jeep out for a few spins through the neighborhoods. It really is a lot of fun driving a WW2 Jeep! I find myself looking forward to the short 10-minute drives. I wish I had more picturesque drives I could go on.

That being said, I took it through a drive-through at a local Jack in the Box to get some food… which the reactions of the employees was pretty awesome. ‘AWESOME ride man!’ ‘That’s so cool!’ Not to mention driving it around the area gets a lot of looks, thumbs up, smiles, etc.

I took it to the local park again and got some photos with the newly added stars.
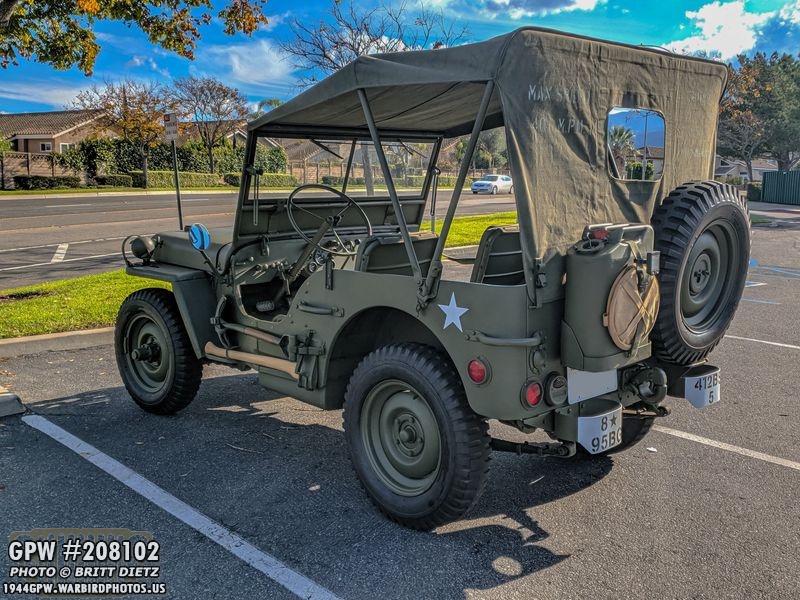
They look pretty good! (I did photoshop out the license plate… which I’m going to change to a black custom plate in the near future).

And, on Christmas day I pulled her out to get some Christmas photos with a Santa Hat.
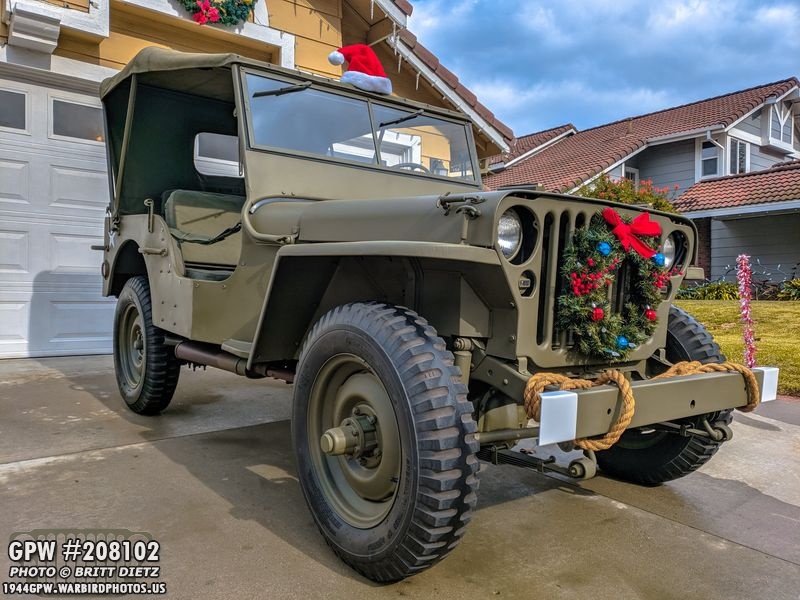
Just a few more markings to go, and she’s photoshoot ready! That’s it for this Christmas double-week update! Till next week, have a wonderful New Years and can’t wait for what 2020 holds for the Jeep!