 Small Projects and Extras
With things at a bit of a standstill as I figure out my next move with the strange rear axle noise, I didn’t do much this week. However, there are several side projects I’ve done the last few months that I’ve yet to cover with the Jeep, so I decided to compile them into this week’s update including a F stamped keychain, wartime Fire Extinguisher and modern Extinguisher, Push-Pull switch tags, and more!
Last week’s really fun update was all about taking a PowerMaster PowerGen alternator and making it look like a WW2 Generator. It was a huge success, and over a week later it’s been running excellent! There were some concerns brought up about the nut not being fully secured due to the limited amount of threads with the WW2 pulley, but after checking the nut a full week later, it’s as tight as can be and isn’t moving.

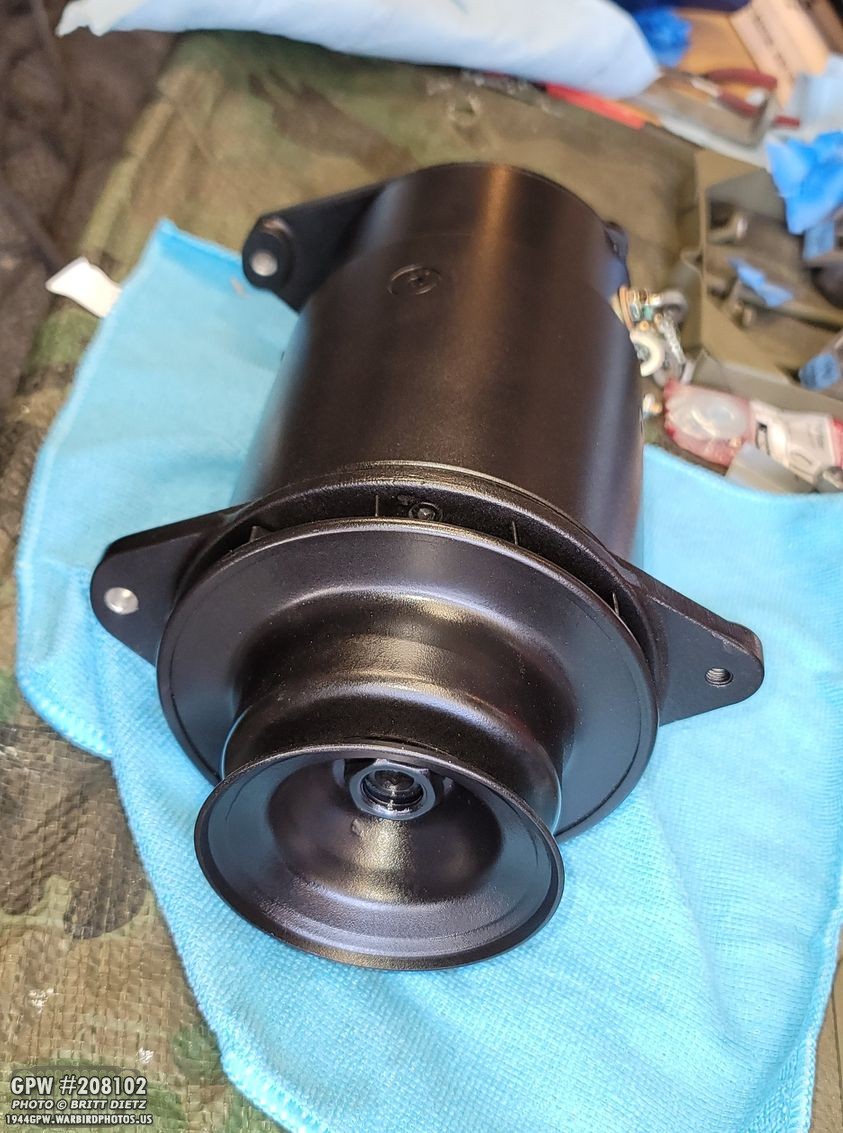
I had a request to see what’s inside the PowerMaster PowerGen alternator (this is, again, model 82051-2). Here’s a look inside with the back cover off. As you can see, it’s literally a one wire alternator in the front part of the generator body. The back is empty aside from the terminal connections. In theory, I suppose you ‘could’ take this out and possibly put it in an actual WW2 generator, but that could be risky and a lot of work.
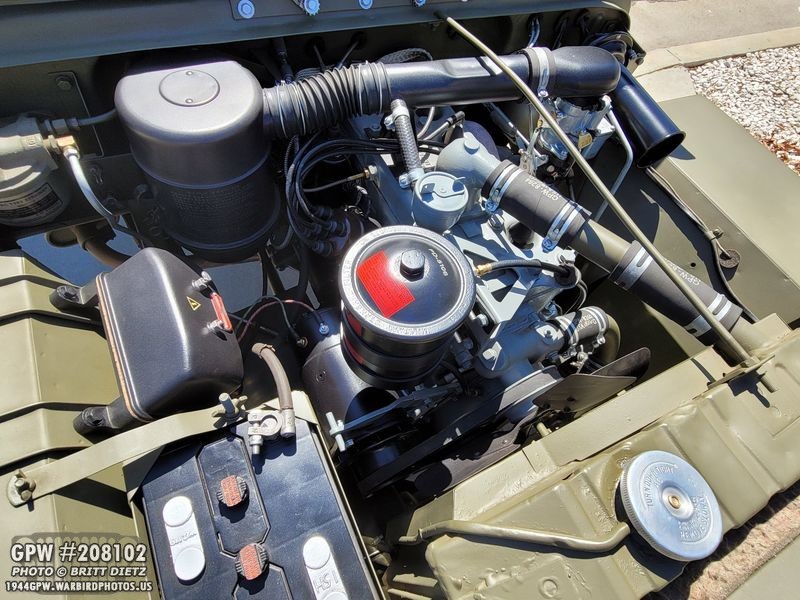
Here’s a couple photos of the PowerGen in the Jeep in the sunlight. Sure looks nice!

Especially with the correct voltage regulator wires hooked up, it looks so much more proper than the one wire delco I had.
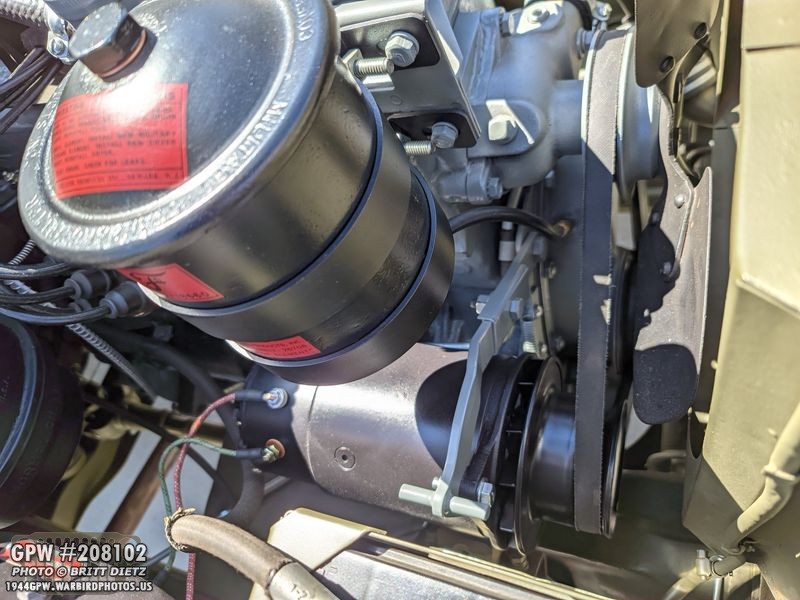
I’ve been asked, why not just use a 12v generator? 1) I don’t have a 12v voltage regulator. That will cost a lot to either get one or get the 12v solid state internals for mine I have. 2) That generator is MASSIVE. It would take the entire area between the oil filter and the battery with very little to spare. That’s going the opposite direction of making things look correct, in my opinion.

I think I may have posted about this earlier this year… for Christmas I got this fun mini auto fire extinguisher to put with the Jeep. Since you can’t refill the WW2 fire extinguishers, this is the next best thing.

Best of all, it fits PERFECTLY next to the trailer socket cover in the driver’s side tool box.
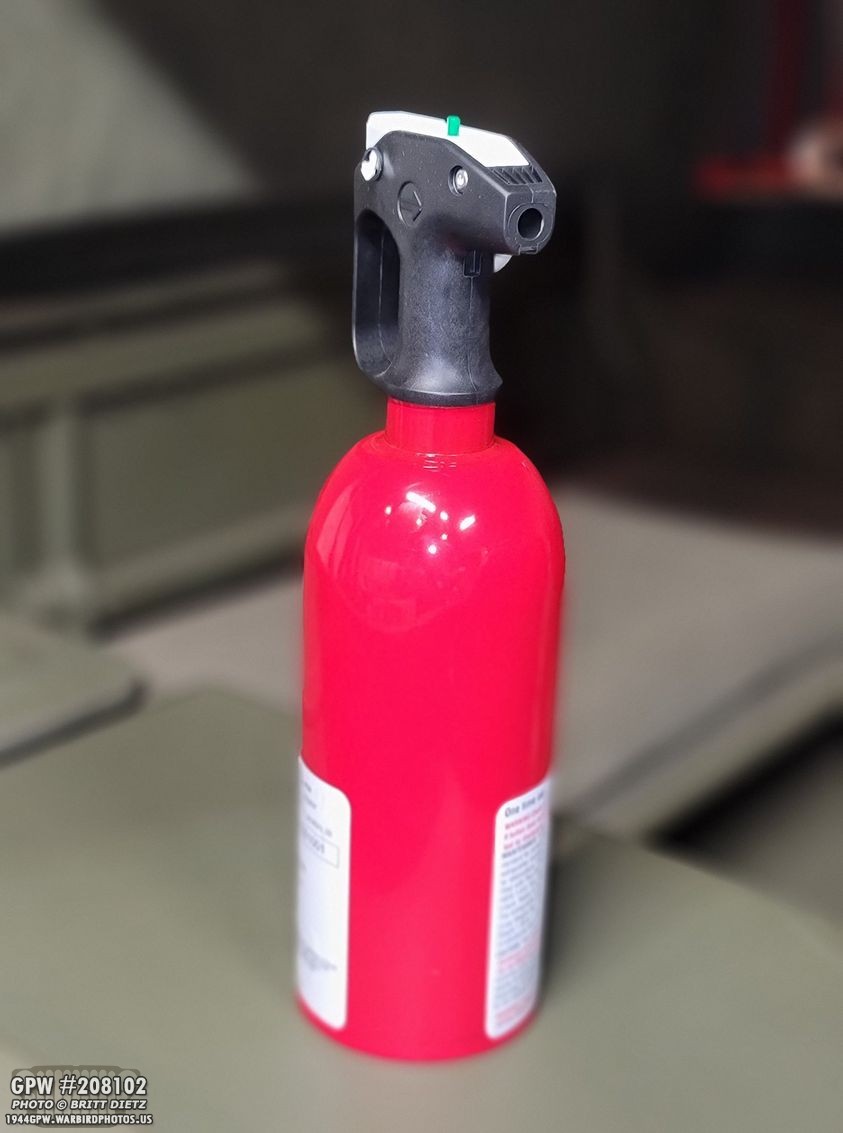
If you take the bracket off, it’s even smaller. But I feel the bracket helps to prevent the pin from being pulled.
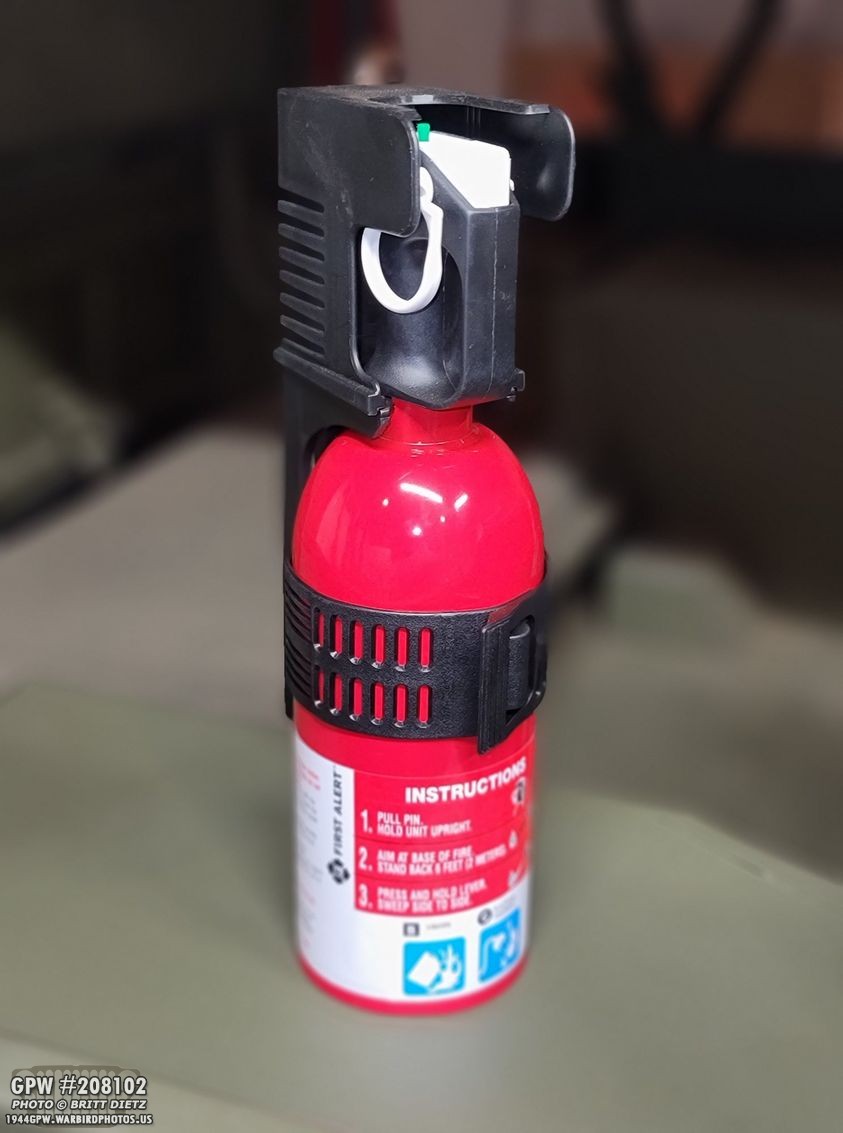
I’m working on having someone make a canvas case for this, so it’s not just rolling around the toolbox scratching things up. I’ll post about this again once I have the first canvas case.

Last week, I used what was left of my original GPW generator bracket (that bubba had heavily modified to work with the one-wire delco alternator) to extend it to make things fit. I didn’t want to toss this section with an F stamp, so I decided to make a keychain out of it so it can stay with the Jeep.

After shaving down the thickness of it (that took forever), I used a flap disk to carefully make it round. I think I did a pretty darn good job considering. Then I drilled out a hole.
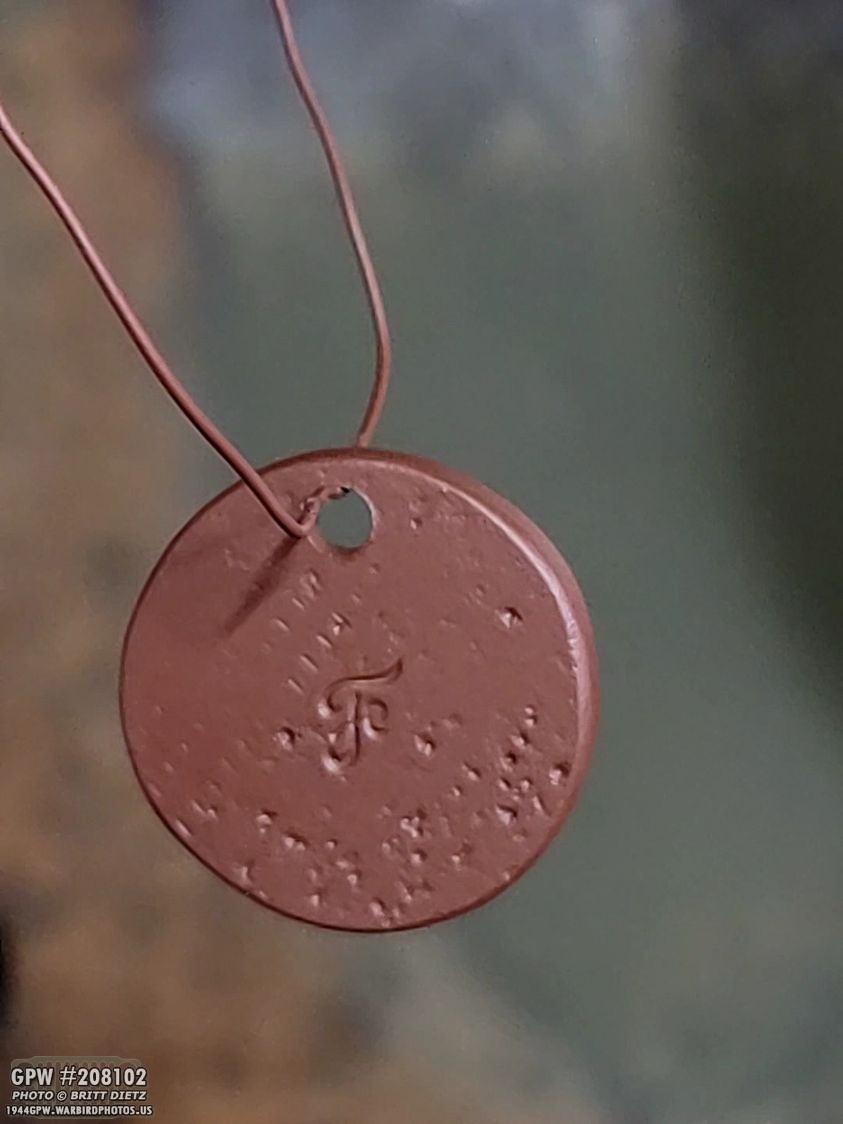
I then primed it….

And painted it with the Ford Engine Gray. Here it is on the Jeep’s main keychain. Not only is it keeping this original part with my Jeep, but also a great way to talk to people about F stamps on GPWs.
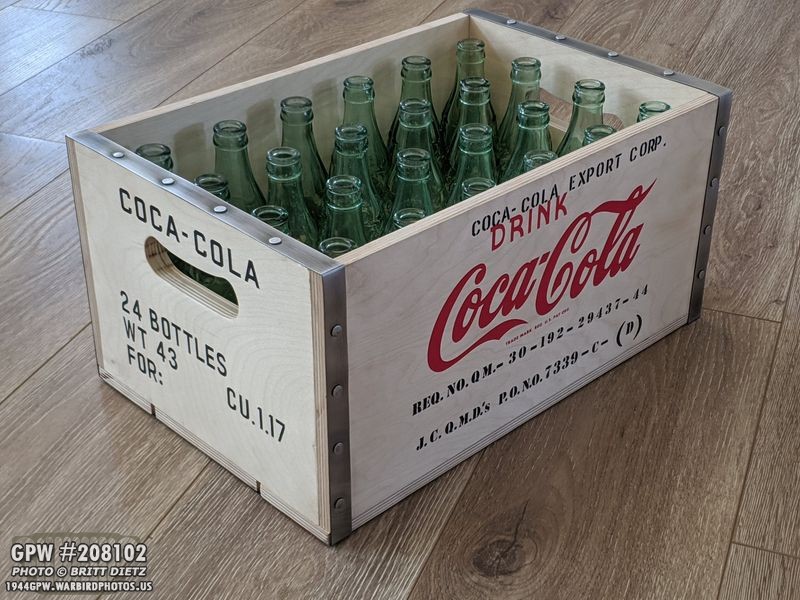
As many of you know, during my journey restoring my Jeep I’ve done several side projects along the way. Some were crazy big projects, some were small ones. Like building a very accurate Coca Cola crate from scratch.
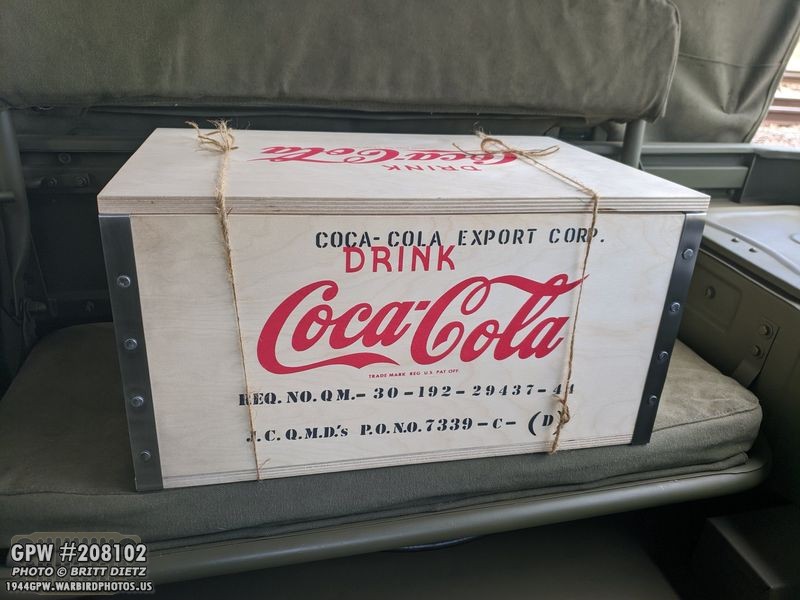
I chronicled the whole building of this crate from start to finish on updates last year (you can use the new blog to search for them, just search for ‘Coca Cola’). I’ve always enjoyed doing these fun details as it sets the Jeep apart from many others. I’m always a sticker for details like this, and if I can make them myself, then that’s fun.

Another example is making my own Fire Extinguisher decal for the SOS Fire Guard. I used an original brass dataplate I had and matched up the fonts, letter spacing, shapes, colors, texture, etc as best I could using that brass plate and any photos I could find of original decals online.
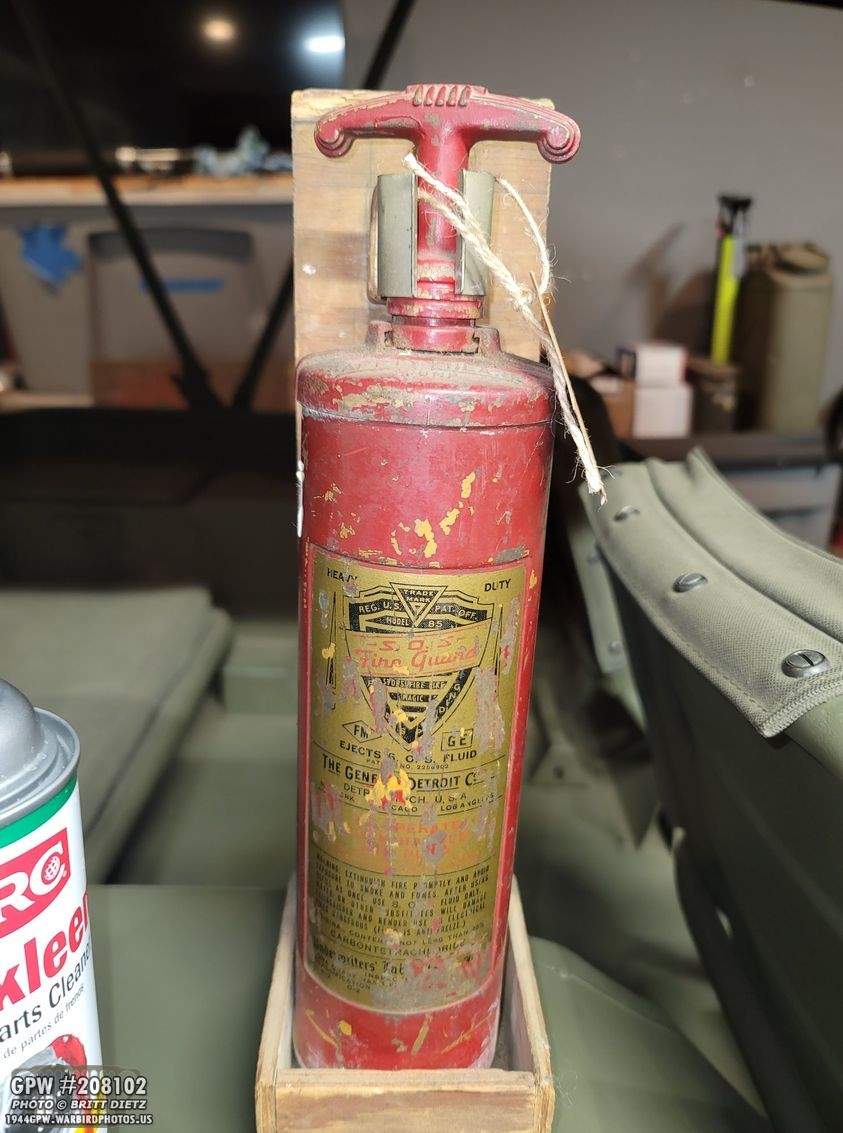
At an antique store a few months ago, I actually found an original WW2 era SOS Fire Guard with an original decal!

I was then able to really study the decal. While I can’t replicate the interesting honeycomb-like pattern on the black ink, I got everything else pretty darn close. Having this original allowed me to also shrink down the decal slightly to the correct size using this as a reference.

The end result is pretty spot-on, I think. I also made the MB version as the request of a fellow Jeep owner. I hope to offer both versions of the decal for sale in the future.
Here’s a look at the final decal on the extinguisher in the Jeep.
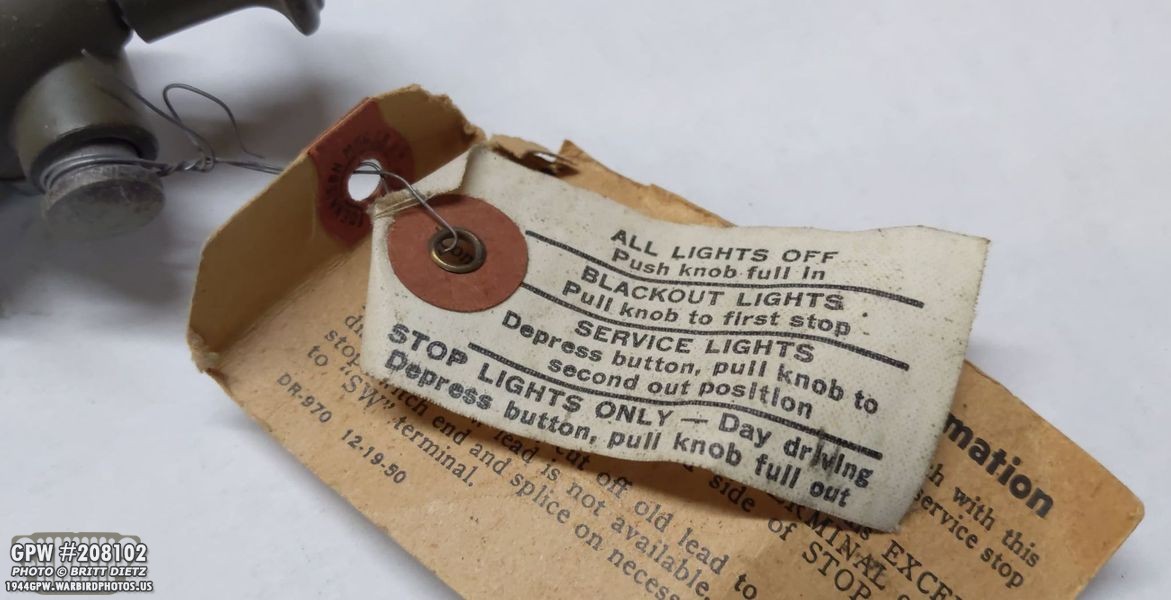
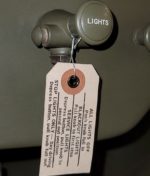
Another project I dove into this year was making an exact replica of the push-pull switch light tag, shown here. This is an original which high res photos, measurements, and material study were done by Matthew Caffrey, who owns the original seen here.

First, I matched the fonts, letter spacing, lines, shape, etc and printed out samples via photoshop.

Hunting at craft stores for a few weeks for the exact type of material… like a stiff woven paper, I discovered this material which appears to be an exact match.

Here’s the first prototype of the material. I used thin foam as the reinforcement donut and used what eyelet I could find (which is too thick). I also ‘aged’ the printing a little bit. It was a good first prototype, but I wanted to get it even closer.

I then went to work figuring out the best way to age the material and get it a more brown tone. I found a great method (after several tests) that nailed that vintage look.

Doing the same process, here’s the end result. Pretty good… but that darn reinforcement donut bothered me. It wasn’t foam, and this foam was just a hair too red.
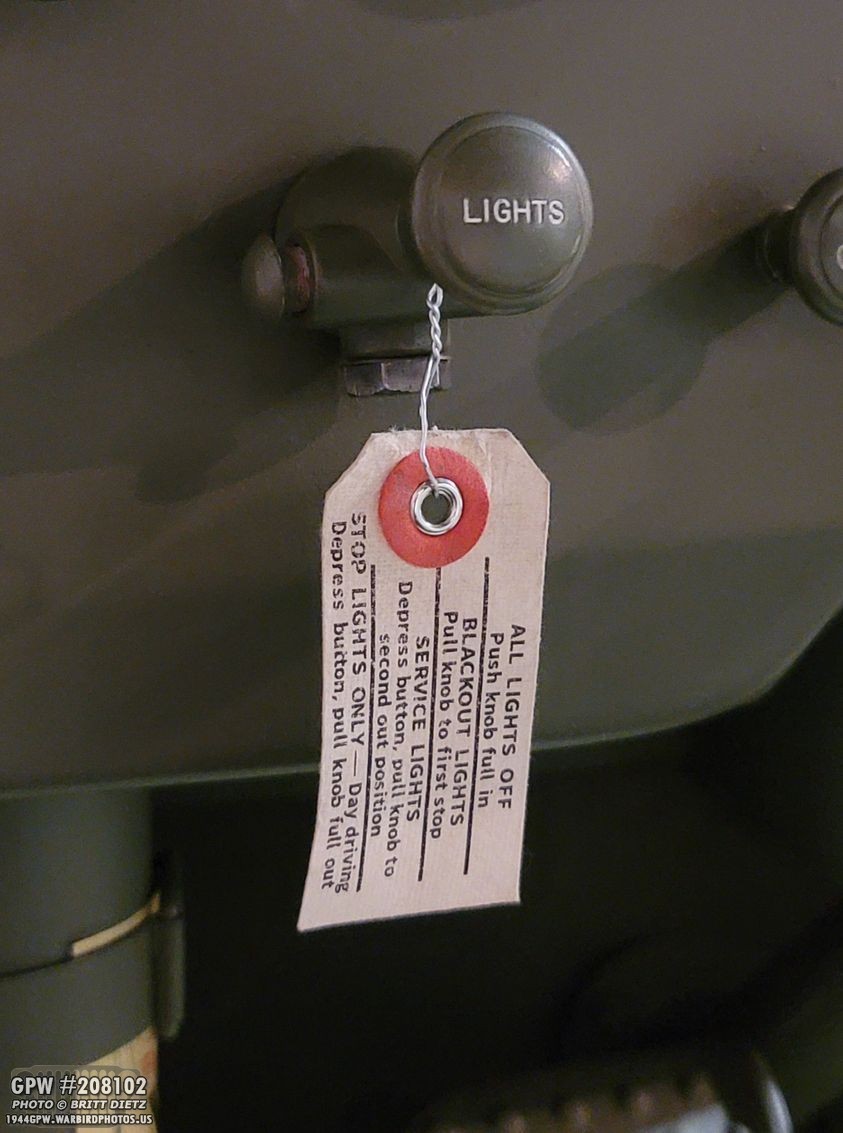
Testing it on the Jeep, it sure looked pretty good!
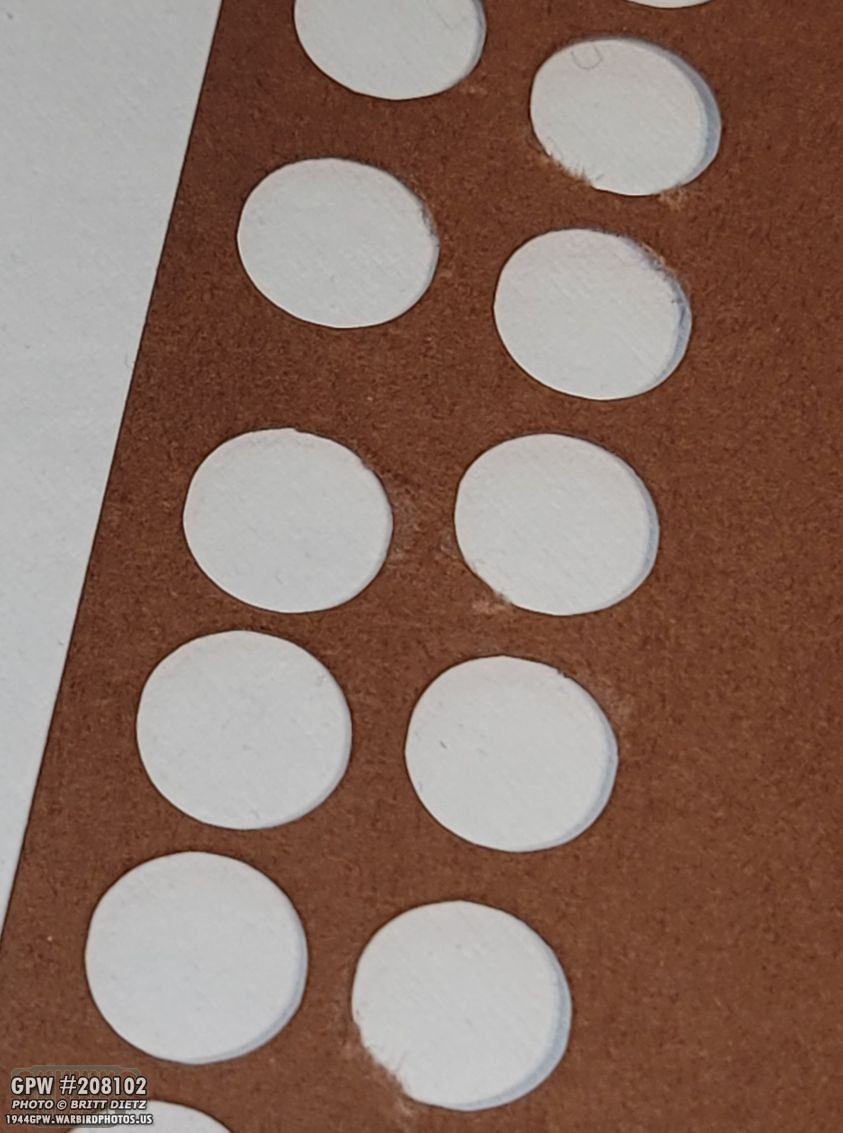
After discussing the material with Matthew, we found this stiff material that appears to be an exact match (possibly the same material!). Thankfully, it wasn’t too thick that I couldn’t use my Cricut Explore Air 2 to cut perfect donuts out.

I found thinner eyelets (still a bit too large compared to the originals, but only by a little… and honestly I cannot find them smaller anywhere) and went to work making a final version.

Here’s the final result, with some slight aging to the printed text. Just like the examples I’ve seen online, they are all slightly different in alignment with the printing. The reinforcement donuts are perfect.

I made a couple of these tags in both ‘vintage aged’ style, and brand new white style. My plan is to make more and sell them to those who want this extra little detail.
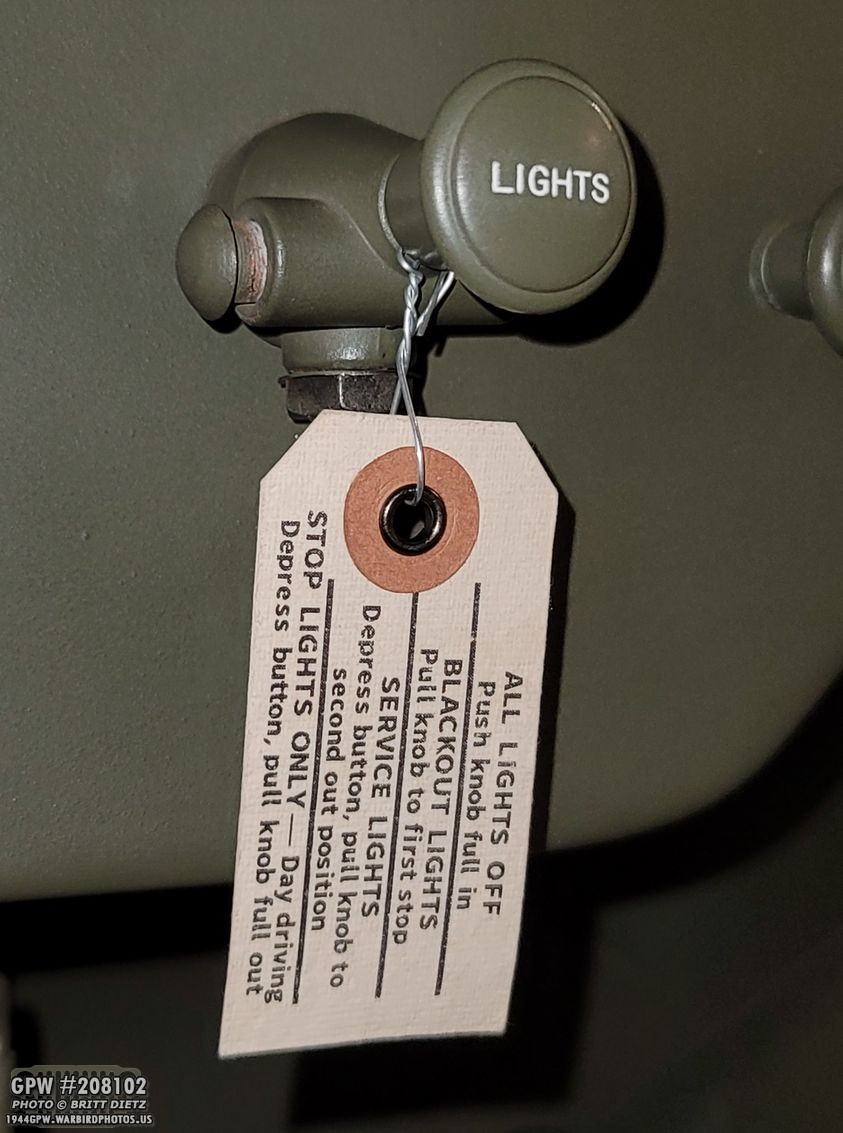
Here’s how the final version looks on my Jeep. Another fun detail that helps take the Jeep to another level.
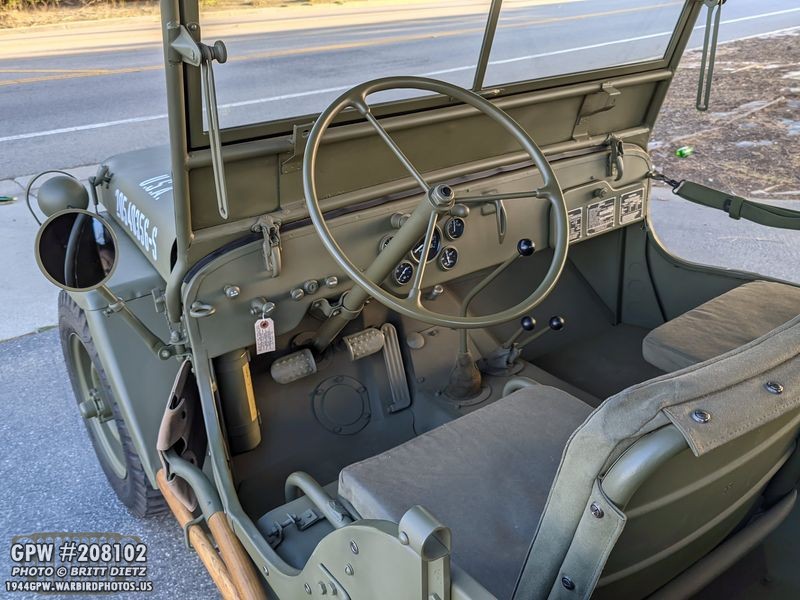
And a shot of the dash with the tag. I keep it on there all the time. Even though I know the different modes, it’ll be another education tool for people checking out the Jeep at events.

Last year I also chronicled how I restored my first aid kit. The markings were just about non-existent, so I stripped down the entire case, repainted it with the correct OD Green (not 33070)… but I was torn on how I could add the lettering. Again, the Cricut Explore Air 2 came to the rescue and I was able to custom-make stencils via photoshop (matched up the fonts exactly) and paint everything you see here with those stencils!
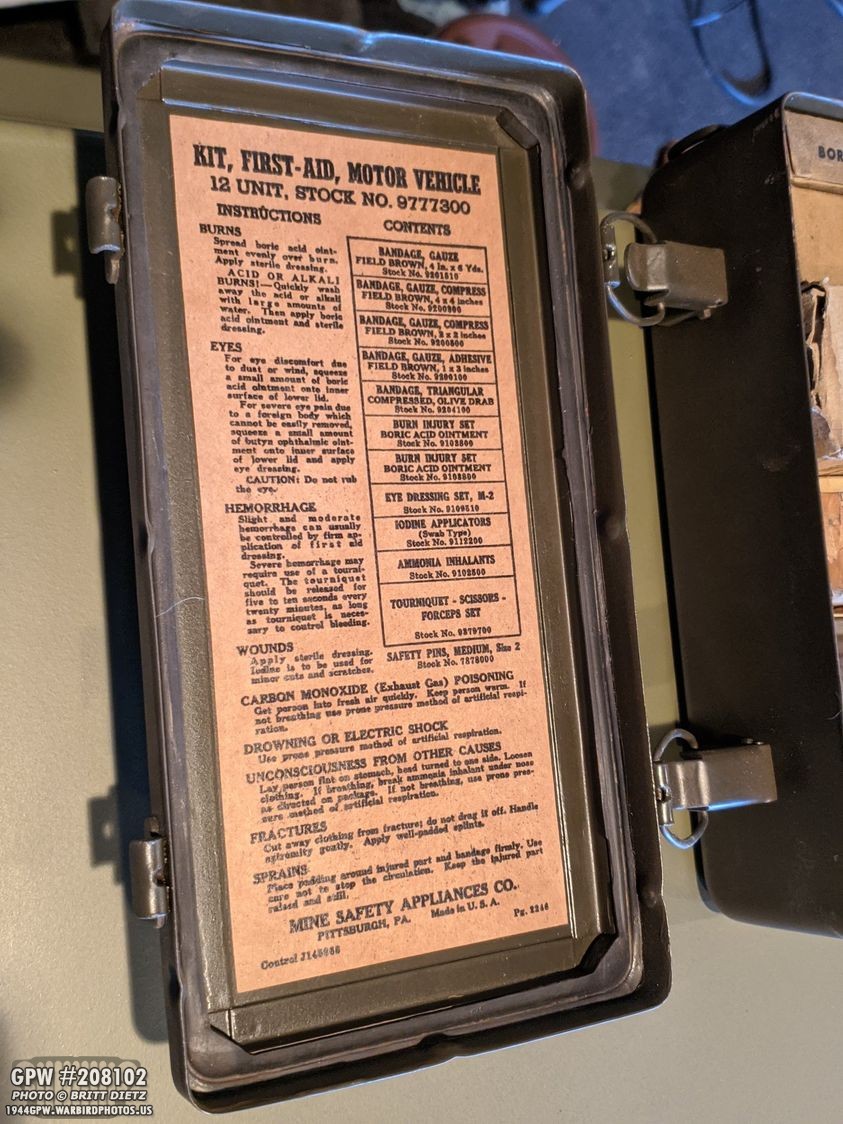
I also recreated the internal contents list, the correct style for Jeeps. This was printed on thin cardstock and glued to the inside cover.

But the problem has been the contents inside. While two of the first aid boxes are from WW2, they are not from a first aid kit like this. Several items in this are post-war. After going to all this work making the outside look correct… I should do the same inside.

I ran across another first aid kit at a flea market that appeared to have the correct style boxes (left one), but after researching I found those too are post-war. Doh!

Still, what these post-war boxes will provide me is proper size and shape.

So, using high res photos I’ve searched and found online (still looking for more if anyone wants to help me!), here’s the first prototype of a correct box for the wartime Jeep first aid kit around the time of my Jeep. This is just made out of thicker paper, but I’ve already figured out how I can do this with the exact same cardstock-like material using my Cricut, again.

Here’s a first test in the tin, and it appears to perfectly match the size of the other boxes. Normally, these first aid kits had thickish cardboard liners all around the sides and under the boxes, which will lock them in place. So, I’ve begun the process of trying to recreate all the proper boxes with the proper materials for my first aid kit. My hope is to actually transfer some of the correct items from the WW2/post-war boxes I have to the new ones I’m making. Look for more on this in the future.

Two weeks ago I mentioned a fun grouping of items I got from Ferrel Fox from Canvas Division (G503), which I traded for some of my MB extinguisher decals and a push-pull switch. This included a correct tool roll, spare parts bag, spare key bag, and more. These are the GPW style and he made them himself to spec.
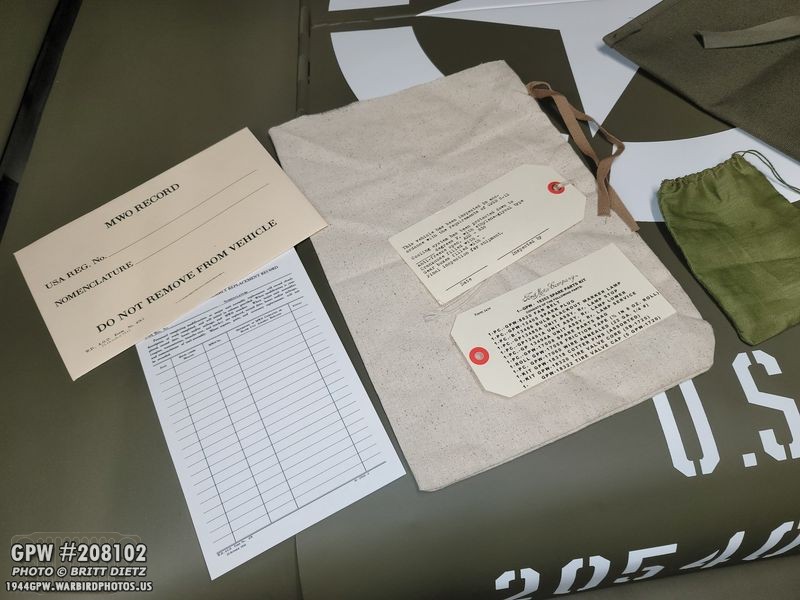
They also came with a GPW spare parts kit list tag, an inspection tag, and an MWO record with an envelope. Great attention to detail!
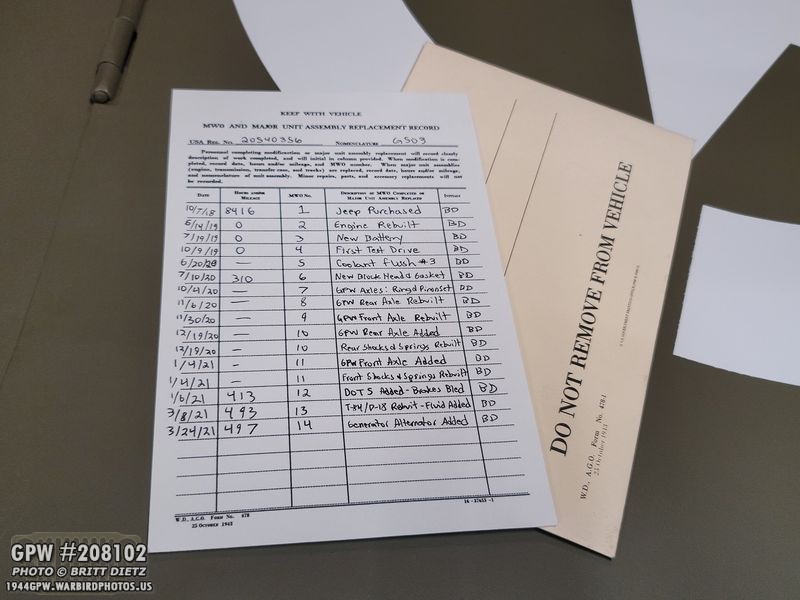
A few days ago, I decided to actually fill out the MWO record, which is basically a maintenance history for the Jeep. I went through my updates and photos from the start of the restoration and tried to chronicle major things that has happened with the Jeep that I will keep in the envelope in the glove box. It’ll be a great way to quickly reference when something happened (IE, when did I last change the oil? When were the gear oil levels last refilled? etc) with the Jeep. I plan to keep this up to date from now on.

Now, on to where I’m headed now with my Jeep… as many of you have read in the previous updates, I have a mysterious ‘clackity’ noise coming from the rear axle on my Jeep. Short story is… I had CJ axles on my Jeep with CJ rims. I got a pair of wartime GPW axles from a G503 member for free and did a complete teardown restoration and rebuild of them (shown here when they were finished almost a year later). This strange clackity noise started when I first test drove the Jeep with the GPW axles.
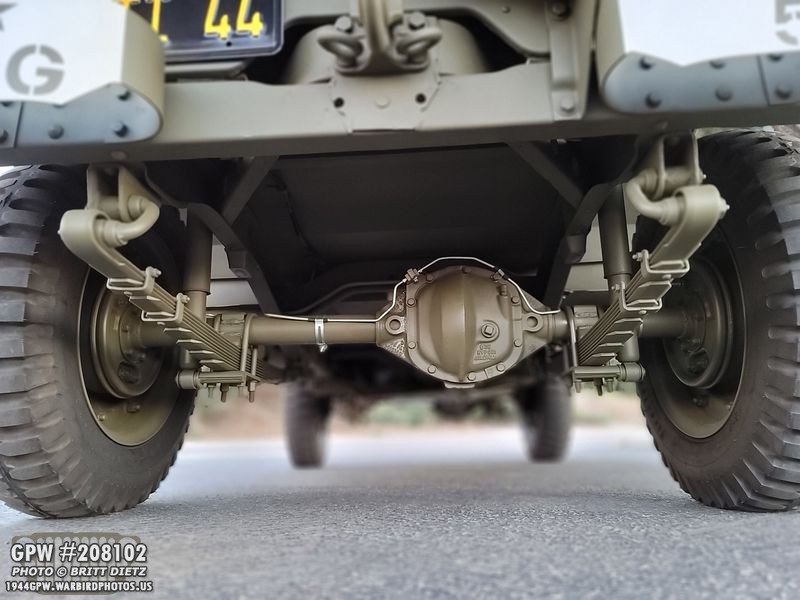
There’s not a lot of patterns to this strange noise, and the ideas of what’s causing it are continually evolving and being argued in one way or another. The main culprit appears to be split between either the rear drive shaft, the rear axle, or both.

I’ve already re-gone through the rear axle rebuilding the spider gears in the carrier just in case and re-setting the ring and pinion. The sound is still there and has been there now for weeks.

So, I’ve started to get more heads in on this issue. I started a thread over at G503 (https://forums.g503.com/viewtopic.php?f=4&t=322717 if you want to follow along or read the full story) and earlier this week I purchased a GoPro Hero 8 that I’ve been mounting under my Jeep during short rides to see if we can isolate this sound further and check for any issues. Here are two screen grabs from those videos (see the G503 thread on page 3 for the video links).

So, where I’m at now is this coming week I’m picking up another GPW rear axle to being work on, which will be the main update for next week and start enough tear down and rebuild of a wartime axle. I also hope to borrow another rear driveshaft to see if that’s also causing the issue. My hope is that over the next few weeks I can either get this sound fixed, or replace that axle with the other one.
So that wraps up this short update. Till next week…