 THE JEEP TURNS 76!
Today, June 26th, the Jeep turns 76! With a DOD (date of delivery) of June 26, 1944, the Jeep is another year older. This week, I added some more Ford F stamp enhancements, continue work on one of the hood clamps, more Torque Reaction Spring work, some flea market finds, and PART 3 of the Coolant System flush!

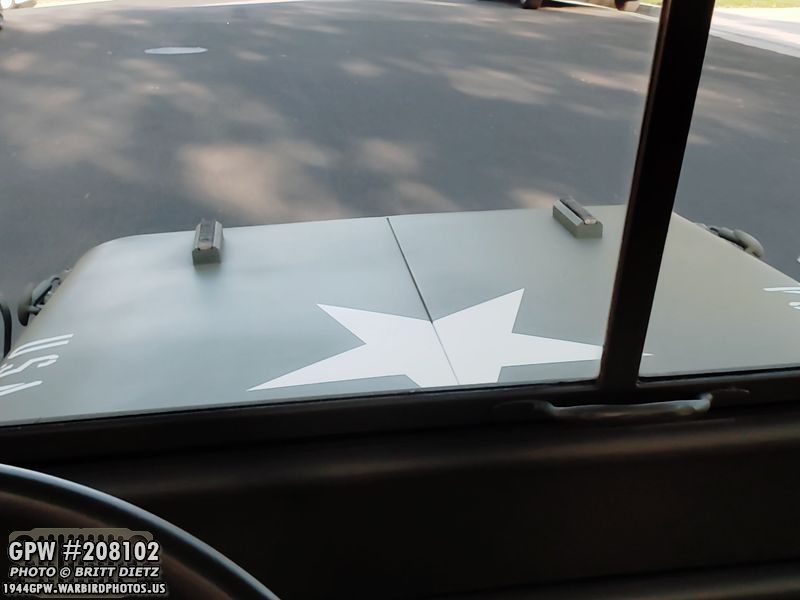
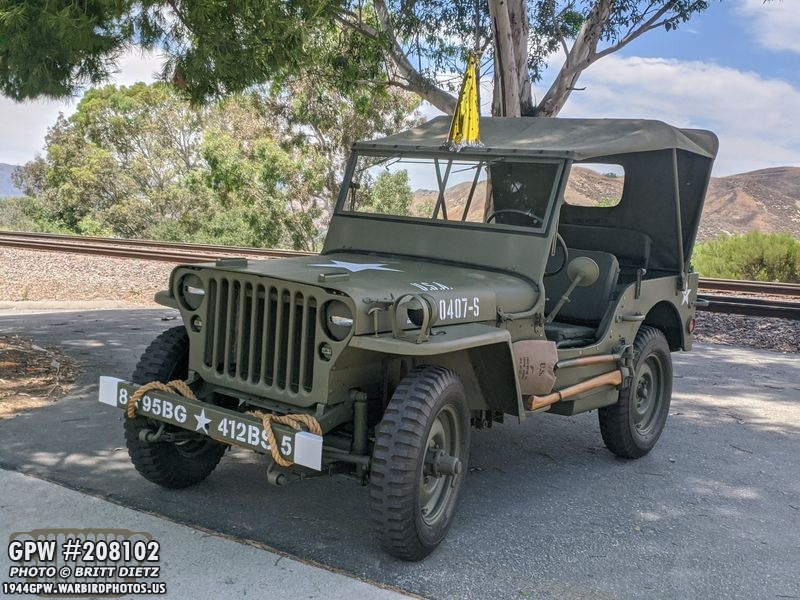
Happy Birthday to the Jeep! It’s been 76 years since it was delivered to the Military (which is considered the birthday of a Jeep by most people, even though it was probably actually built a few days/weeks earlier). So naturally, I took her out the day before her birthday for a little photoshoot with a party hat.

She doesn’t look a day over 75. Actually, a lot has changed on her since one year ago and her 75th birthday. Aside from the fact that I can drive her now and she has over 300 miles now since driving her, the bulk of the restoration has been completed. There’s still several large projects, like replacing the CJ axles and putting combat rims on for instance, all which I hope to finish by this year.
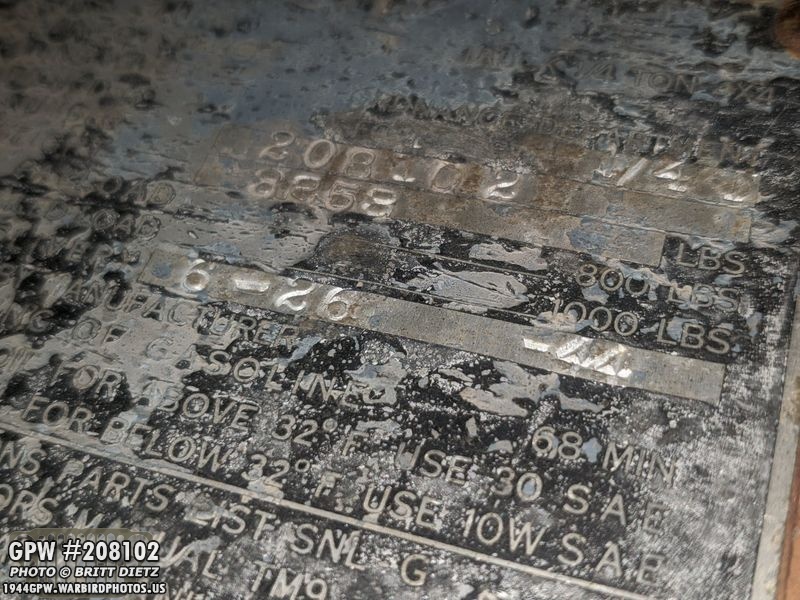
And here’s a look at the original dataplate that I keep safe off the Jeep with the original stamped date. June 26, 1944.
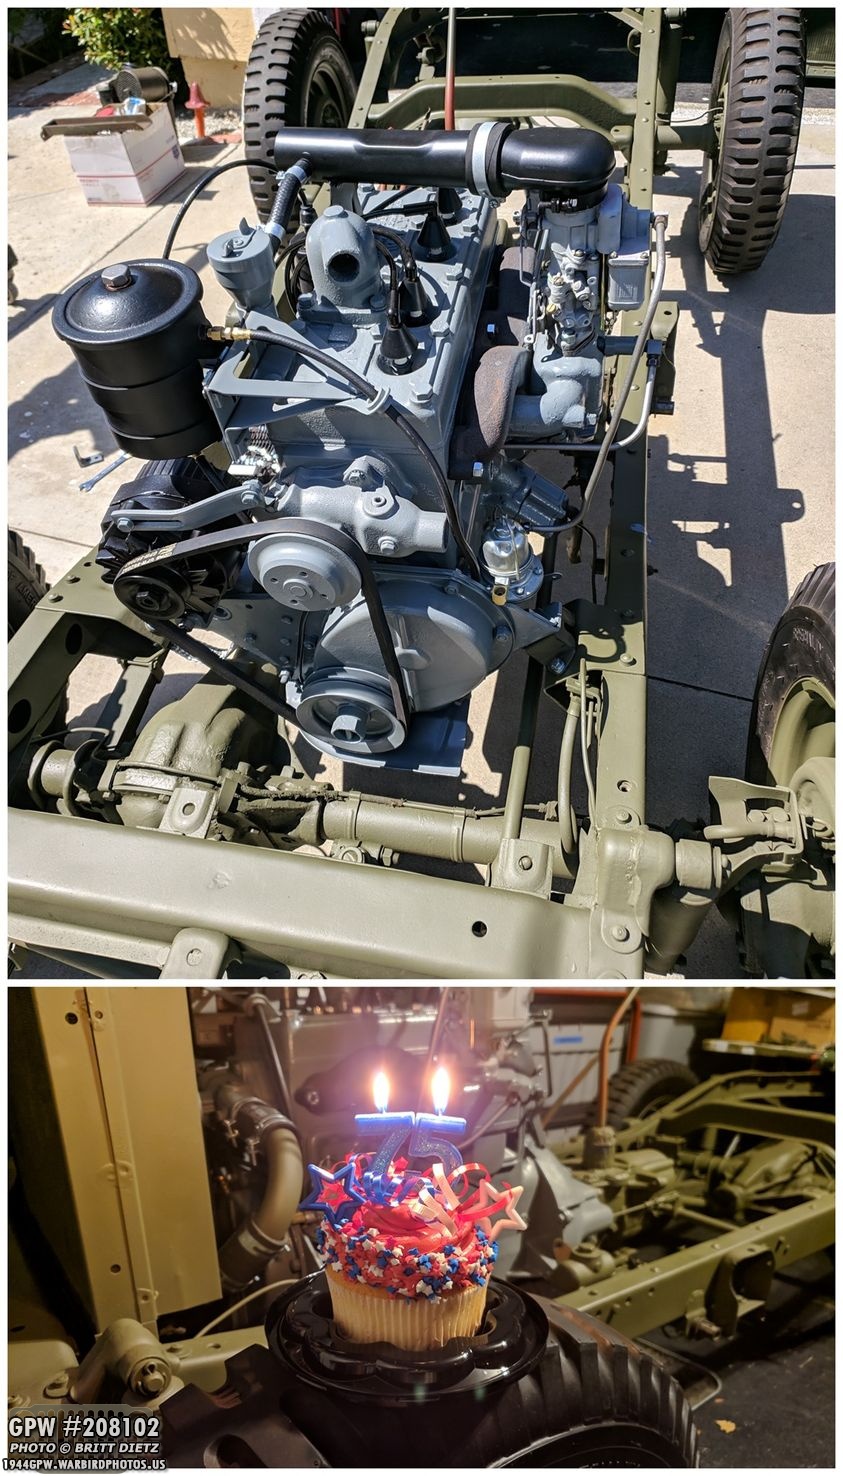
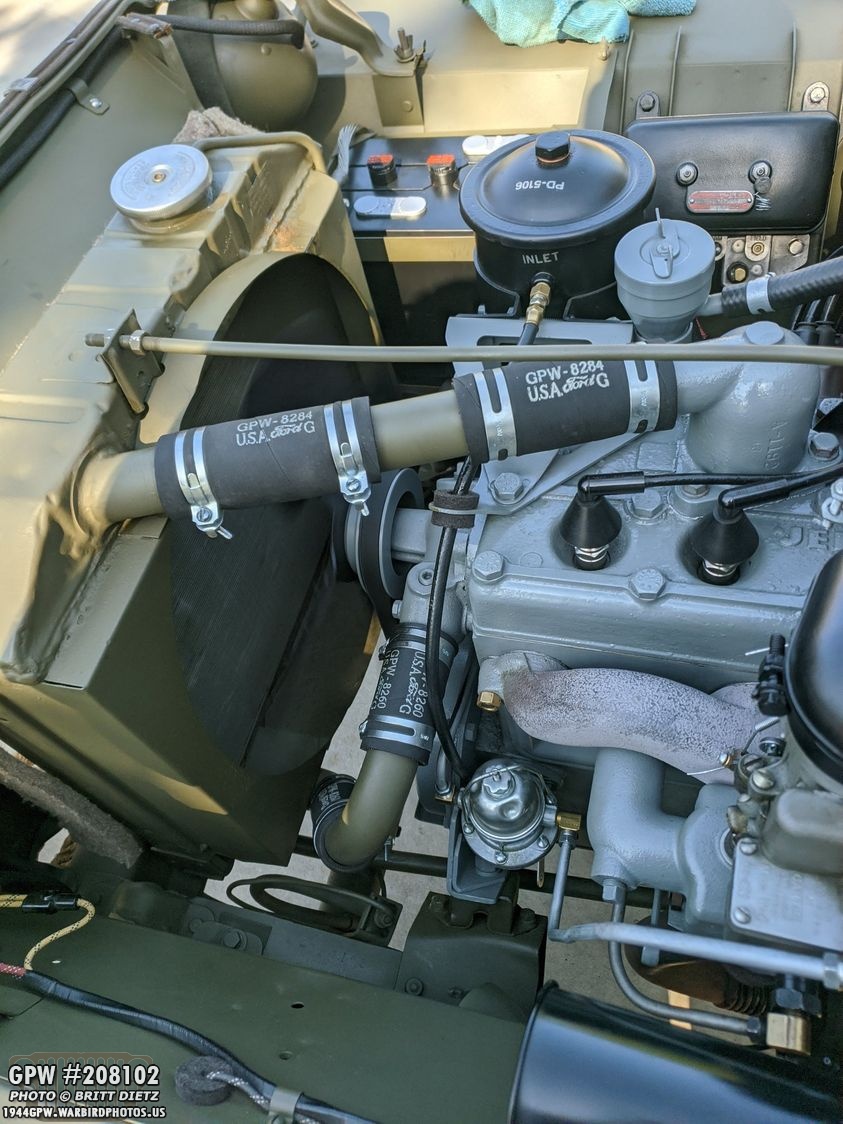
And here’s how she looked one year ago for her 75th… the new body tub wasn’t close to being ready to put on, the engine had just been installed, and I had just finished adding the radiator and the coolant system. The Jeep has been through a lot in that year’s time!

A birthday present to myself and the Jeep (we’re just 11 days apart from a birthday… and over 30 years!) I got a set of F stamped top bow parts. I originally had bought non-f stamped ones, and I’ve since regretted that decision. So now I can properly replace these items! These came from &Ron Fitzpatrick Jeep Parts.
Since they came in a glossy OD Green that’s not the 33070 shade of my Jeep, I needed to repaint them. But since each layer of paint will fill in the stamping a bit more, I always sand down the stamping areas as best as I can to start over. I then prime and paint the parts to the correct 33070.
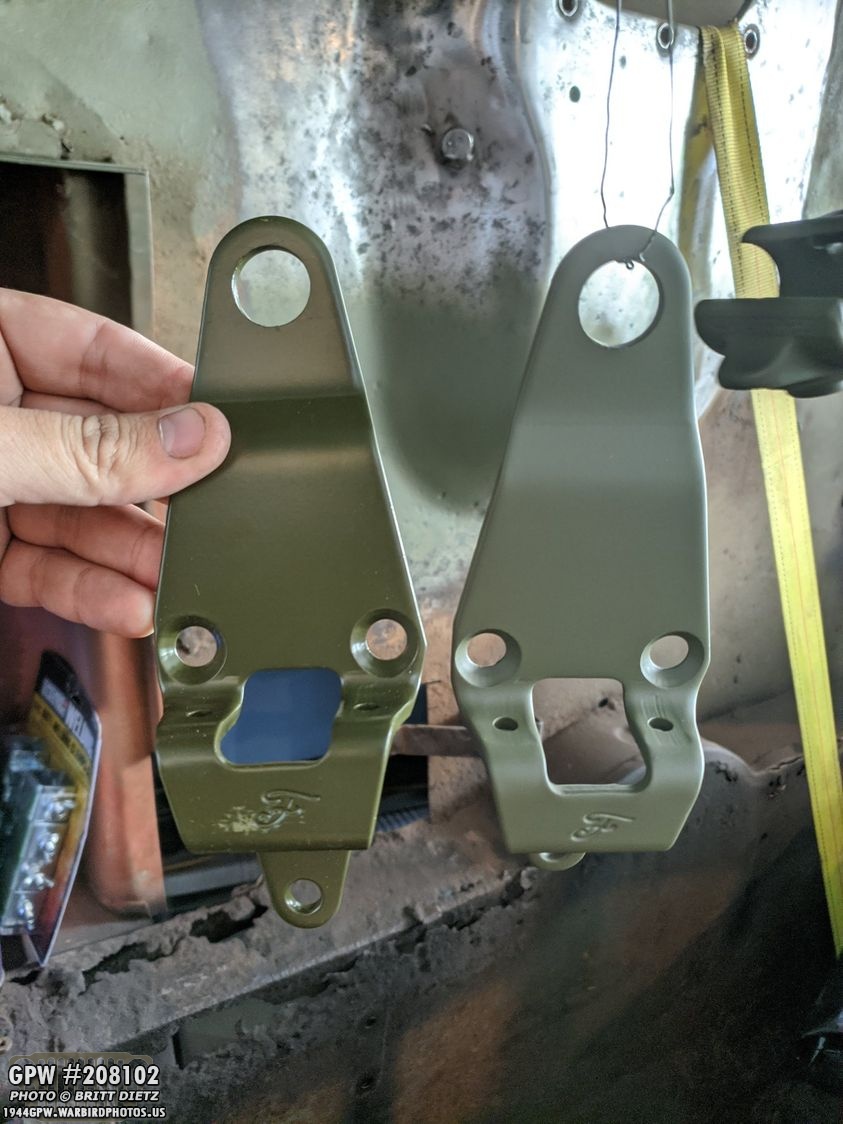
Here’s the difference… on the left is the glossy paint the parts came with, and on the right is the correct 33070 OD Green paint (the color is a bit off in this shot, the 33070 is more green and the glossy paint is more brown)
After priming and painting, you can still easily make out all the markings.

Same with the brackets.

All painted and awaiting 24 hours for install!

The next day, it was time to swap out the brackets! I was a bit lazy, and didn’t want to have to take down the entire top bow and canvas top assembly, so I used a towel (and my girlfriend) to hold the top bows as I swapped them out.
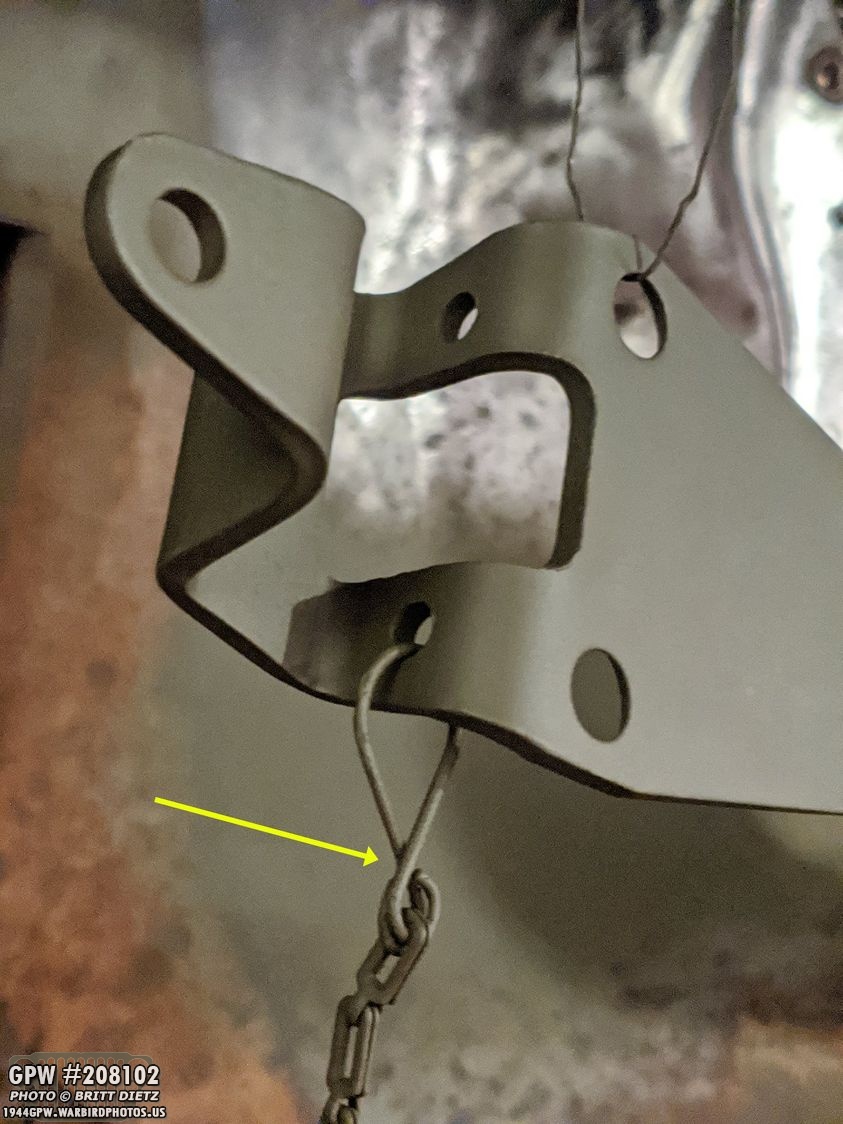
One thing I had to do was transfer the safety chain for the thumbscrew. This isn’t an easy task, these little buggers are hard to get on. It’s like one of those puzzles where there are two metal shapes you need to twist and turn a certain way to get on and off each other. After that, a quick touch up of paint for the scratches and they are ready to go.

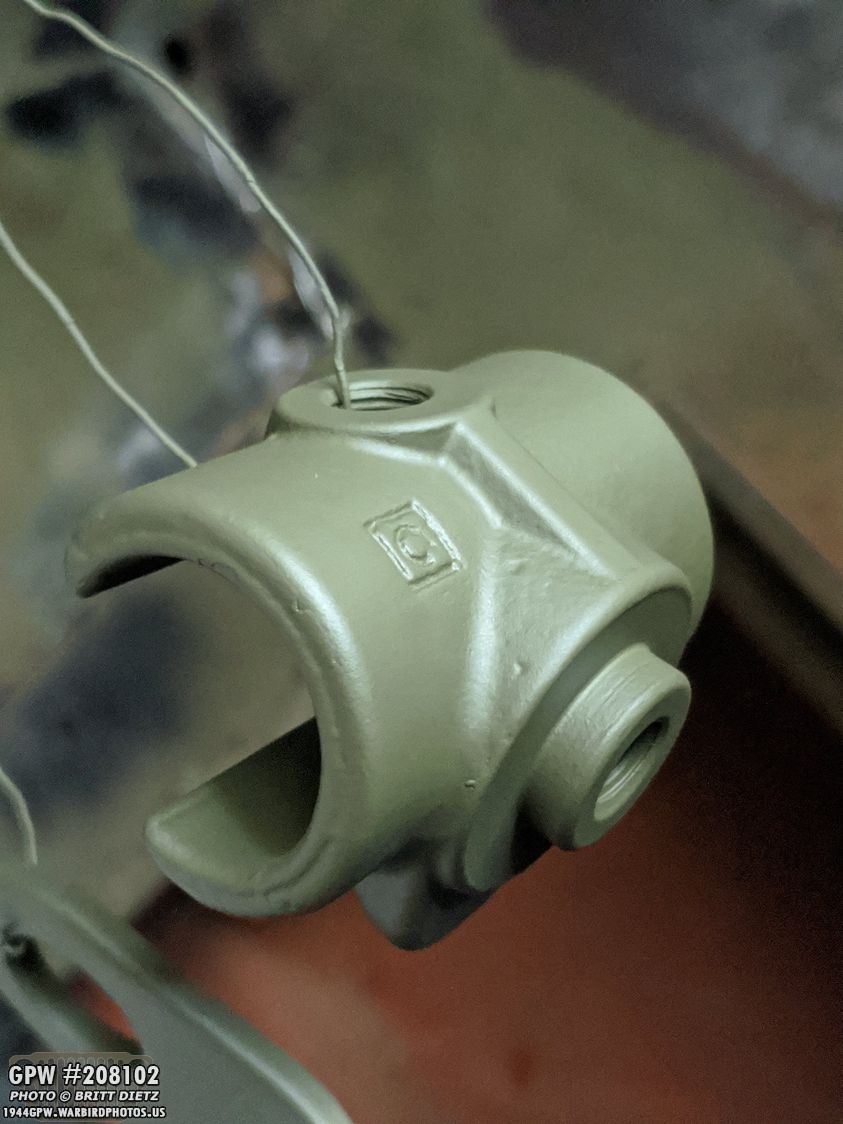
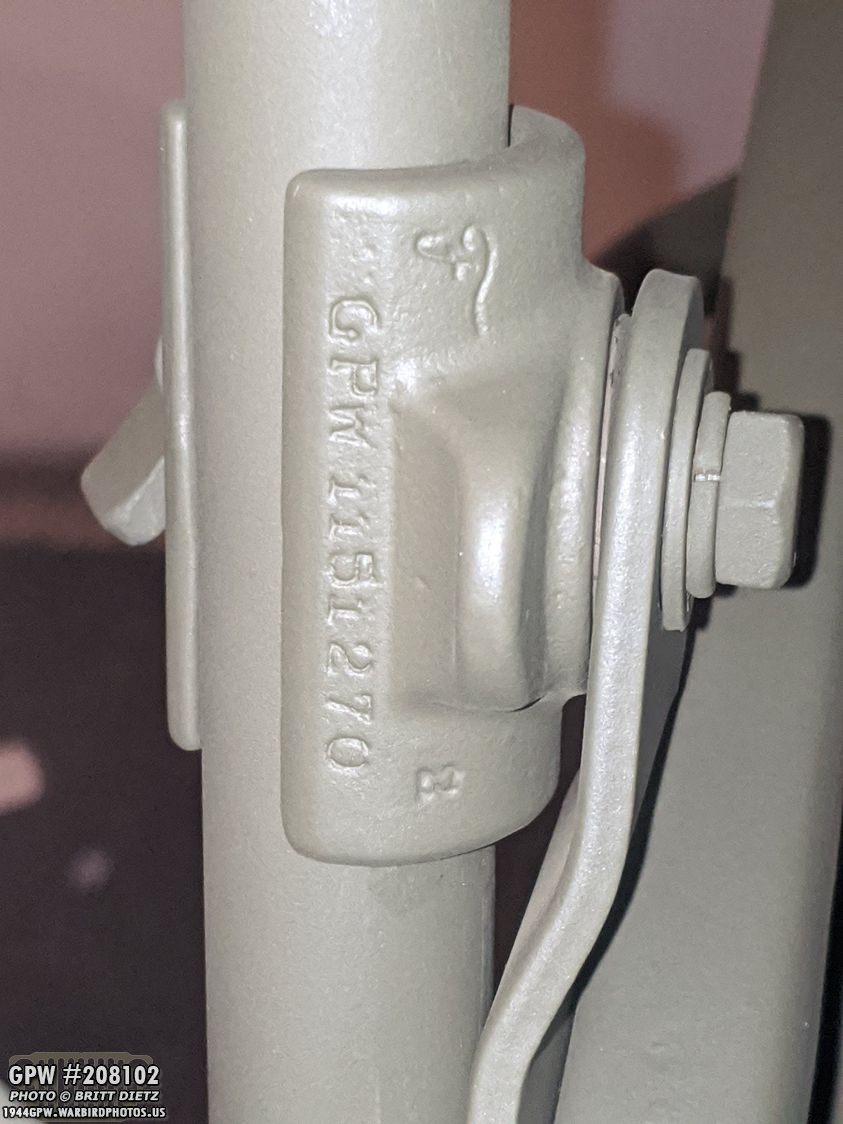
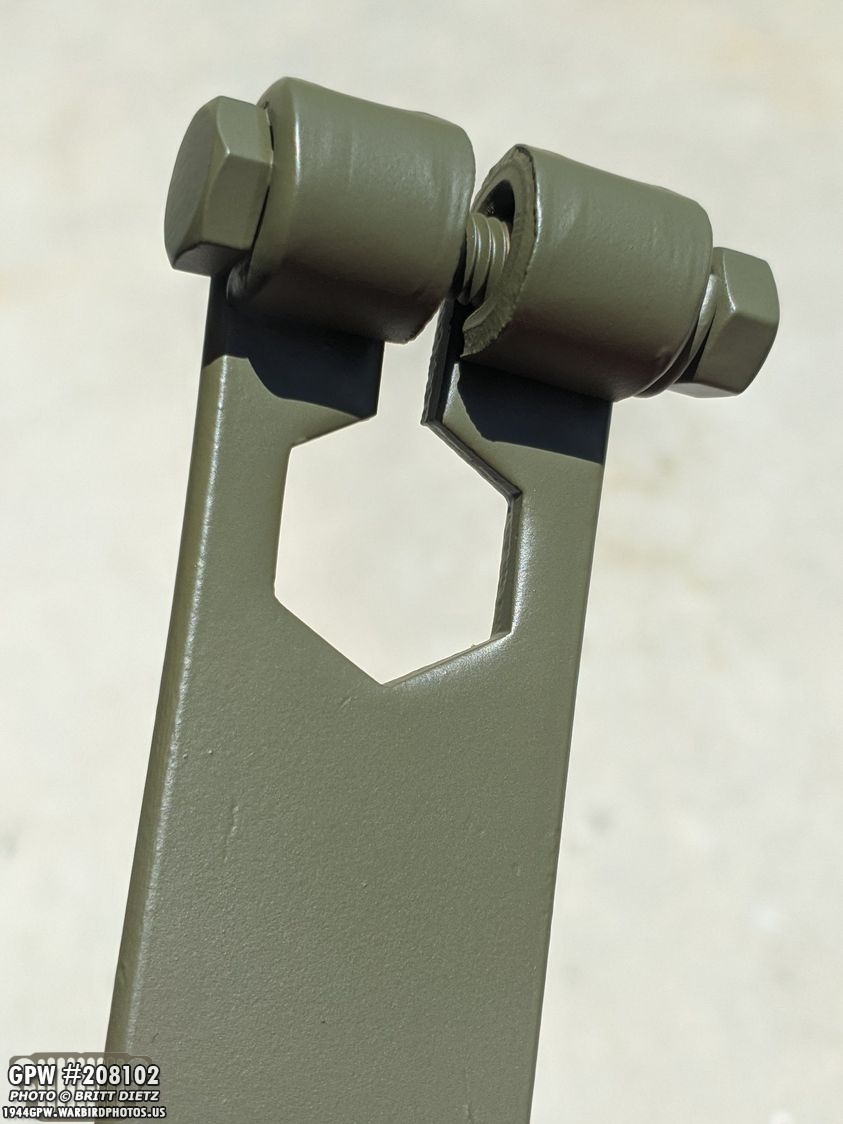
And here’s both the bracket and the C pivot bracket swapped and installed on the passenger side! ?Note the F stamped bolt at the bottom, which I had added a few updates ago.

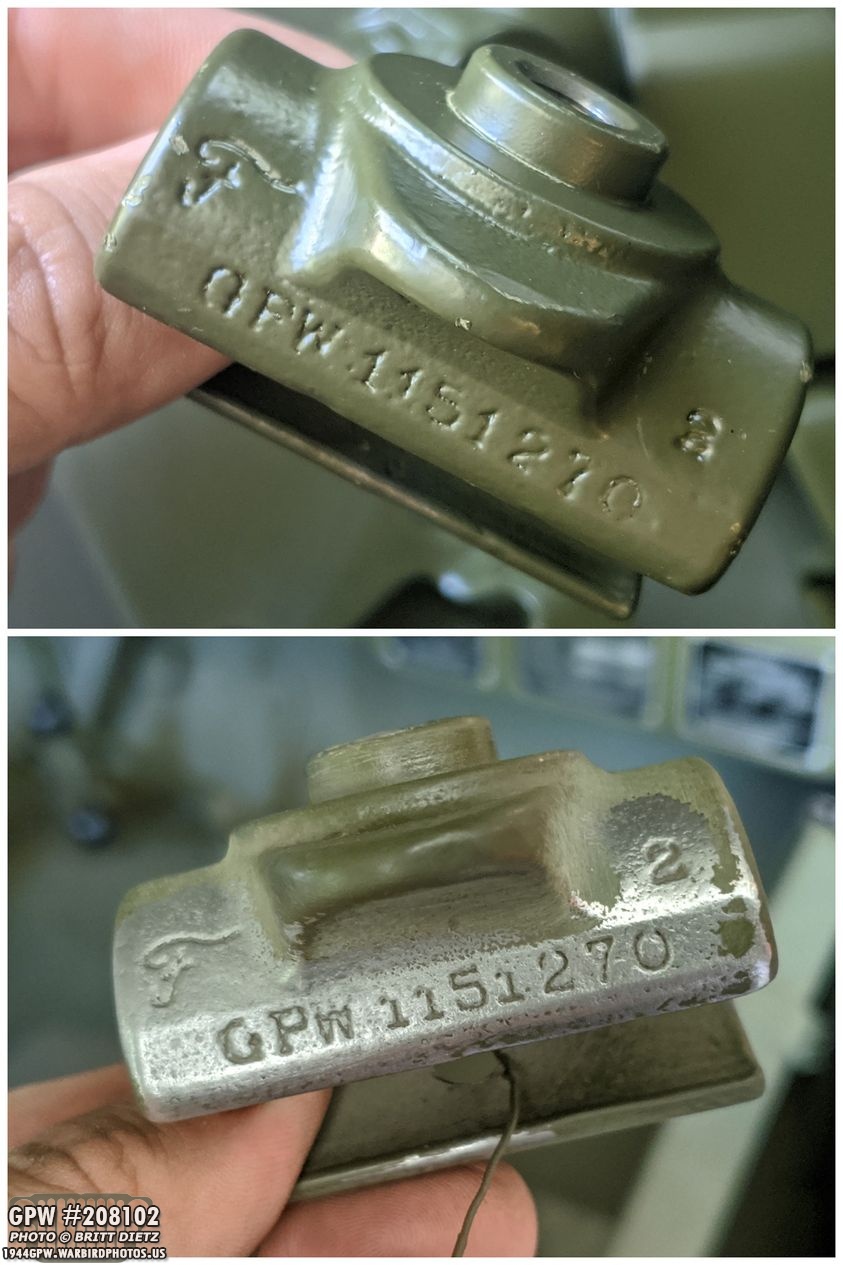
The pivot bracket has nice sharp stamping!

And here’s the driver’s side all finished! Looks good, and adds another 2 F stamps on each side of the Jeep. I think there’s around 28-29 right now on the passenger side (not inside!) of the Jeep alone!
And a close up of the stamping on the pivot bracket. This bracket holds the top bows in place and allows them to pivot upwards for the canvas top of sideways for storage.

And a look at both out in the sunlight the next day! This assembly is now complete and won’t need any other swaps/additions.

Next up will be the front top bow brackets, which have the F bolt but not stamp on the bracket itself. &Ron Fitzpatrick Jeep Parts is out right now, but hopefully back in stock soon the complete the F stamped top bow items!

Speaking of F stamping… another big change coming for the Jeep (teased last week) is coming… it will probably begin in next week’s update. But here’s a sneak peak.

I spent a little work prepping the items for this awesome project that will make my GPW a bit more… GPW!
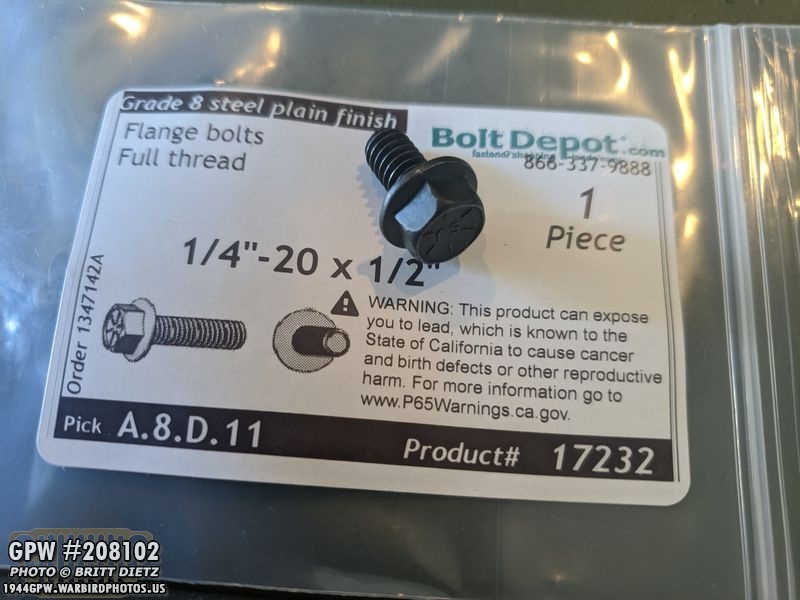
Another GPW tweak I’ve been researching and now starting to change is adding recessed head bolts to several spots on the Jeep. There’s a lot of debate on these types of bolts on when they were added, if they were mixed with hex bolts, etc. I decided to go with what most of the research seems to point to, which is those spots having these bolts. So I bought this one from boltdepot.com to test out.

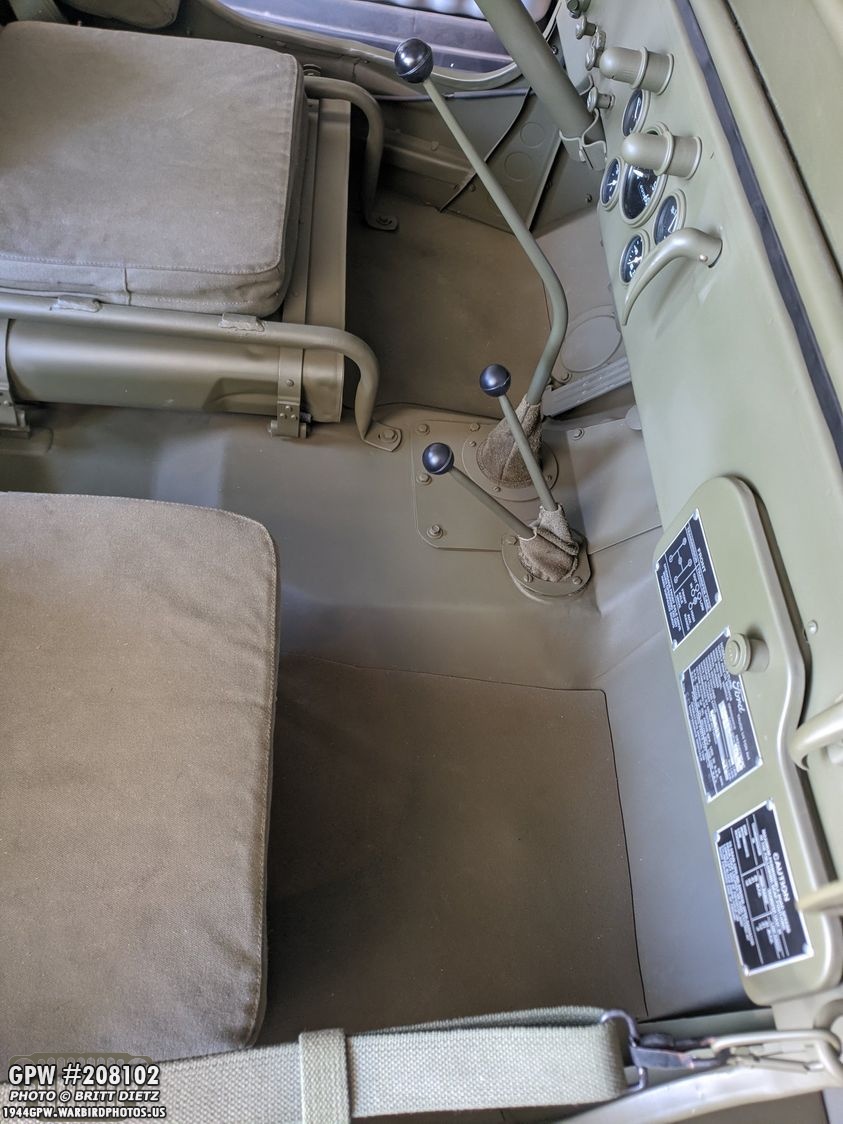
Here’s the first section where GPWs (not MBs) had the recessed head bolts. The brake master cylinder cover and the transmission cover have recessed head bolts with flange and no washer but a star washer in 1/4-20 x 5/8. The blue arrows are also 1/4-20, but these are longer. I opted for 3/4 and an inch to see which work better since they have to go through a ring, leather from the boots, the plates, and down to the capture nuts. The driver’s seat bolts sound to be 5/16-18 recessed head bolts.
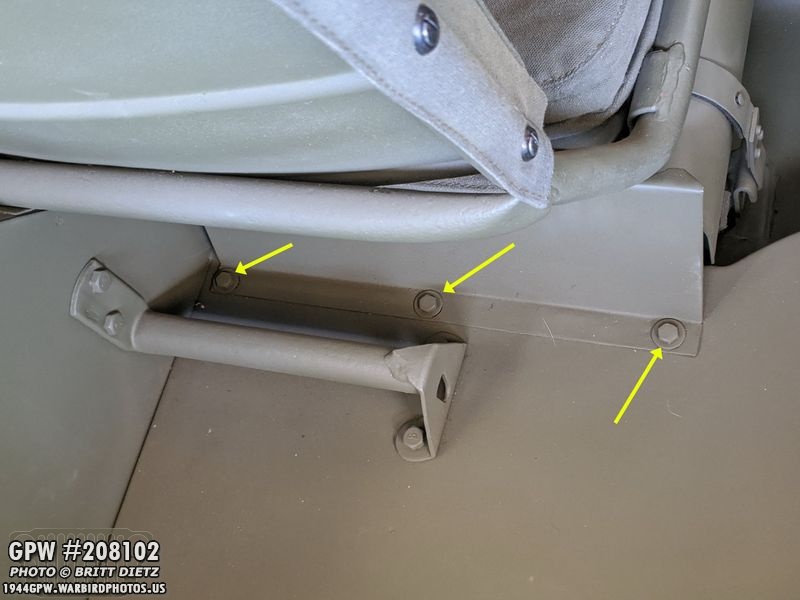
And also, for the driver’s seat fuel tank shield, there should be three 1/4-20 5/8 recessed head bolts.
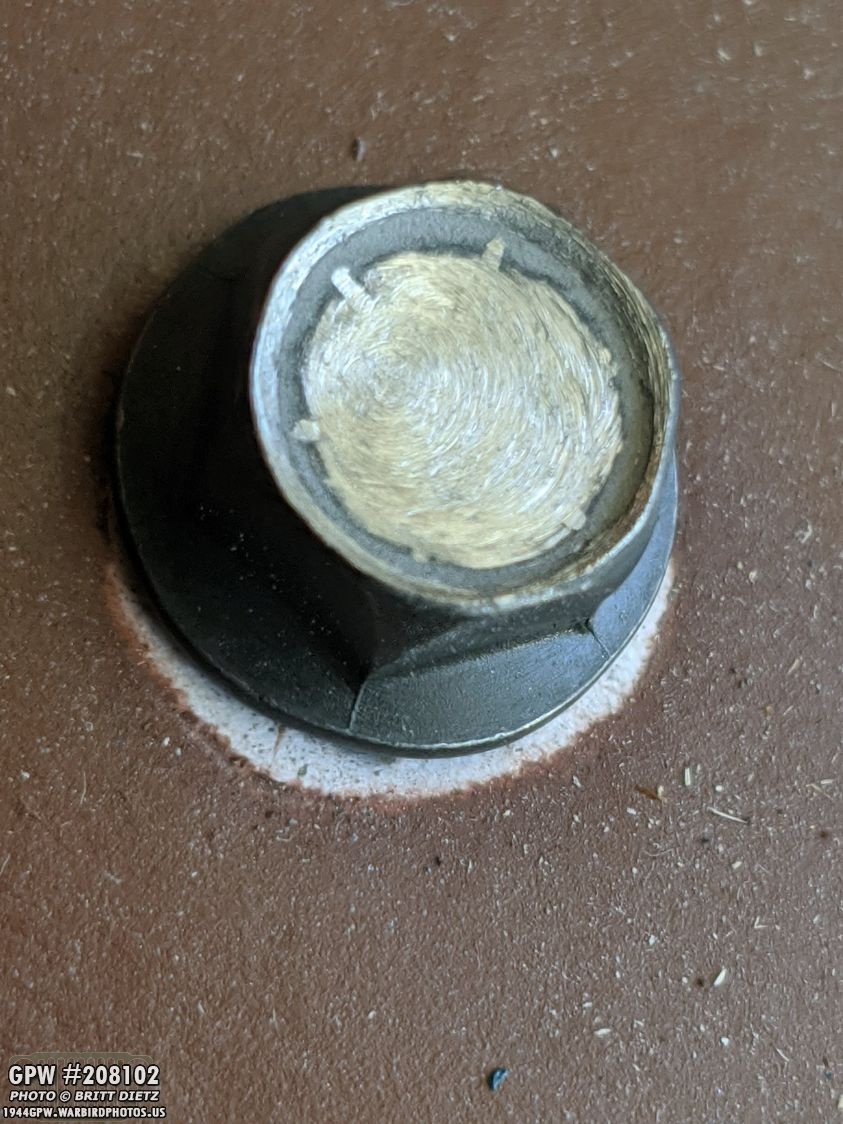
So, first thing I did on the test bolt was use my Dremel and grind off the head markings. I then primed the bolt with Red Oxide (no photo of that).
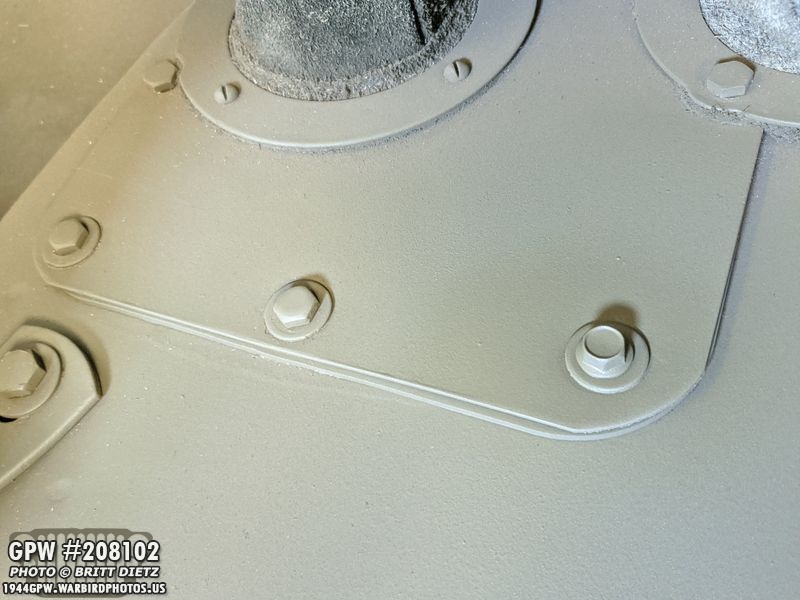
And here it is installed on the Jeep. Now, that washer shouldn’t be under there, and instead a star toothed washer should be. Since I was just checking how it would look, I didn’t want to peel up the washer and have to sand that area down. While the recessed head bolt is not 100% perfect to the originals (incredibly hard to find), I think it’s certainly close enough and will look the part perfectly. I’m awaiting all the bolts from boltdepot.com and will post about their installation next week!

Moving on, if you’ve been following along for a few weeks, I’ve been slowly restoring a take-off torque reaction spring system. My Jeep has CJ axles, but soon will have 1943 wartime GPW axles I’m also restoring, and when I do that I’ll need to add the Torque Reaction Spring system since my ones were removed a long time ago when whoever replaced the axles with CJ ones. I’ve replaced the two bushings in the shackles (left photo, before I replaced them), and then slowly been getting everything ready testing it out (right photo).
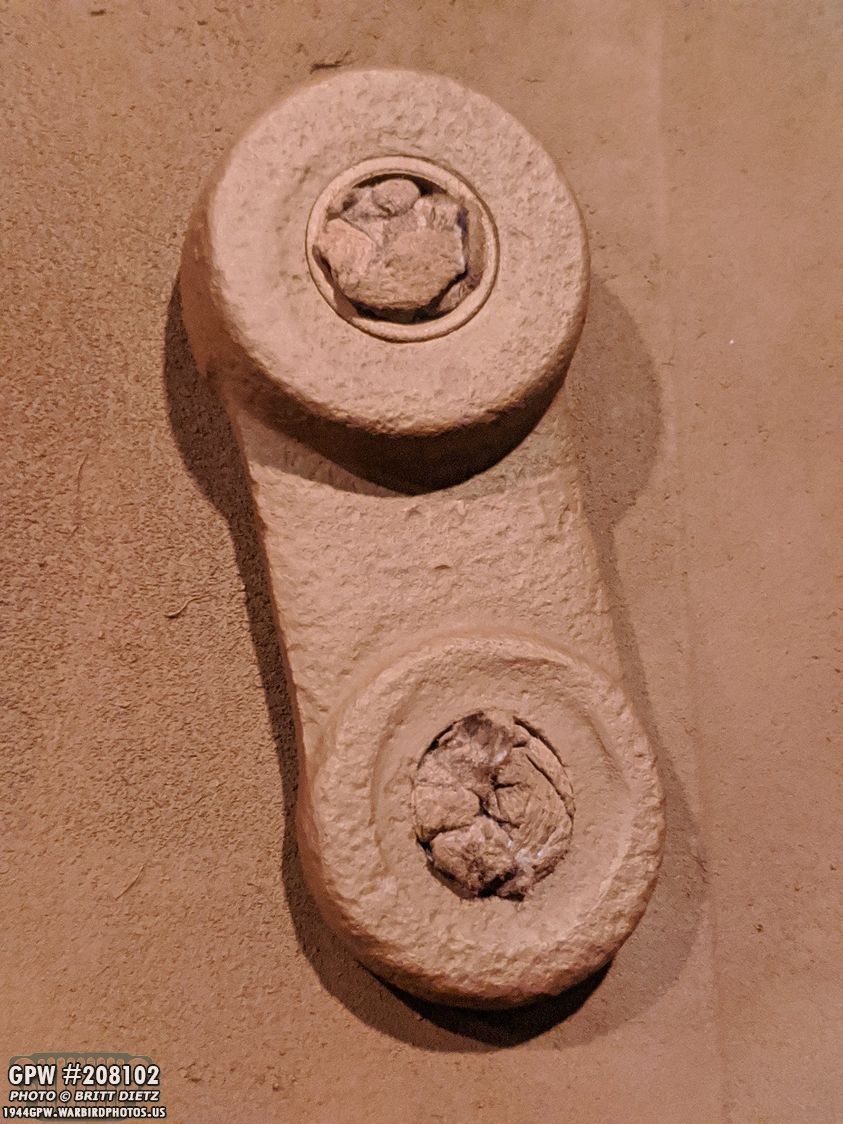
This week I painted the final shackle now that I have the correct bushing installed. Here it is with the red oxide primer.
I also went to Home Depot and got the correct bolt for the lock bracket, which is a 5/16 – 18 x 2 inch bolt. I sanded off the head markings and primed/painted it.

I also painted the head of the long shackle bolt that I got from &Ron Fitzpatrick Jeep Parts last week.

And here’s the shackle all painted with OD Green! To the left is the driver’s side hood hold-down clip that I repaired last week.

As a reminder from last week, the pivot area on the hold down of the driver’s side hood clamp was starting to bend open and, when you lay the clamp all the way down flat on the fender, it would come out of that groove. So I carefully hammered it back closed so it would not come out.
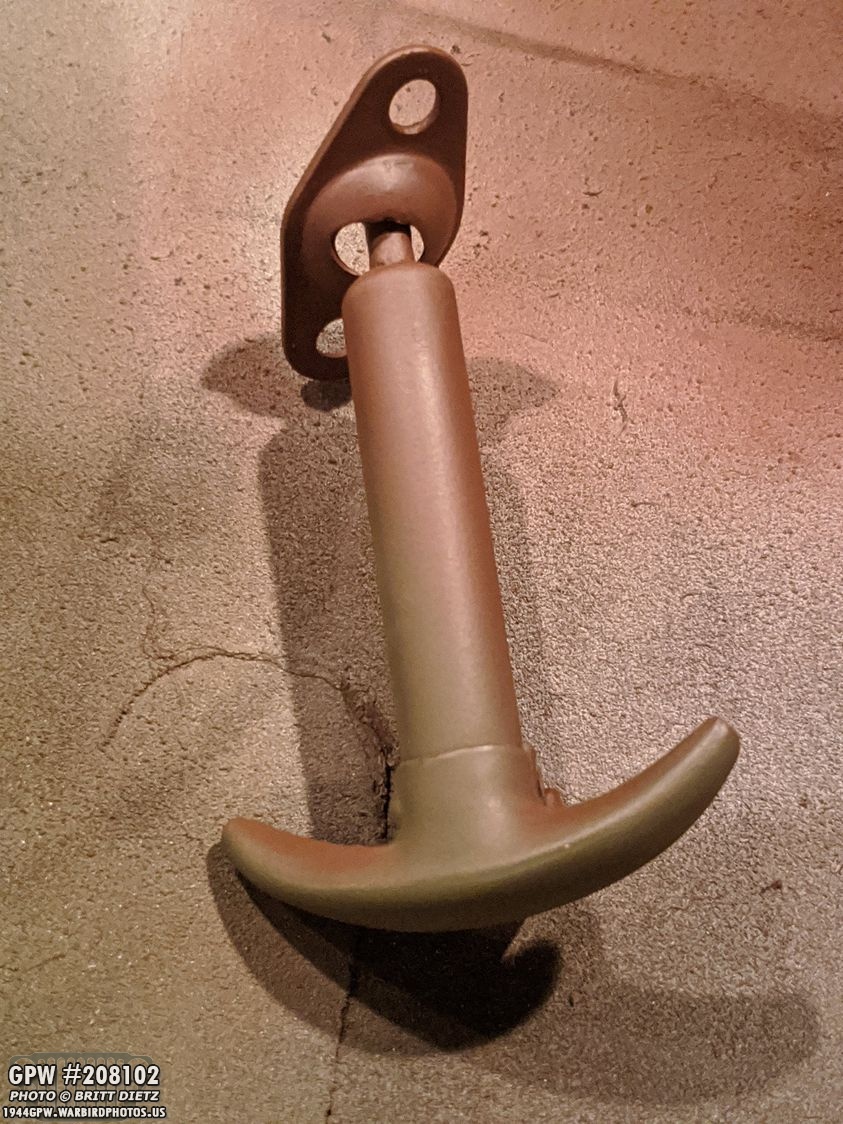
It was then primed and painted once again.

I also cleaned up the area where the bottom hold down clip was attached to the fender. I didn’t bother fixing the area around the screw holes as that would be under the clip and not seen. I gave it all another quick coat of OD Green.

And there we go! Back on the Jeep and not going to come out for quite some time now! Another project fixed!
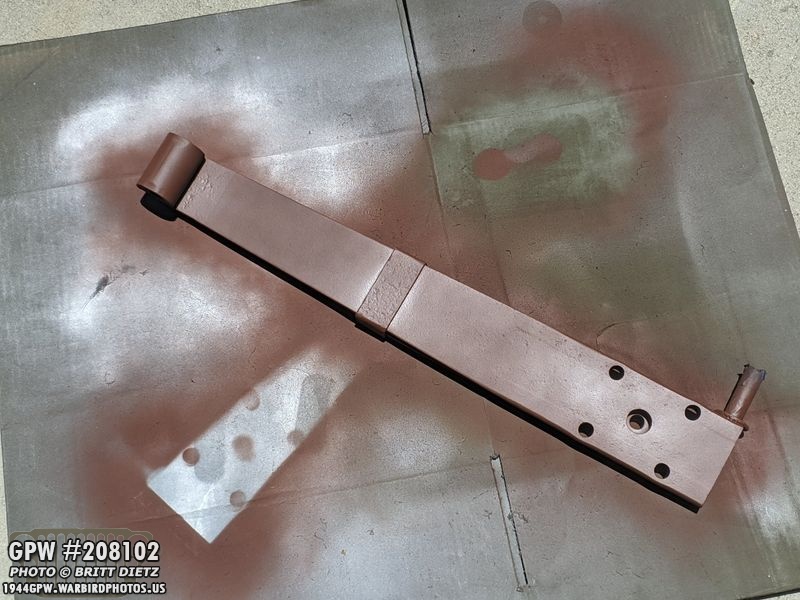
Going back to the Torque Reaction Spring project, I painted the spring itself this week. I finished the Red Oxide Primer…
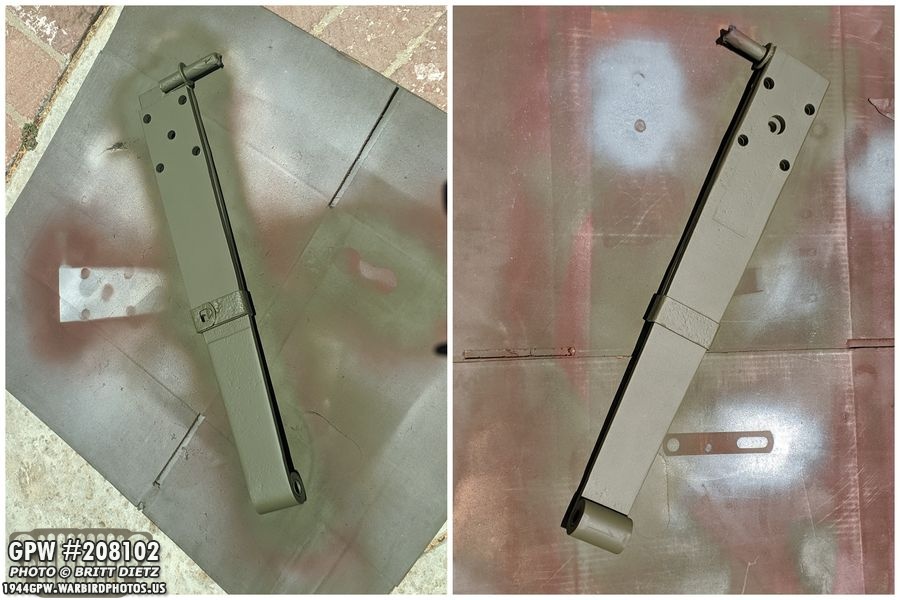
And painted it 33070 OD Green during the week on both sides. The entire system is ready for installation once I get the GPW axles on the Jeep! If you’re wondering what the heck the Torque Reaction Spring is, I’ll go more in-depth once I install it in the future, but in a short nutshell it helps to stop the Jeep from swerving to the left when hitting the brakes hard with wartime axles, which have the steering system attached to the axles.

Moving on, some flea market finds! They finally reopened the first major flea market in my area, the Long Beach Flea Market! I was anxious to go, and scored some good finds! First off is this 1940s era shovel. It appears to be a shovel that could be used on a Jeep.

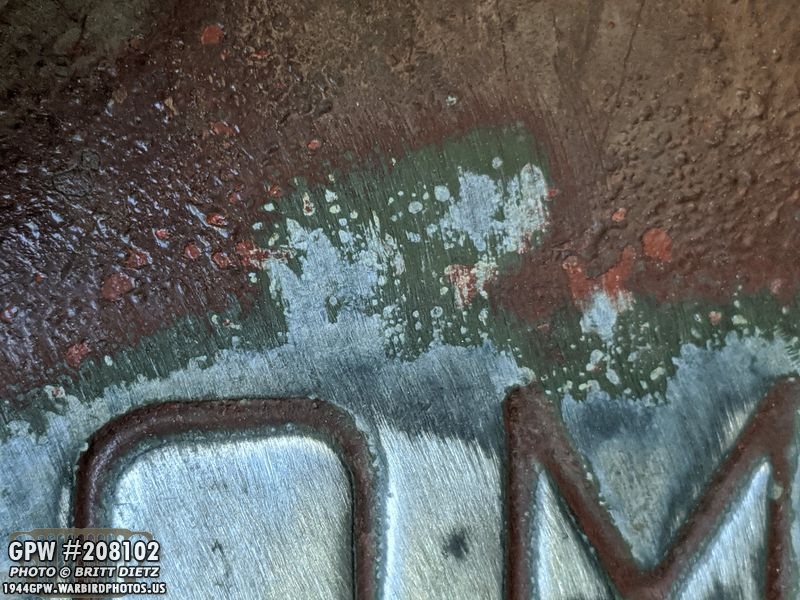
The only markings are:TAPER FORGEDTRUE TEMPER 2HEAT TREATED
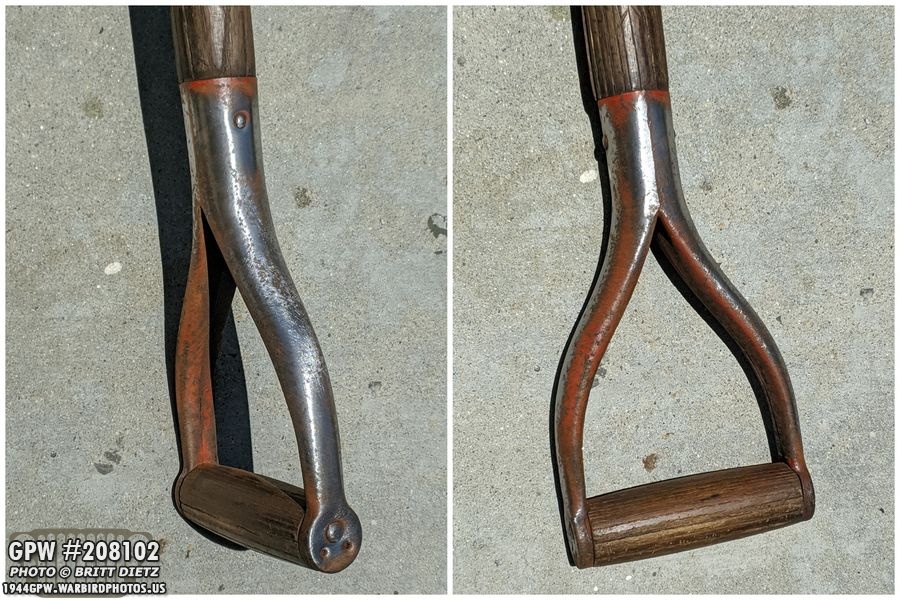
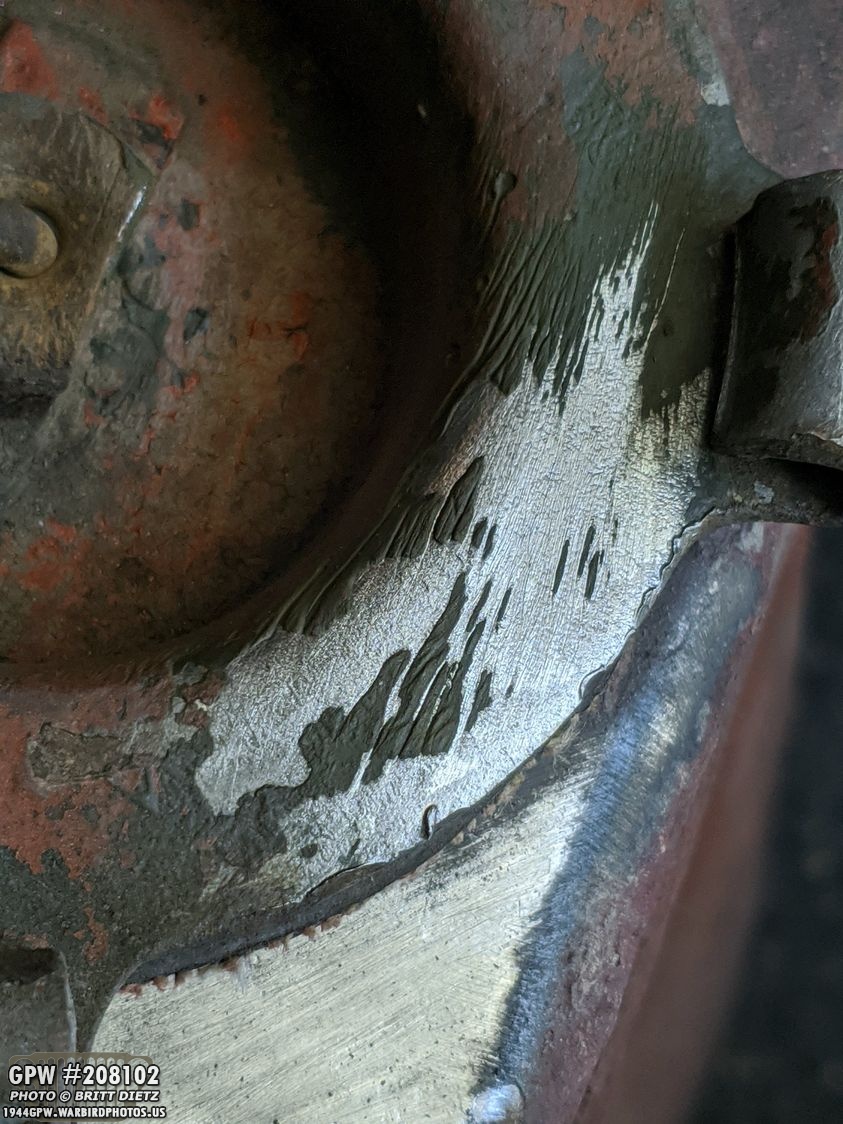
The handle looks about right. It looks like it was painted red. There’s a darker paint under the red, but I can’t tell if it’s a black or a dark green.
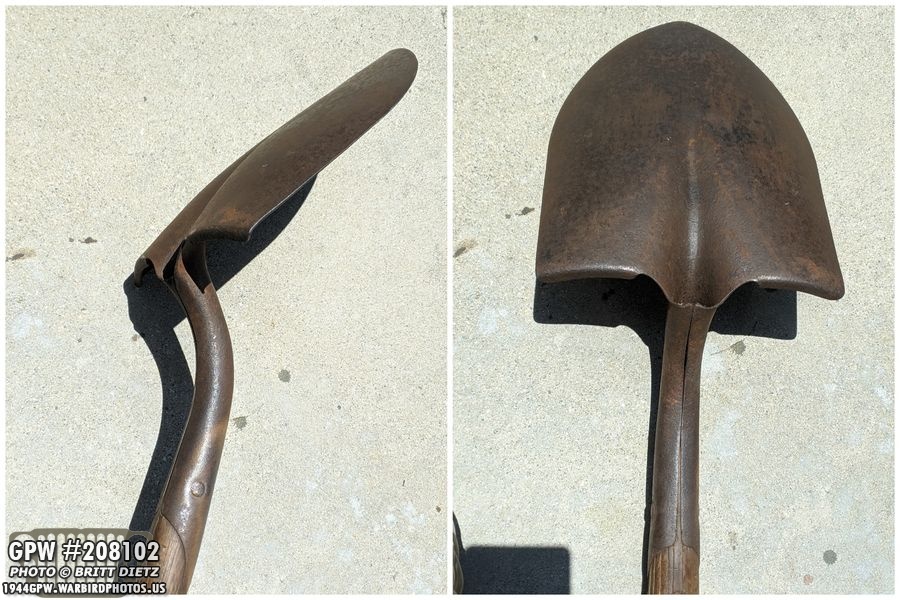
It passes what’s known as the ‘flea market test’ where you can sit it flat on the ground and see if it would fit on the side of a Jeep based on the angles… so it could be a Jeep shovel. There were several types of shovels used on Jeeps, and still some being discovered. I’ll clean it all up, paint it, and see if I want to use it on the side of my Jeep.

Next up, a nice find of an early 1941 Jerry Can! Has some dings and a repair, but in otherwise pretty good shape. Just needs a good cleaning, wire wheeling, and paint!

Here’s the markings underneath… ICC-5 = Interstate Commerce Commission 5 (5 being the specs used to make it)Wheeling = Wheeling Corrugating Company. 20 = 20 gauge thickness of the can5 1/4 = The capacity of the can in gallons.41 = 1941
After carefully wirewheeling it to pre-see how easy it will be to clean up, I discovered what looks like original OD Green paint under the red!
Here’s another look showing the OD Green!

And here’s the cap, in really good shape with rubber gasket.

Inside could use some muriatic acid, but looks pretty good. I think it could hold gasoline.

And here’s the markings under the cap. So I’ll get to cleaning up the Jerry can and see about installing it on my Jeep. I still want a 1943/44 dated one instead, but it’s better than the 1975 one on there now.
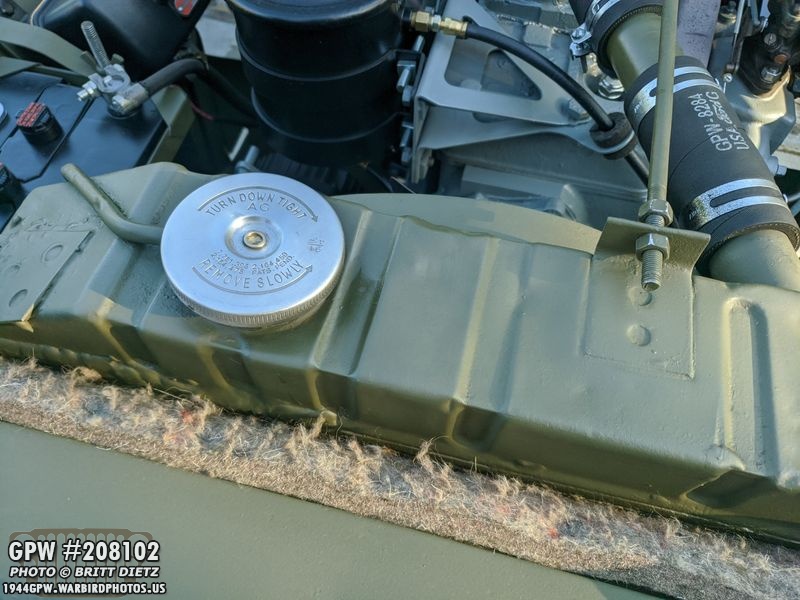
During the week as I was doing the usual quick drive, I decided to check on how the radiator was doing after my intensive flush a few weeks ago. Bad news…

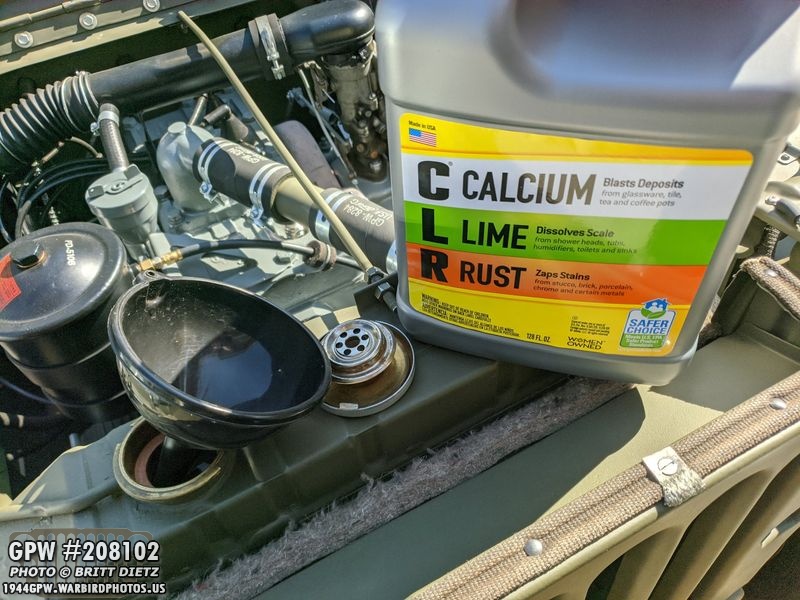
I noticed that there were some sediment and crud again. Ugh! I’d gotten some comments on the flush last time that I should have used CLR (Calcium, Lime, and Rust) to do the flush… so I decided, what the hey?

BOOM! I got the 128 OZ large container so I could do it in one go. The idea is to drain the Jeep… put in 64 OZ (half), run the Jeep for 15 minutes, drain it out, put in the other 64 OZ, run for another 15 minutes, then drain again. It’s quite a bit rougher on cleaning, so you don’t want to leave it in the engine all day.
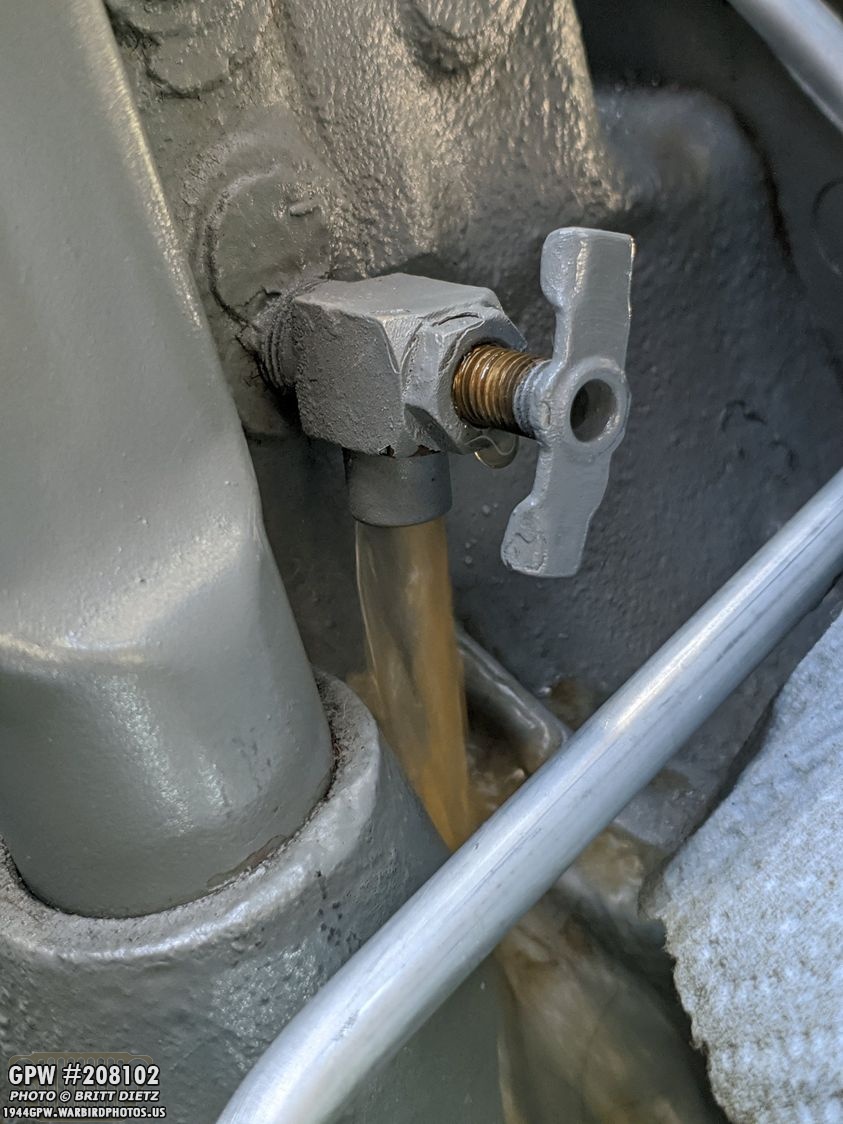
So, first up… draining the water that was still in there. I haven’t yet filled it with antifreeze since the last flush, so it still has the water. As you can see, it’s not coming out clear. My only thought is the previous flush didn’t get everything and it’s still been breaking up as the liquid passes through.
After all the water was drained, I poured in the first 64 oz, about half.
I then ran the Jeep for 15 minutes to let the CLR circulate through the system. I also took the Jeep around for a quick drive to get the system warm.

After it cooled down, I opened it up and checked, looks good so far! No buildup. But still need to do the whole process again.

After draining out the CLR and flushing the system with water, I put in the other half of the CLR into the system.
After that, I ran the Jeep for another 15 minutes and drove it again around the neighborhood.

I did keep (and will continue to keep) an eye on the freeze plugs as the CLR is abrasive. I was warned with the last flush that the radiator flush could disrupt the rust that might have developed on the freeze plugs and caused them to leak. So, since CLR is tougher, I’ll have to keep a continued eye on them.

Good news is that during all the running (took a few hours for the entire CLR flush process), there were no leaks that I could see. So, now it was time to drain it all again.

It’s always hard to tell, when draining the system, if what’s coming out is full of stuff when the color of the liquid is already a darker color like the CLR. But, it did seem to get some of the sediment out. I then ran the hose through the radiator to flush out the system as best as I could.

So now I’m back to using water for the time being, I’ll let it run for a few days and drain the water and see if it’s clear or dirty. Let’s hope this second flush does the trick!

One thing I had to do, because I’ve taken on and off the radiator cross over tube and the covers, the screws (which seem a bit cheap) have started to have issues bending and stripping. So I got 8 new slotted screws (much better ones) to replace them next time I take them off (which should be soon).

Another quick project this week was repositioning the tire pump hose under the rear seat. I didn’t have the hose secured very tight on the pimp, so it was dragging and rubbing on the tub floor. It was also vibrating making noise, so I made a wrap around the T handle to make it a bit more taught. That seemed to do the trick, but it was tough to do as that hose is quite stiff.
I wanted to mention an update on how the floor mats are doing. Quite a few updates ago, I found a rubber material at Home Depot that I custom cut to perfectly to fit the floor of the Jeep. I painted these with the 33070 OD Green. They’ve actually held up REALLY well and the paint has stuck well. I take them out whenever I show off the Jeep, and it keeps the floor nice and clean. If you didn’t know, you might not even realize they are in there. So win on that!
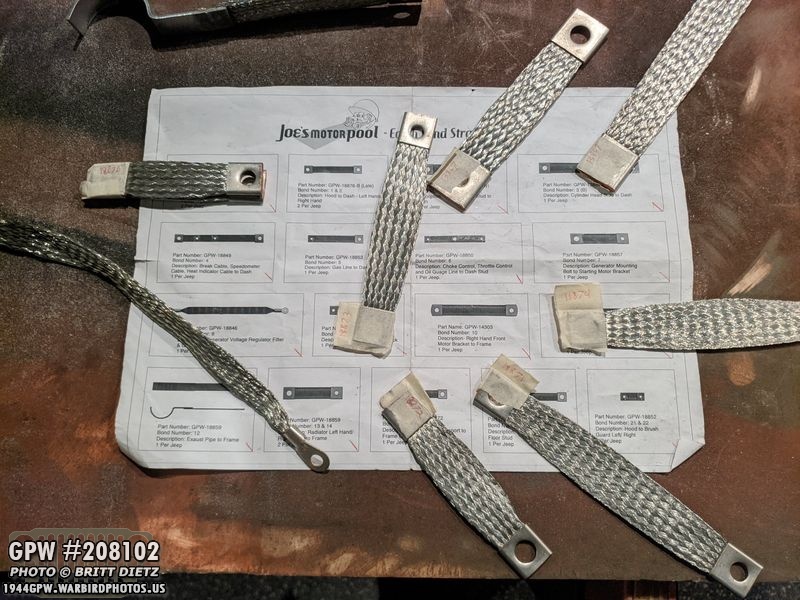
As I wrap up this update, another project I hope to start next week is putting the rest of the Bond Straps on the Jeep where I can.
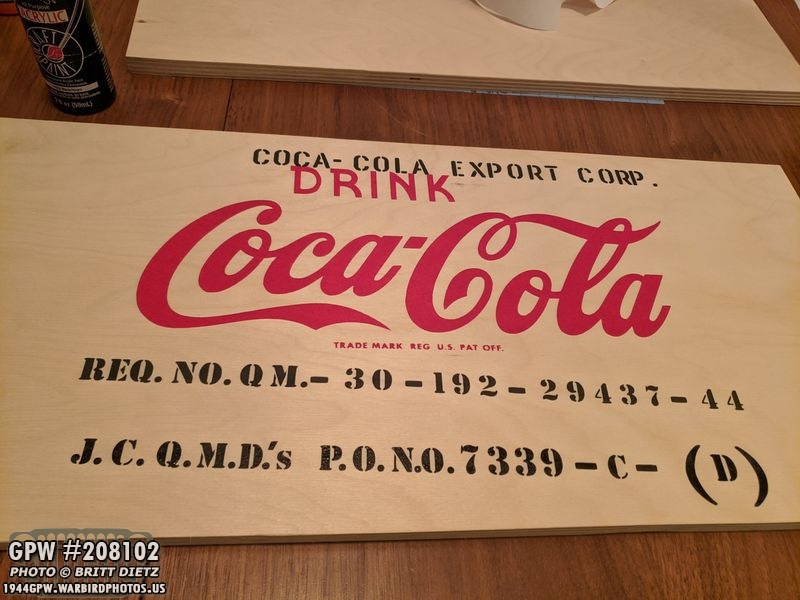
I also wanted to mention a note about last week’s Coca Cola crate. The response was a bit more than I thought, and I had several people ask me if they could get the stencils I made so they can make their own. I’m thinking about doing a limited quantity of stencils (the entire kit) for a crate… if I do go ahead with this, I’ll post about it.
And now we’re back to the Jeep. Another HAPPY BIRTHDAY to the Jeep and I hope the restoration I’m doing will allow her to live on for 76 more years.

So that’s it for this week! I hope for some exciting new things next week, so stay tuned! Till next week…