 Warbirds, EBrake, and new License Plate!
This past week the Jeep went on another adventure, this time to Chino Airport to have some photos taken with warbirds and around Cal Aero Field. Also, I continued work on the restoration of the Emergency Brake for the Jeep and finally got in my custom license plate!
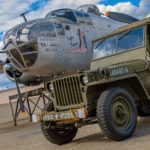
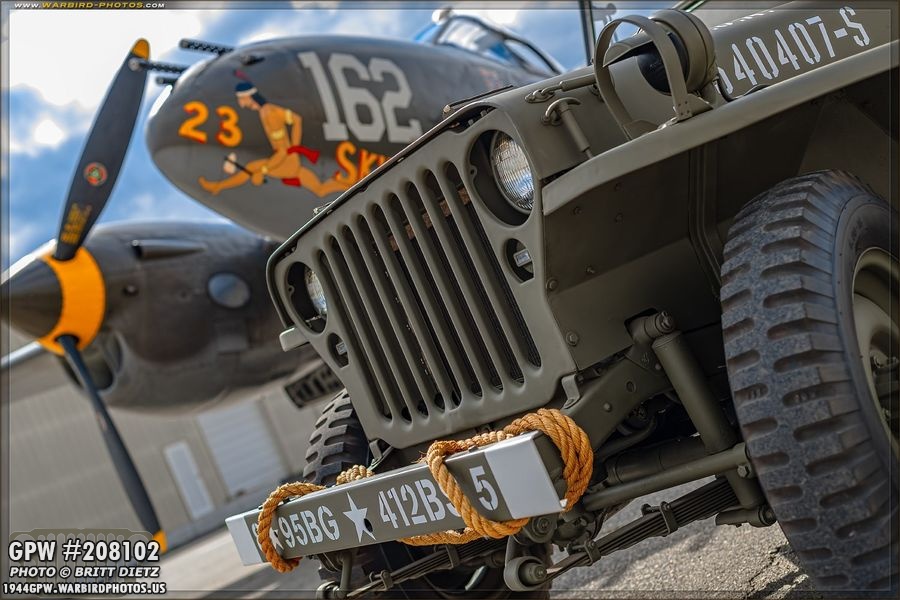
Kicking off this week’s update with a shot that’s hard to beat… Lockheed and Ford! This is the first warbird that the Jeep (which is an Army Air Force Scheme) has taken a photo with. More on this in a few photos…** NOTE – This post will be photo heavy again. To get to the restoration photos, you’ll need to skip through them all.
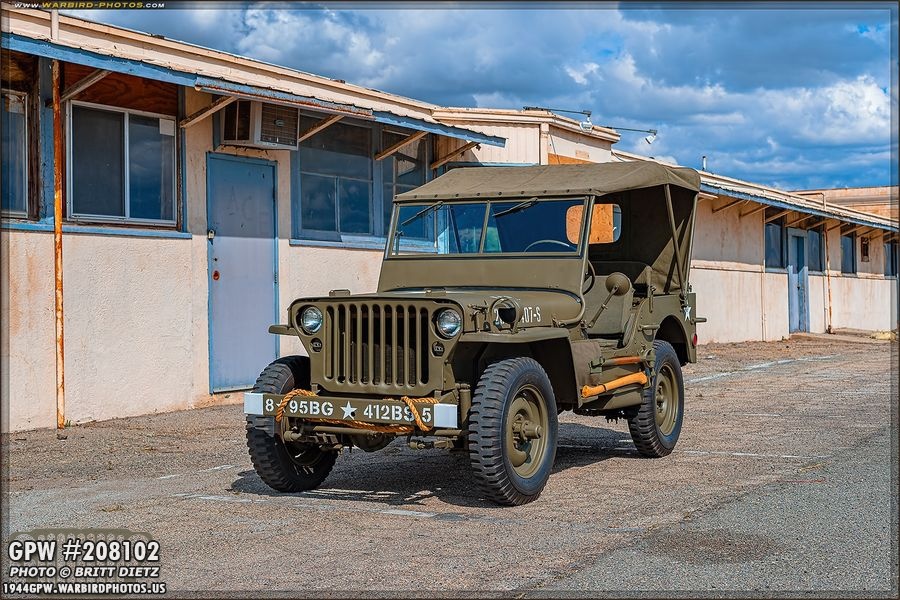
The Planes of Fame Air Museum out in Chino, CA had their monthly Living History Flying Day event featuring the P-38 Lightning on March 7th. Living not far from the airport, I decided to take the Jeep over. The museum is located at Chino Airport, which, during WW2, was Cal Aero Field, a major training base for the Army Air Force. Here’s the Jeep with one of the original WW2 hangar buildings.(Side note, if you notice as you go along, there’s two different styles of photos. The ones with the border, such as this one, are from my DSLR camera. The ones without, like the next photo, are from my phone which isn’t as vivid as the DSLR).

Here’s another look at the Jeep with one of the iconic hangars. A bit of trivia, if you’ve seen the 1941 comedy ‘Keep ‘Em Flying’ with Bud Abbott and Lou Costello, then you’ve seen these hangars and this former training base. It was the setting for most of the movie. In fact, in one comical scene, Costello accidentally rides an activated torpedo through these hangars.
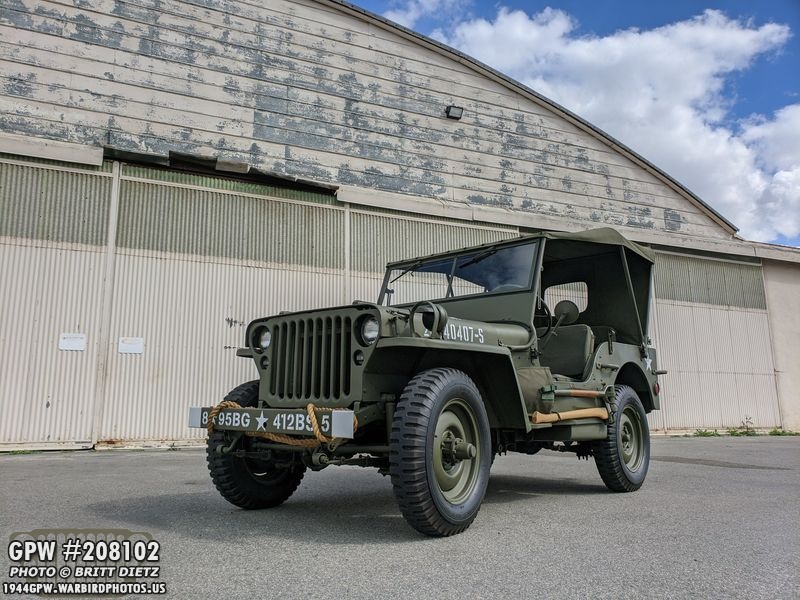
There’s a lot of rich history at Cal Aero Field, and it made for a perfect setting for my Army Air Force Jeep. Not to mention there are several other Willys/Ford Jeeps around the airport at the two museums and various hangars.

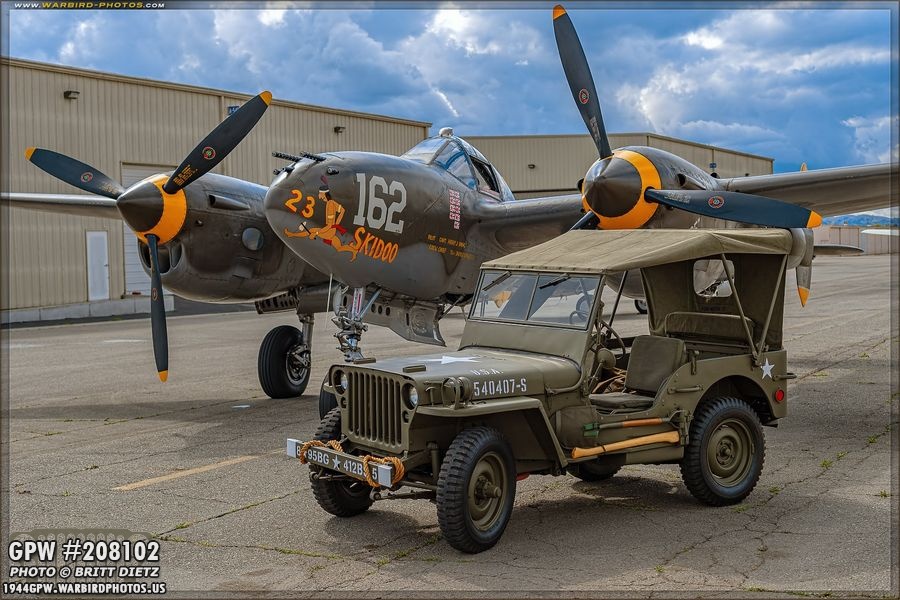
And now back to the Planes of Fame Air Museum, I wasn’t sure when I’d get a chance to shoot my Jeep in front of the P-38, so I quickly parked it there before the flight demo. This is a Lockheed P-38J Lightning known as ’23 Skidoo’.
Naturally, I took a lot of shots of the Jeep from various angles.

While the sky was amazing for photos with wonderful storm clouds, it also made it tough to get consistent light throughout the photoshoot with the sunlight going in and out.

I then drove the Jeep across the airport over to Yanks Air Museum, which had their P-40E Warhawk out for some work. The large Lockheed EC-121T Super Constellation sits behind the P-40. Only had a quick second to snap this shot on my phone before I needed to move on.

Heading back to the Planes of Fame Air Museum, I saw Aero Trader’s famed B-25J Mitchell ‘Pacific Princess’ sitting out on the ramp. Naturally, this is closer to my Jeep’s paint scheme which is 8th Air Force, 95th Bomb Group. One day, I’ll get the Jeep in front of a B-17 Flying Fortress (which is the 95th).

A Jeep… A B-25 Mitchel… a former WW2 Army Air Force Training base… perfect!

I also spent some time filming an upcoming video on the Jeep while out there. But I couldn’t find a better backdrop than this B-25 for my Jeep (the P-38 was a close second!). I will say, being around Pacific Princess makes me realize I need to get the Jeep’s name and pinup art on there soon!

Finally, I drove the Jeep out onto the ramp for some shots with a large open backdrop of the runways.

Couldn’t ask for a better day with the clouds and lighting!

As the sun began to set, the sky got even better.

I will have the Jeep back at the airport this May for the Planes of Fame Air Museum Airshow, which I hope to do a massive photoshoot with pretty much every warbird in attendance.
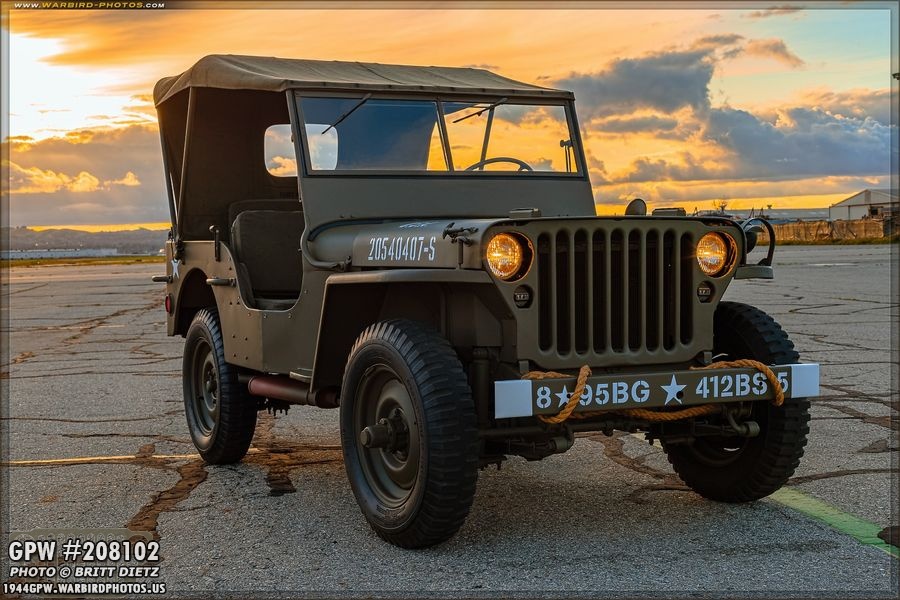
And to end the photoshoot around Chino Airport/Cal Aero Field… one last sunset shot. Till next time I bring it out!

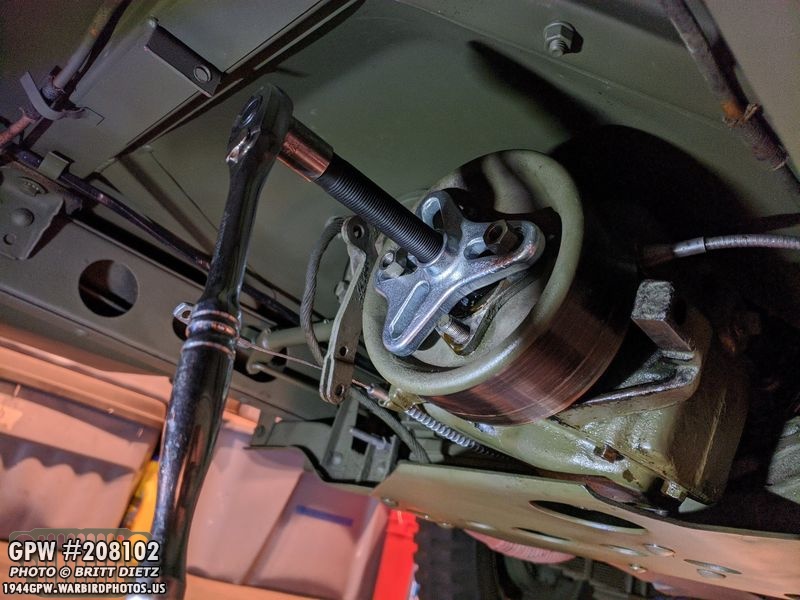
Now on to the continuing restoration! A few weeks ago, I started work on restoring my external emergency brake. Here’s a look before I took it apart. When I had the tub off during the restoration, I regret not taking the time to fix it then. From what I was told, someone had driven with the brake engaged and caused some damage to the band and drum.

I took the band off, which the pad was in terrible shape. That was shipped off to be re-lined by my friend Roger, and should be heading back here tomorrow (look next week for photos of it!). Here’s a look at the parts I was easily able to take off the e-brake without removing the drum.
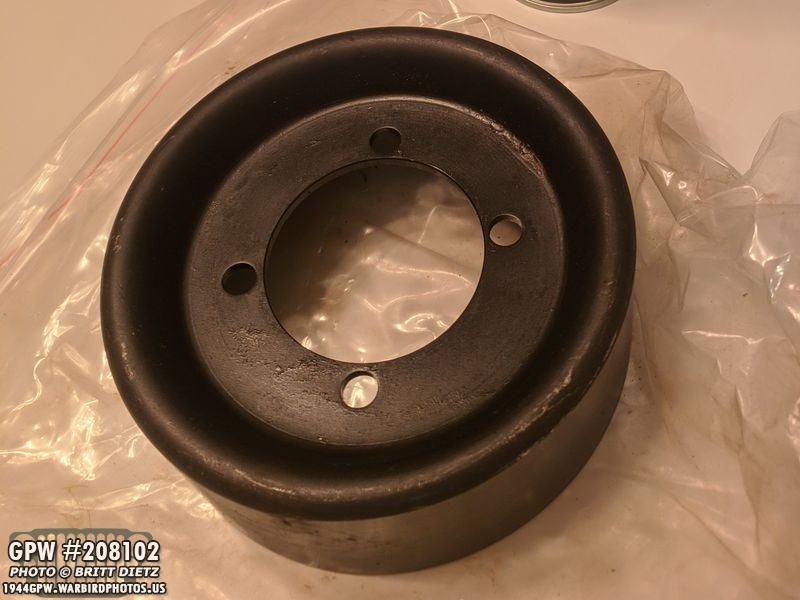
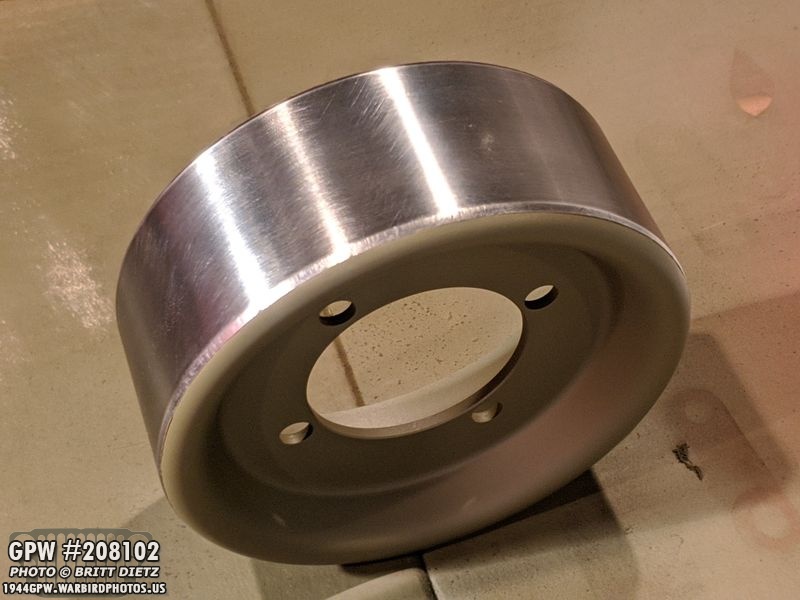
The drum was damaged, so I ordered a new one from Ron Fitzpatrick Jeep Parts. It came painted in this black color, which I would assume is to prevent rust. The problem is, the entire thing is black, including the surface the band will friction against.

After sanding the entire drum, here’s what I was left with. Nice and shiny!

Before painting, I used painter’s tape and masked off the outside of the drum where the band would ride.
And painted it with Red Oxide Barrier III spray from Ron Fitzpatrick Jeep Parts

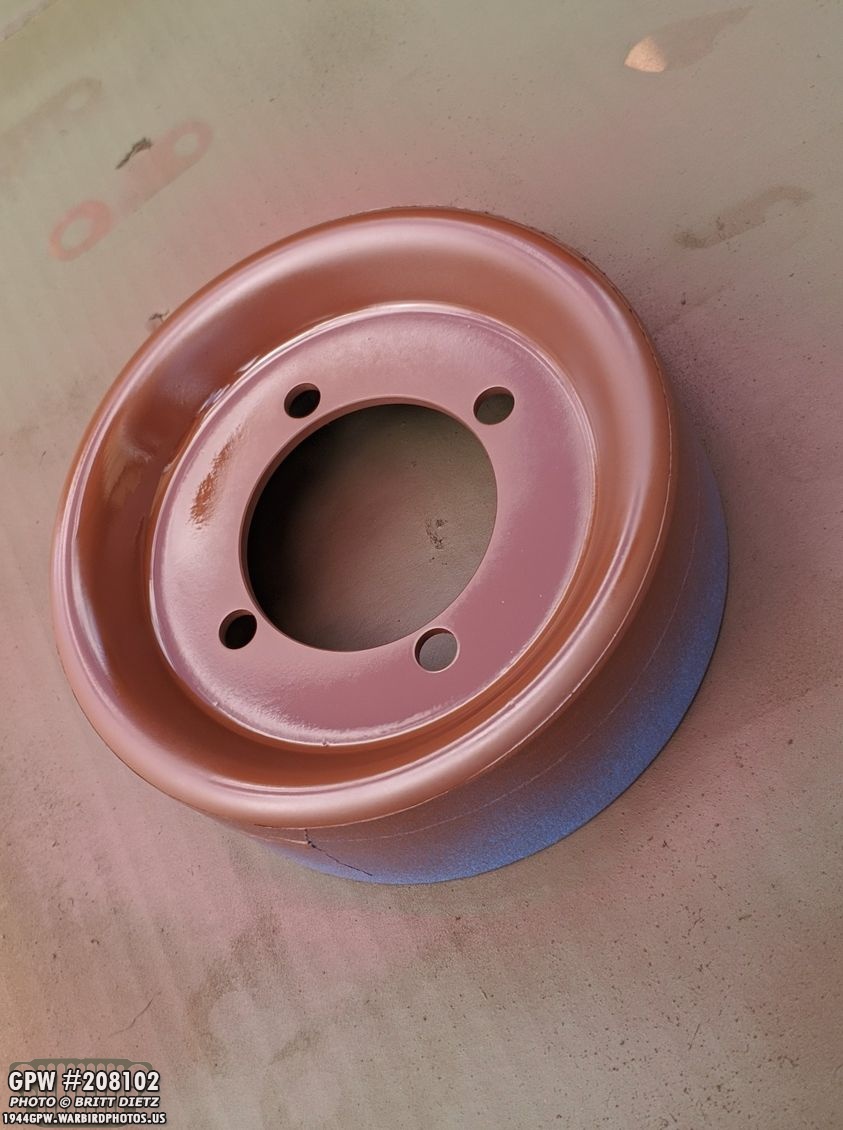
After painting both sides with Red Oxide, I hit it with two coats of 33070 OD Green.
And here’s the final drum after removing the painter’s tape. All ready to be installed! But, I need to remove the original one first…

To get the original drum off, it’s a bit of a process, especially if it’s been on there for some time. First, I had to remove the 4 nuts connecting the propeller shaft to the flange in the drum. The yellow arrow shows one of the four nuts. This was a bit tricky, as eventually, the bolt head would come free and I’d need to stick a wrench on the other side of the drum to hold it in place as I got the nuts the rest of the way off.

I realized it would be easier to just take off the entire propeller shaft. So once I got those four nuts off (previous photo), I found I couldn’t get the yoke and the flange to separate. The shaft should compress (green arrow) pulling the yoke on the shaft (purple arrow) away. So, I had to go to the other side of the shaft where it connects to the differential. That was pretty easy to remove. I unscrew the four nuts on the U-bolts (red arrows) and carefully pulled them out. That unlocked the shaft from the rear axle yoke and I was able to then just pull the entire shaft out. Sounds complicated, but it was easy once both sides were undone. Just be careful that the caps on the journal (blue arrows) don’t go flying off.

Here’s a look at the yoke on the rear axle (which is a CJ axle like my front axle on the Jeep currently). If you’ve been following along the last few weeks, this should look somewhat familiar as I’ve been restoring the two wartime axles to replace these post-war CJ ones.

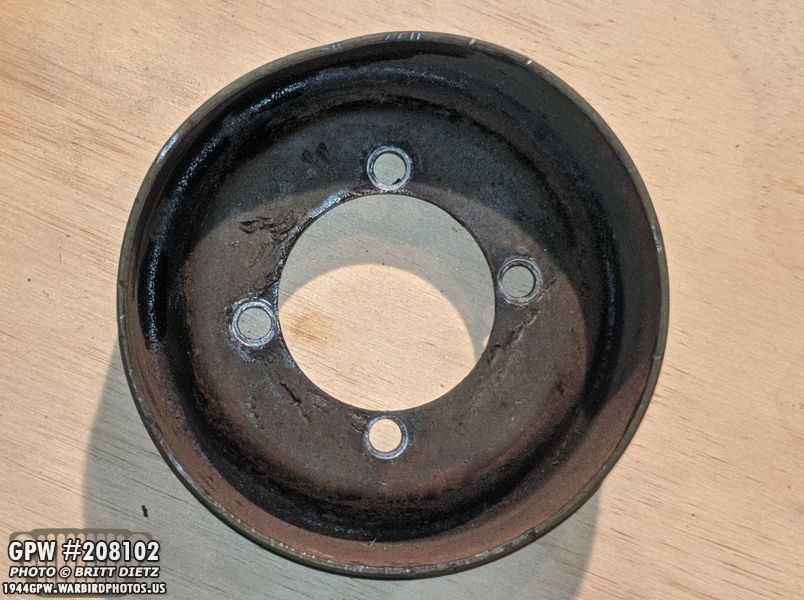
Turning back to the emergency brake drum, here you can see the flange in the middle of the drum. You can also see the 4 bolts that I had to take the nuts off to free the yoke on the propeller shaft. Next step was to take out the cotter pin on that nut and get that nut off… but that proved to be not something I could do with a rachet.

It took the air impact gun to free the nut, and it took several tries to finally break free.

I was hoping, with the nut off, that drum and flange would slide out. Not so lucky, it was on there really good, like the nut. Tapping the drum from the other side didn’t get it to budge either… Before we move on with how I got it, I want to point out that bracket to the left that has a large bolt at the top. That bracket can’t be taken off without the drum off and was holding a surprise.
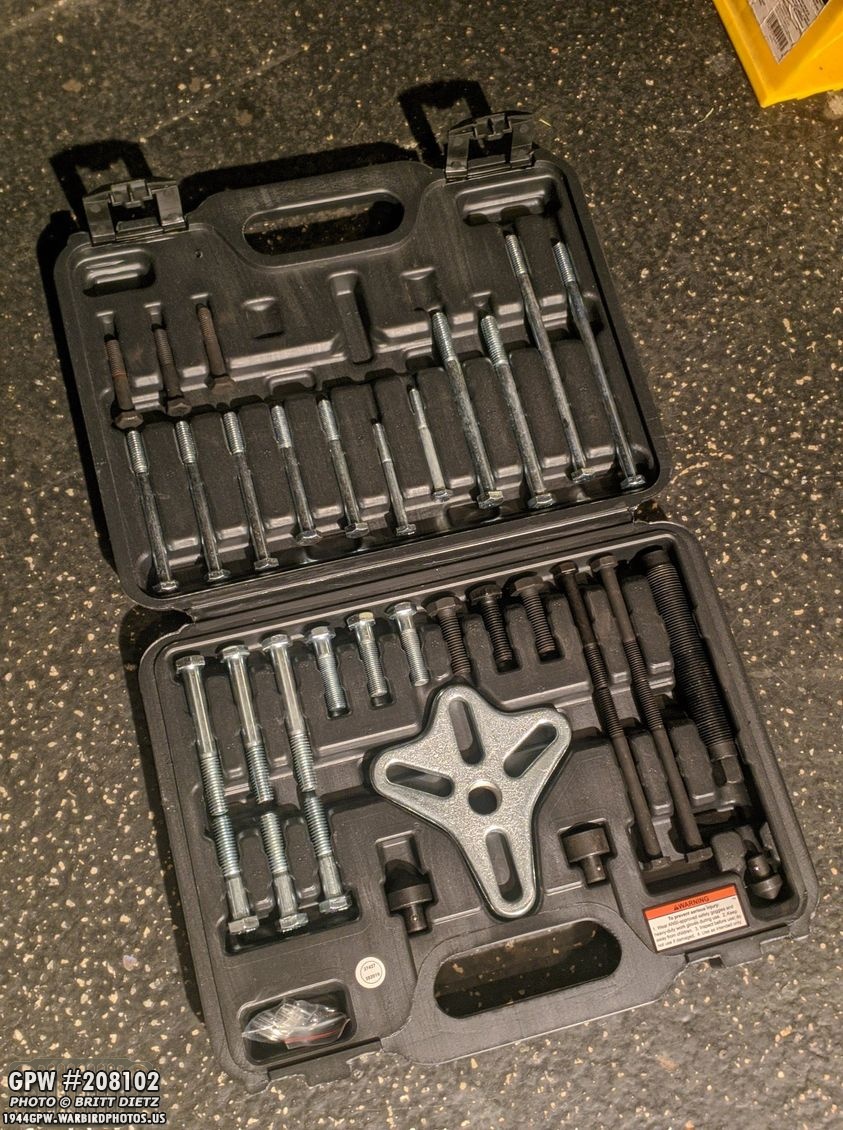
So the way to get that flange and drum off was going out to Harbor Freight Tools and getting a bolt puller set. Was only like $13 with coupon.
Using two of those four bolts I had to unscrew nuts off earlier, I used the nuts I had just taken off and put together the puller. Rachet on one end… I started turning!

And almost immediatly, I saw something start to pour out. It was oil from the transfer case as the drum and flange started to pull away.

The flange did NOT want to come free from the transfer case, and it found me with each turn of the rachet… but eventually, the puller did its job and the flange and drum came free! Here’s after I knocked out the flange from the drum.

Looking back at the transfer case, the oil continued to spill out for quite some time. I’ll have to get a new oil seal and, once everything is back together, I’ll need to refill the transfer case with oil. At least it’s good to know it was full!
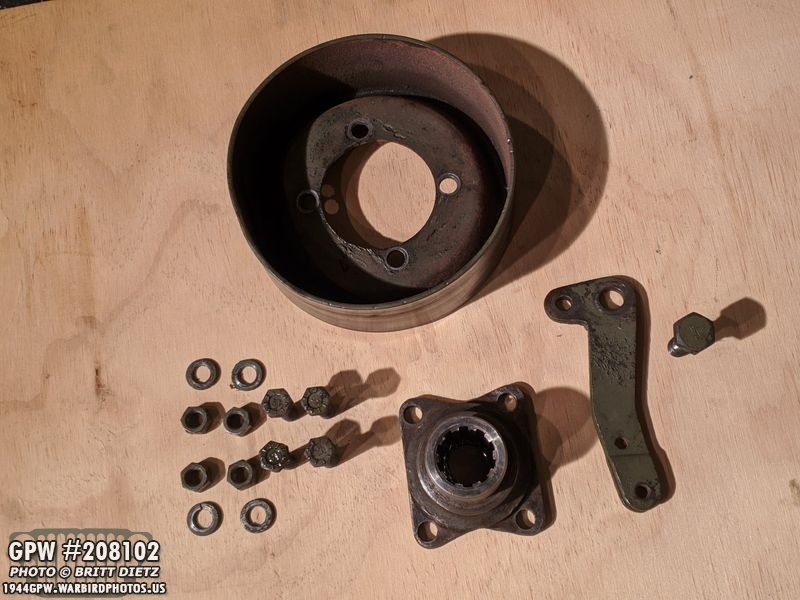
With the drum and flange off, I was able to undo that large bolt and get the final bracket off. Here’s a look at all the items that I took off that evening. You might have already spied the surprise that bolt on the left was revealing…
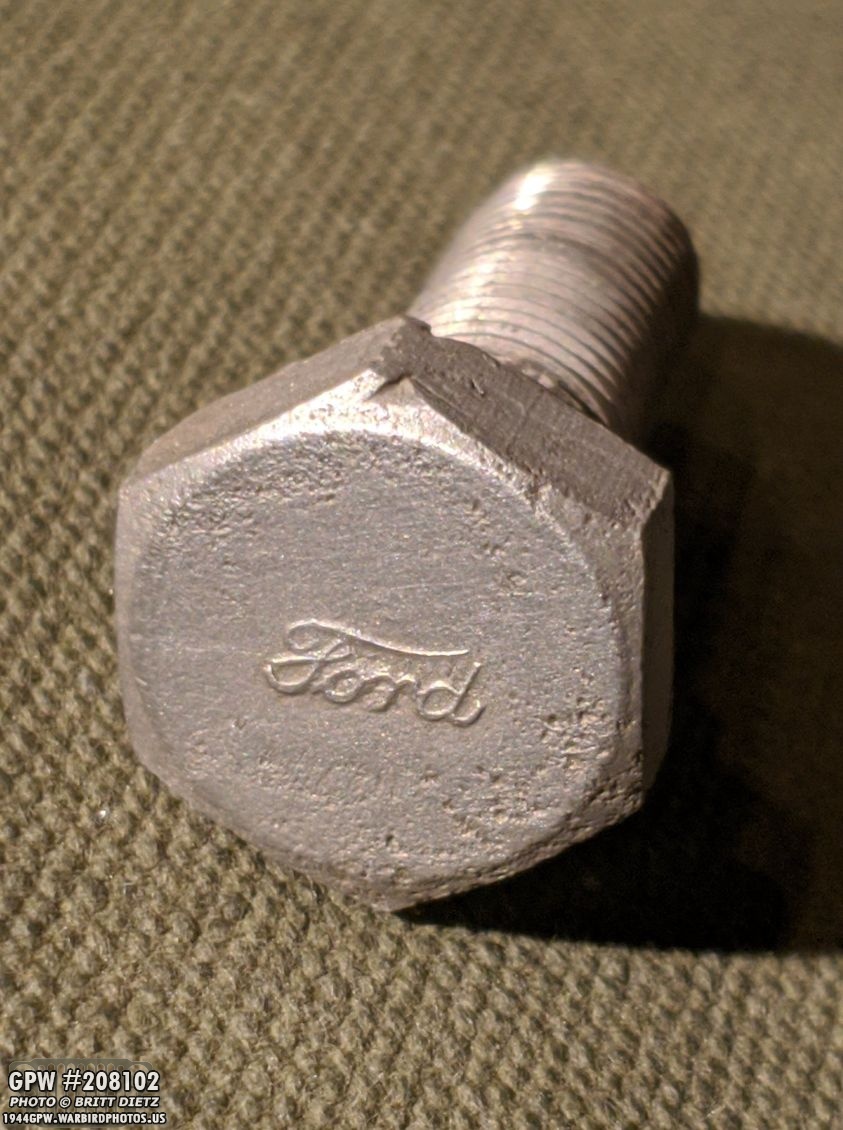
After sandblasting, you can see it much better. Not JUST an F stamp, but a full-on FORD stamp! First time I’ve ever seen a bolt with a full FORD logo. This is called the handbrake pivot bolt. Searching online, I could only find photos of this bolt with F only stamps. This has got to be somewhat rare.
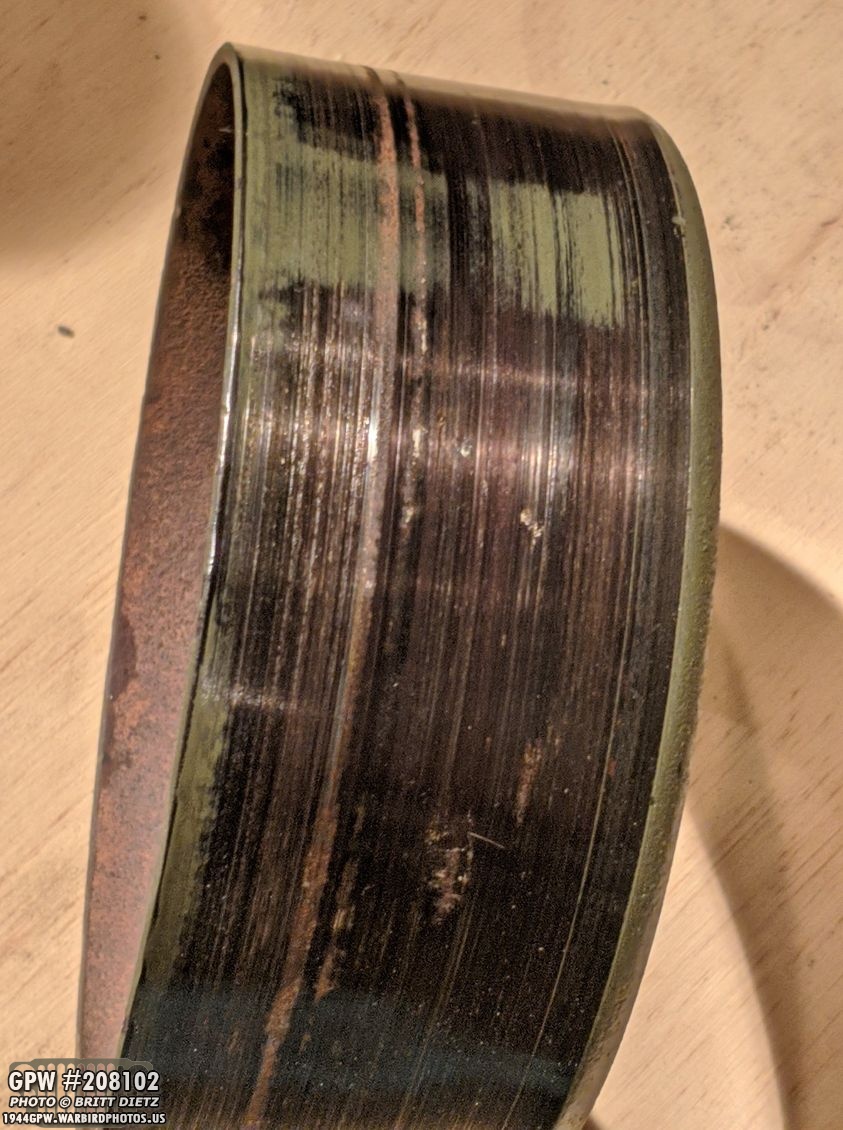
Looking at the drum I took off, you can see a lot of grooves and scoring where the pad on the band has worn away and the rivets holding the pad to the band have scraped against the drum.
But the biggest problem is the warp in the drum itself, which is evident on the top left.

With the entire e-brake now apart, over the next week I’ll clean all the other parts and begin the process of putting things back together for reinstall. Here I’ve taken the drum flange and cleaned it up. It’s in pretty good shape and reusable! On to the next project…
Moving on! Since I started posting these updates, I have masked out my license plate. Not really sure why I needed to, but most of it was because it was just a plain plate. I spent a lot of time at the DMV over the last few months attempting to get a special custom plate for the Jeep… my first custom plate ever. It was a complicated process, as the California DMV website has a lot of rules on what can and can’t be used, even if no one is using them. So I went into the DMV to try my luck, as I’d heard some people have better success… it worked!
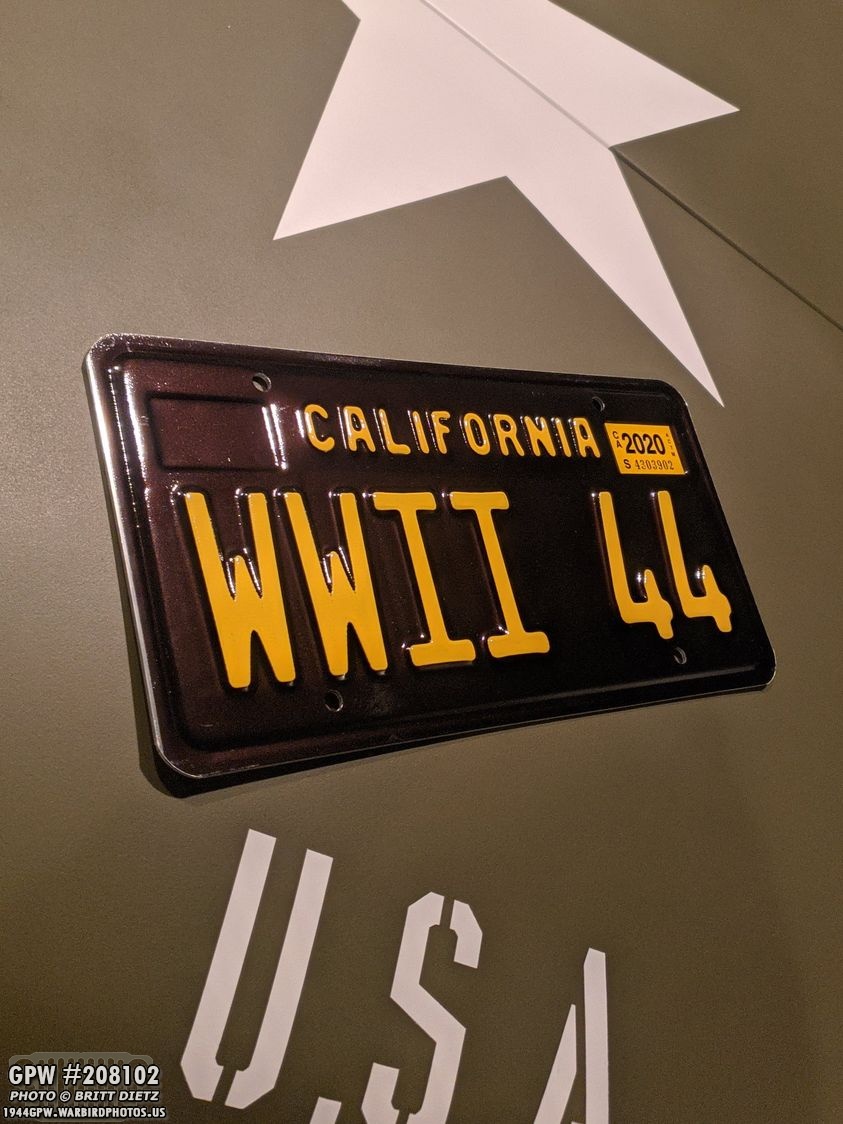
Presenting my custom plate for the Jeep… WWII 44! My Jeep is a 1944 GPW, so it works perfectly. Originally, I couldn’t get this plate as it was ‘reserved for ham radio operators’. So it would say the plate is open, but it would reject it when I went to purchase it. Going in person to the DMV I was able to actually get it!

I talked about this in a previous update, but one of the issues with putting a plate on the Jeep is… well, that Jeeps didn’t have plates in WW2. So aside from creating custom holders for plates, I wanted something I could easily take off when the Jeep is at shows or I’m doing photos. Enter this lovely rubber-coated magnetic holder that is perfect for the Jeep. Before I had left the little caps silver, but when taking it off the old plate, I decided to paint them OD Green to match a little better. (see comments for the link to Amazon)

Here’s how it looks with the magnetic holder attached from the front. the OD Green acorn caps look nice.
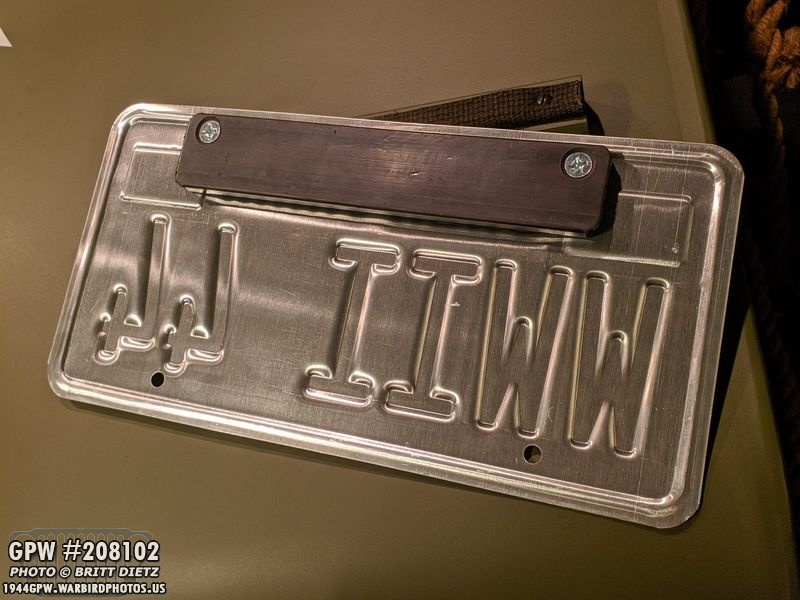
And then the backside with the recessed screw heads and the rubber coating so it won’t scratch the Jeep.

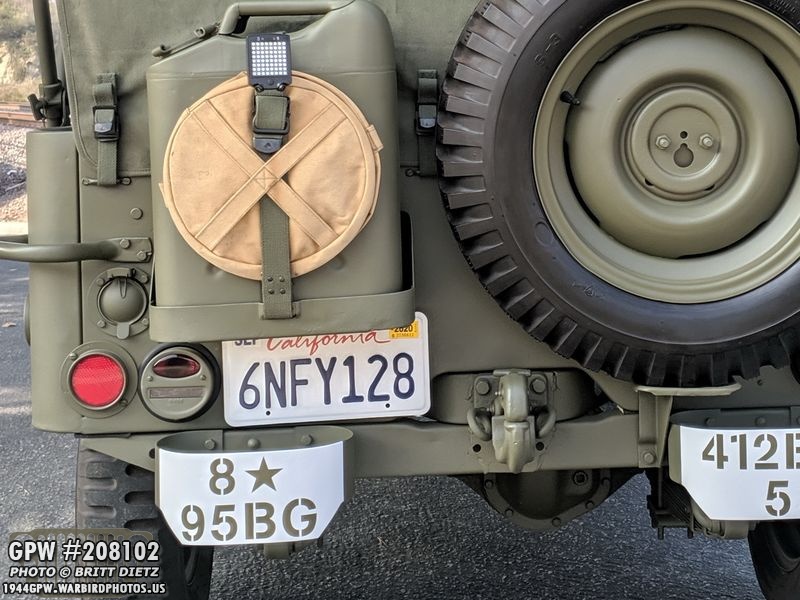
It fits nice and neat in the blank area underneath the jerry can holder next to the brake light. And the magnet holds really well, it’s rather strong. I’ve driven the Jeep over 100 miles with this magnetic holder and it hasn’t come off yet.

And a full shot of the rear end to ‘end’ this update for this week. See what I did there? The plate looks great! My only gripe, which I can’t change per California DMV, is the white and blue month sticker on the top left. Oh well, still looks better than the original white plate! So this week will see more work, and I hope eventually painting, of the wartime axles and putting back together the emergency brake. Till then!